


arch
-
Posts
1,267 -
Joined
-
Last visited
-
Days Won
2
Content Type
Profiles
Forums
Events
Gallery
Store
Posts posted by arch
-
-
Thanks appreciate the comments but way way behing where I had hoped to be but hey such is life.
Next main items are to get the fuel instal done in the boot and get the engine in and start seeing what needs changed in terms of pipework.
Neil message on its way.
-
Looking very smart. Are you aiming for Doune next month?
No chance of making it unfortunately John just to much to do and not prepared to cut corners this time. Target now is Kames in May then Golspie in June.
-
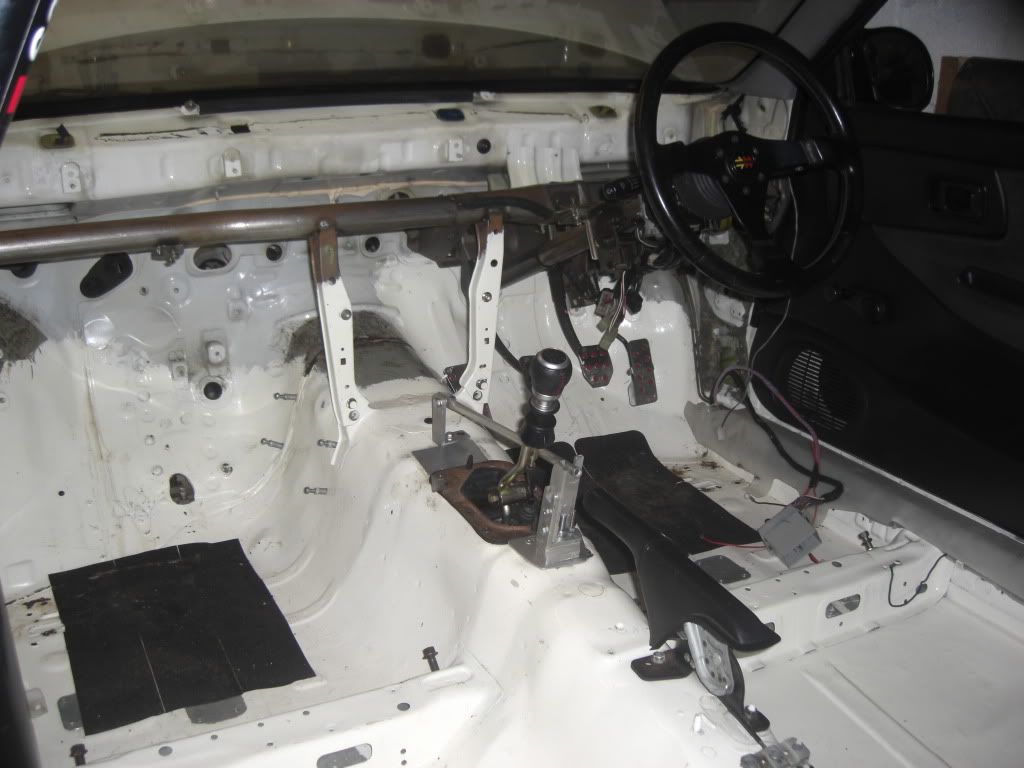
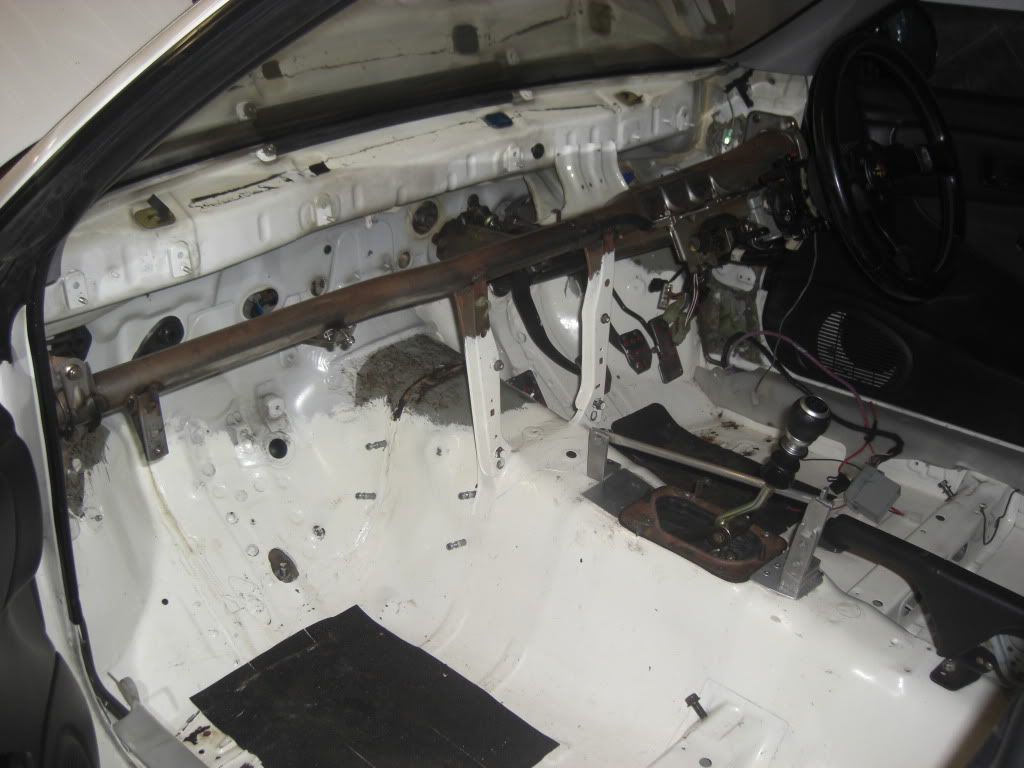
Well it seems longer than 3 weeks since i have updated this although I feel as if its one step forward and 3 steps back at the minute.
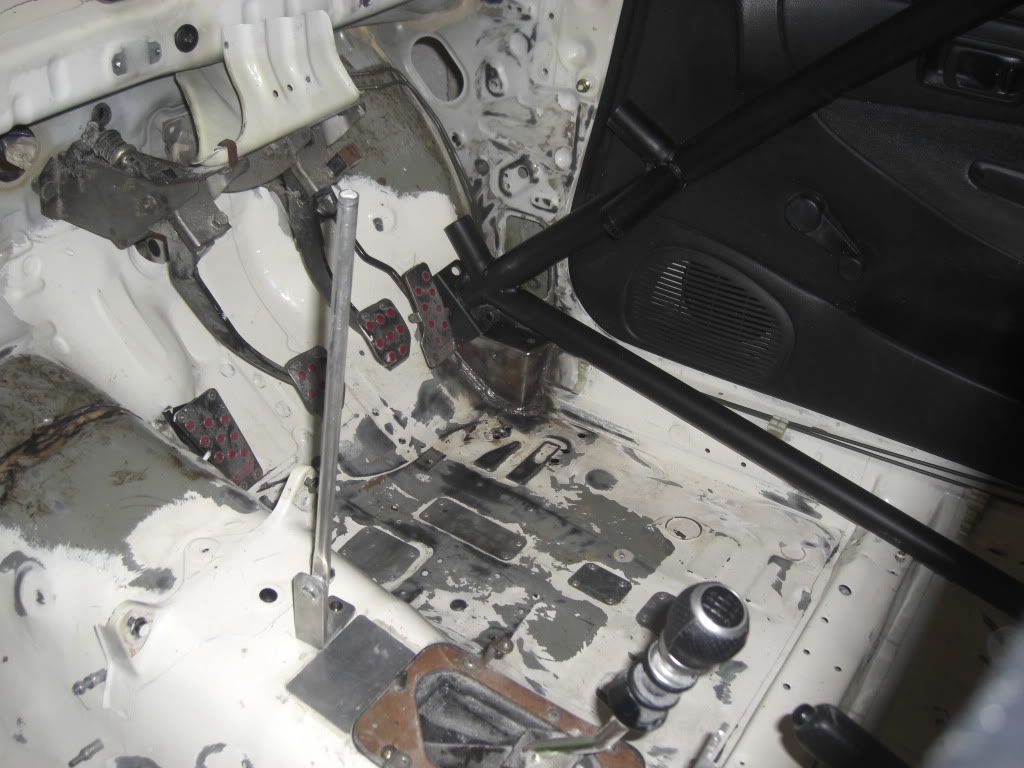
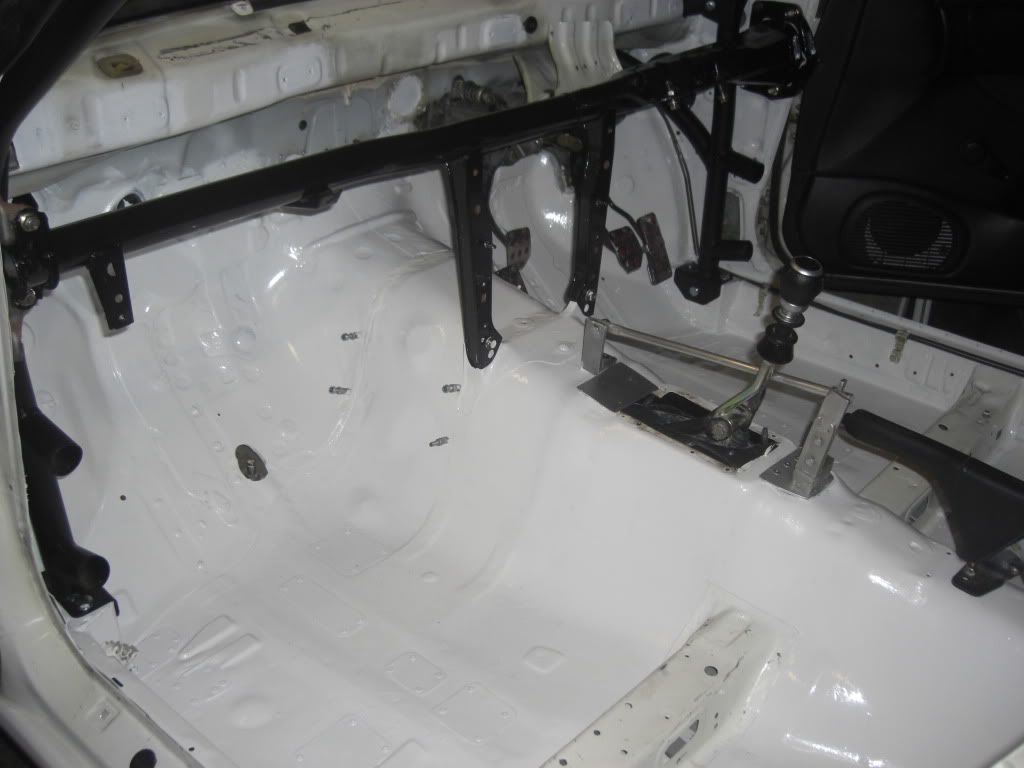
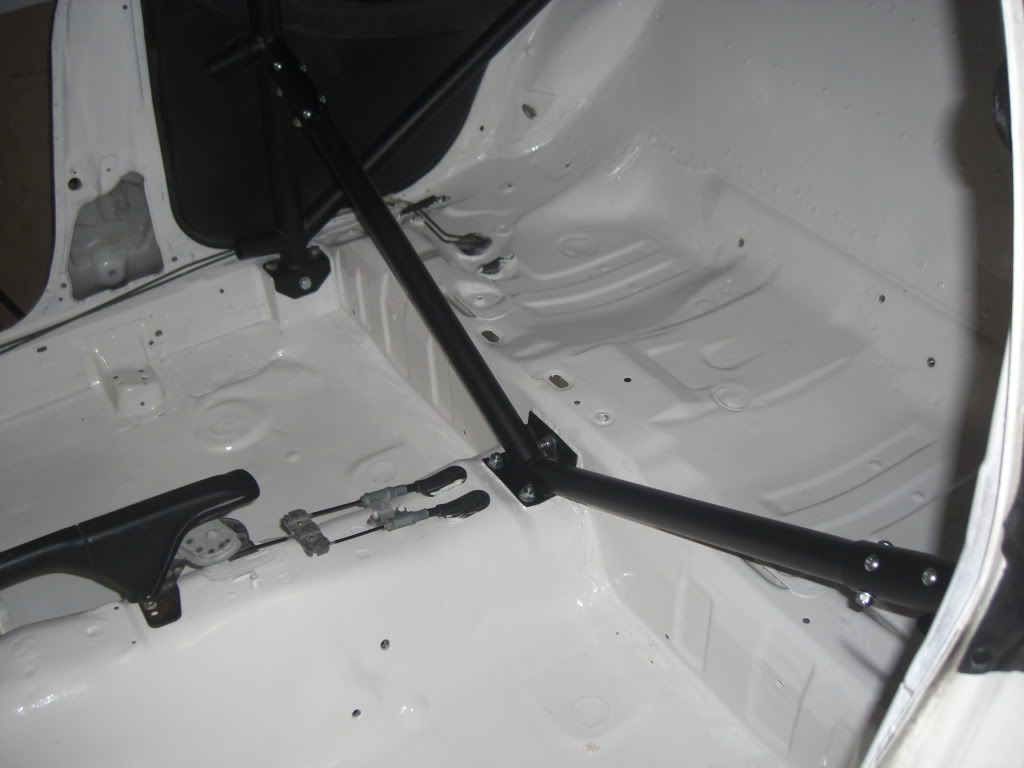
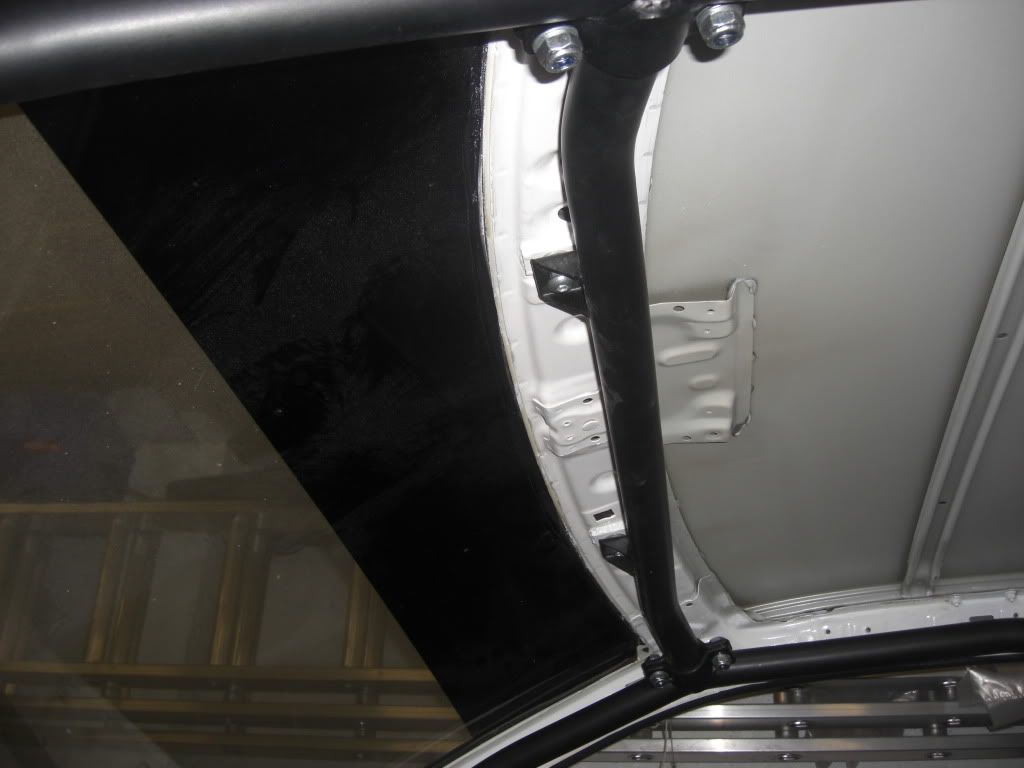
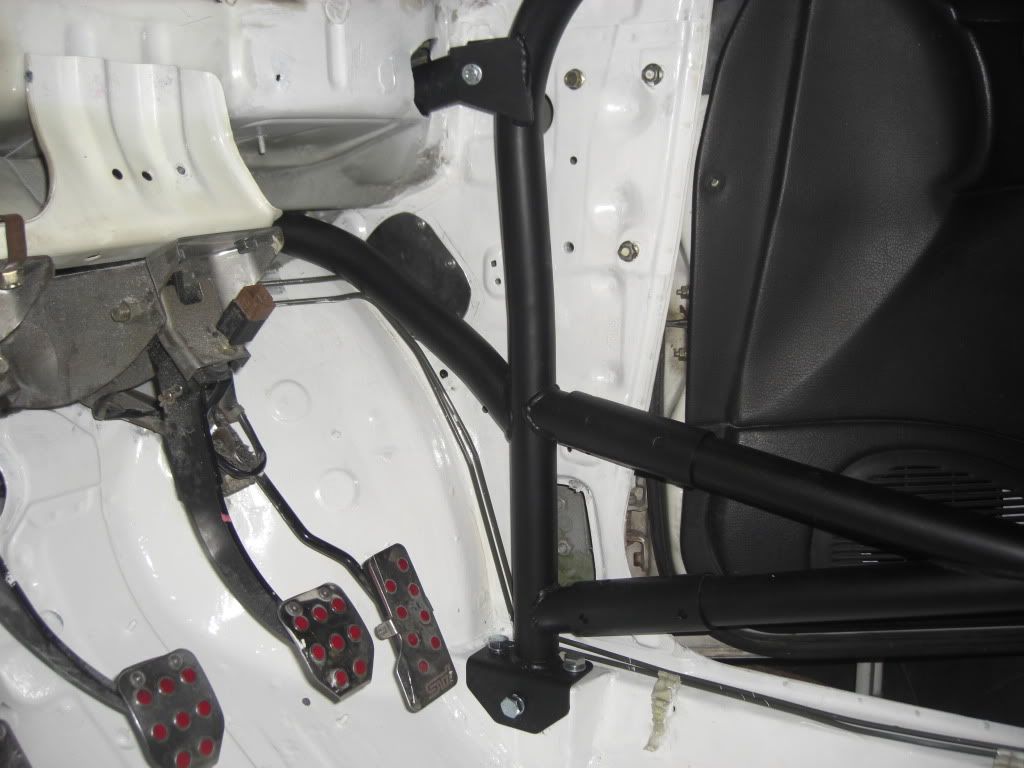
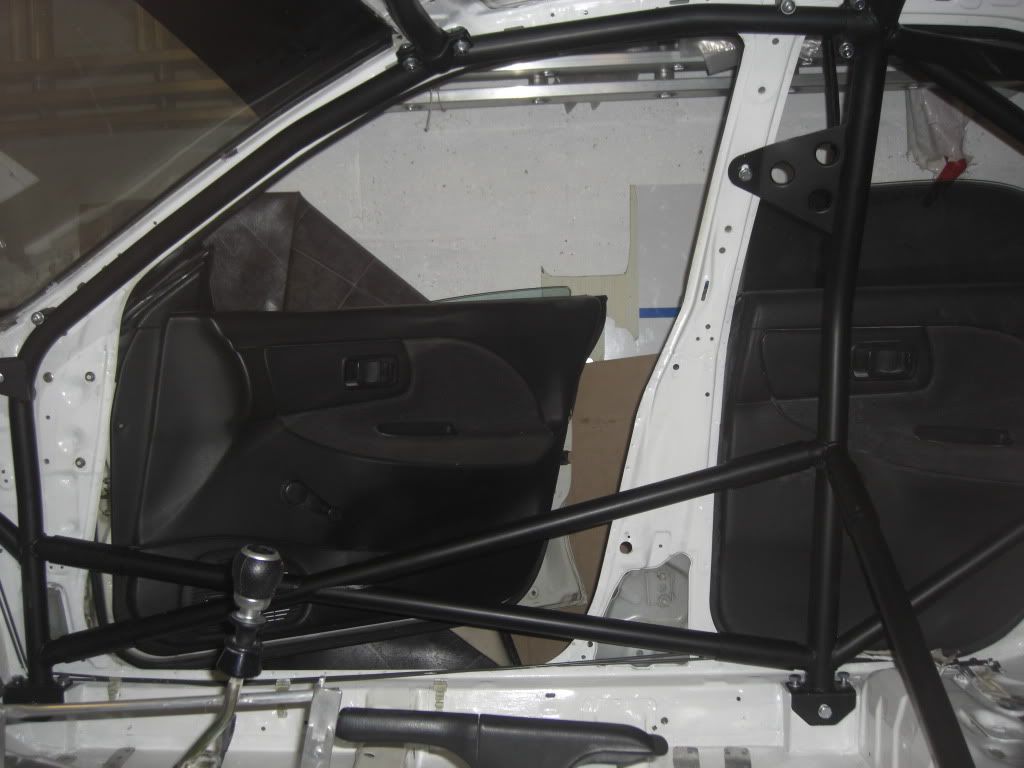
The cage is now in. Huge thanks to Kenny for a 14 hour stint welding the various brackets, of which there are many. I must admit to being very pleased with the way it has turned out. It is by no means a bolt in cage and there is a fair amount of work needed to mock up and weld the various brackets. The main floor brackets are pretty simple but the other ones for the roof bar and front leg section need to be spot on so it takes ages to measure, mark, bolt everything up, check again then remove and weld etc etc. The section that goes through to the strut top is very awkward as it involves bolting two brackets together one between the strut top and the bulknead and one in the wheel well, matching the holes up was a nightmare as was fitting the link bars through but in the end well worth while. The rear section is one piece and was NOT easy to get in the car so once in it didnt come out so we welded around it.
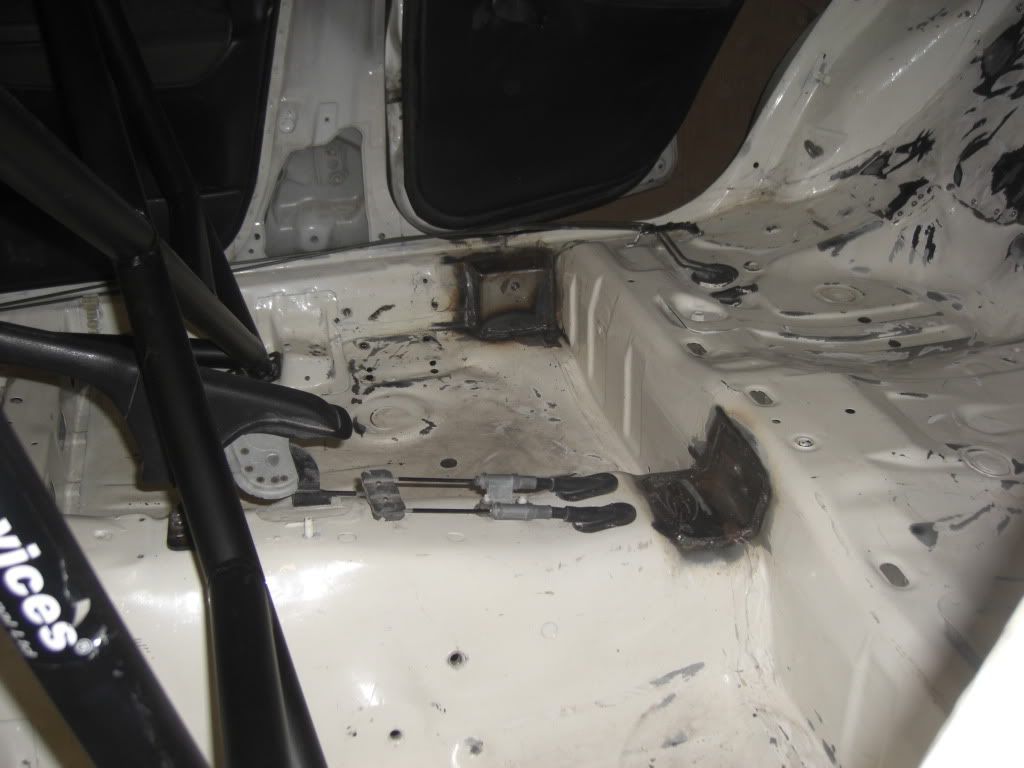

At the same time the cage was going in it seemed logical to rub down and paint the inside to freshen it up. Nothing Gucci but functionally clean. Also plated over the holes left from the old cage.
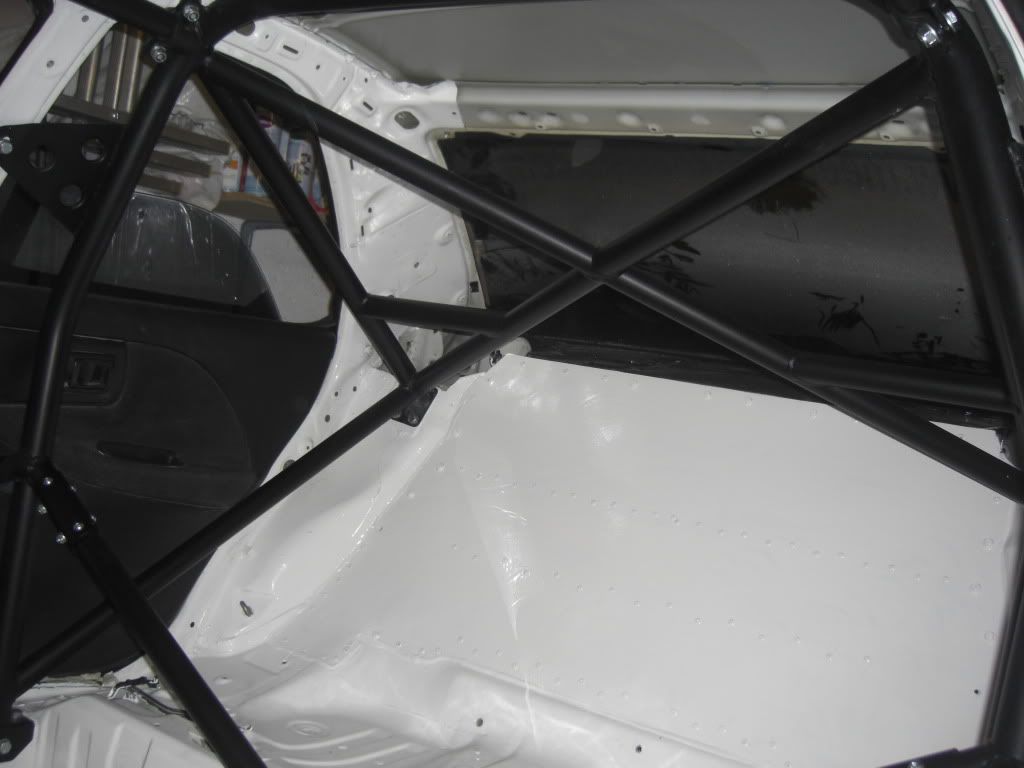
The one problem i didnt think about was the horizontal hole for the section mounted to the tunnel, it goes into a box section so I couldnt get to the back of it. If I had thought about it I would have just got kenny to weld the section on instead of leaving it as a bolt on. To get to the box section it meant taking the diff back out and removing the t-cradle and then cutting an acess hole to get a bolt through, ah well lesson learned but all done now and hole patched over.

Well thats pretty much the progress. I had a look at the diff flange today before removing it and noticed the holes didnt line up with the prop, no problem thinks me its obviously the usual PCD problem, although I was a bit confused as this diff was used with a six speed box, anyway i think to myself I will just redrill it like I have done twice before with previous diffs. But after marking it up its now obvious that the diff flange is to small to allow the prop to fit so quick call to my advisor and yep there seems to be two sizes of diff flange and I need the bigger one no shocks there - deep joy so diff now needs to stay out until I can get a flange.
I had also planned to fit a newage STI servo but after trying to fit that, it became obvious that square pegs do not fit in round holes so back on with the old servo. Anyone need a newage Blobeye STI servo and master cylinder lol.
Well newage quick rack is fitted, column now mates with the rack and the steering wheel boss I have fits perfectly so just need a little welding to extend the mounting plate and its good to fit.
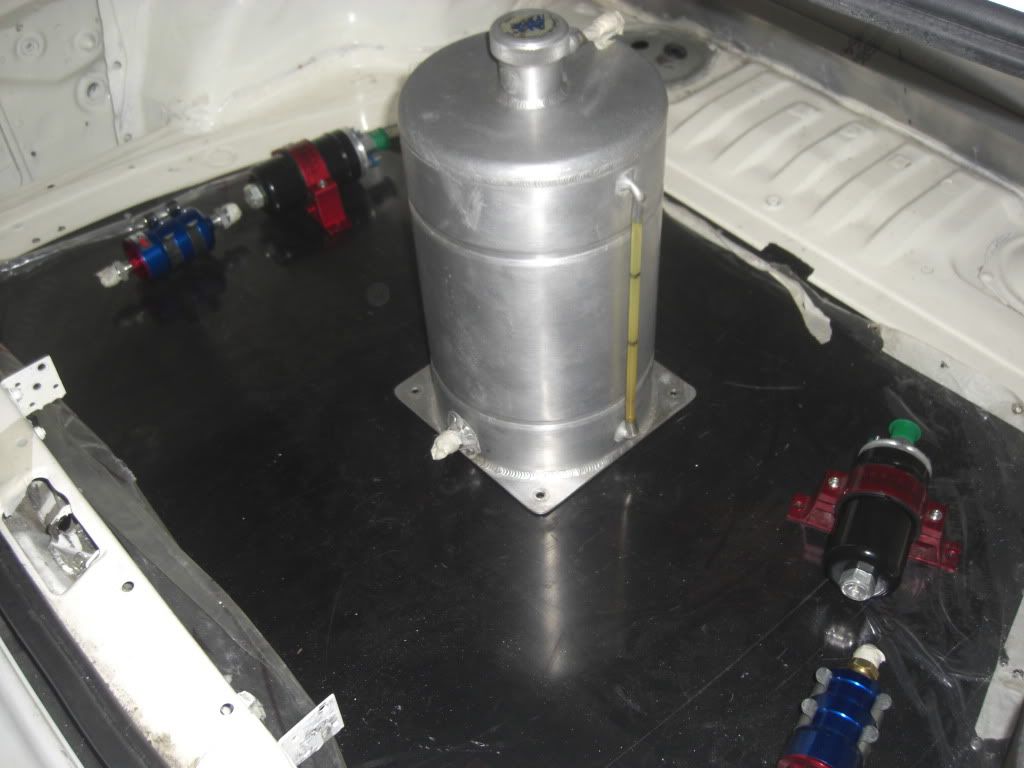
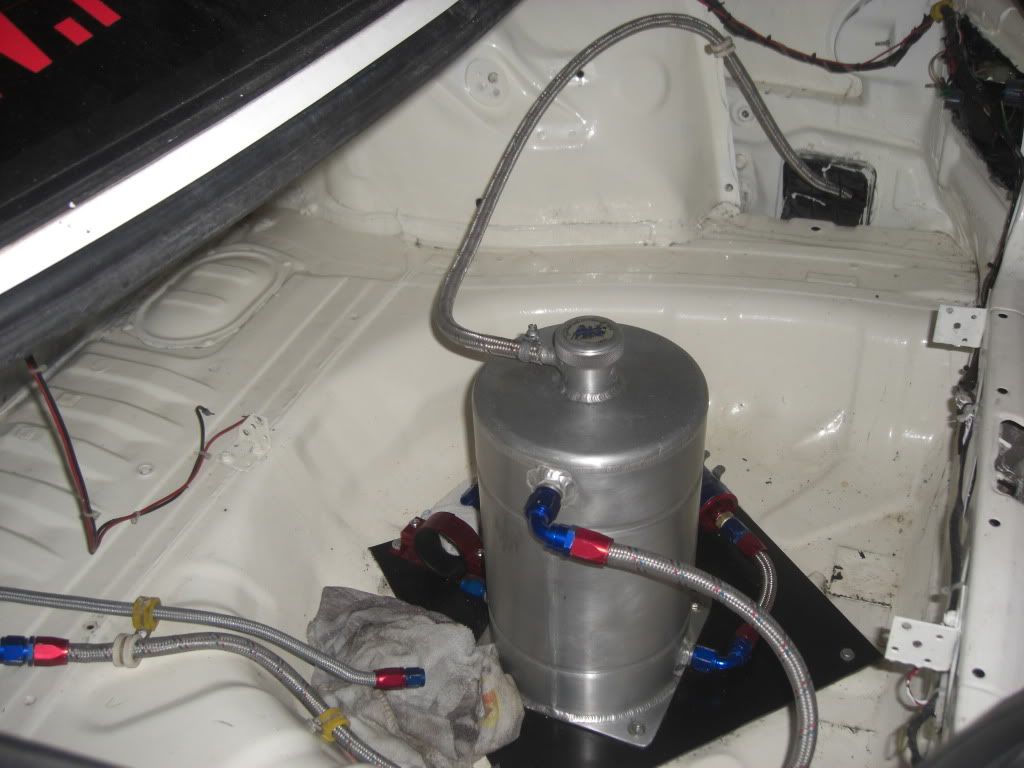
Started mocking up the fuel set up in the boot which is proving to be a challenge as I want to be able to fit the pumps and flilters but have it all plumbed in such a way that i can swap the small tank and the large tank by only undoing the two feed unions and the return and vent. Think I have sussed it but it wont be as neat as I wanted and wont be symetrical but hey function over asthetics. Just need to get the post pump filters and I can make up the pipework and get this part finished.
Few more whiteline goodies arrived, needed a new roll centre kit as the other set was tired and also needed new drop links because the arms I now have use a standard drop link, so not much suspension wise on the car now that isnt whiteline - thanks for the help with this Graeme.
Few other bits arrived which will need sorting at some point including some weld in seat rails.
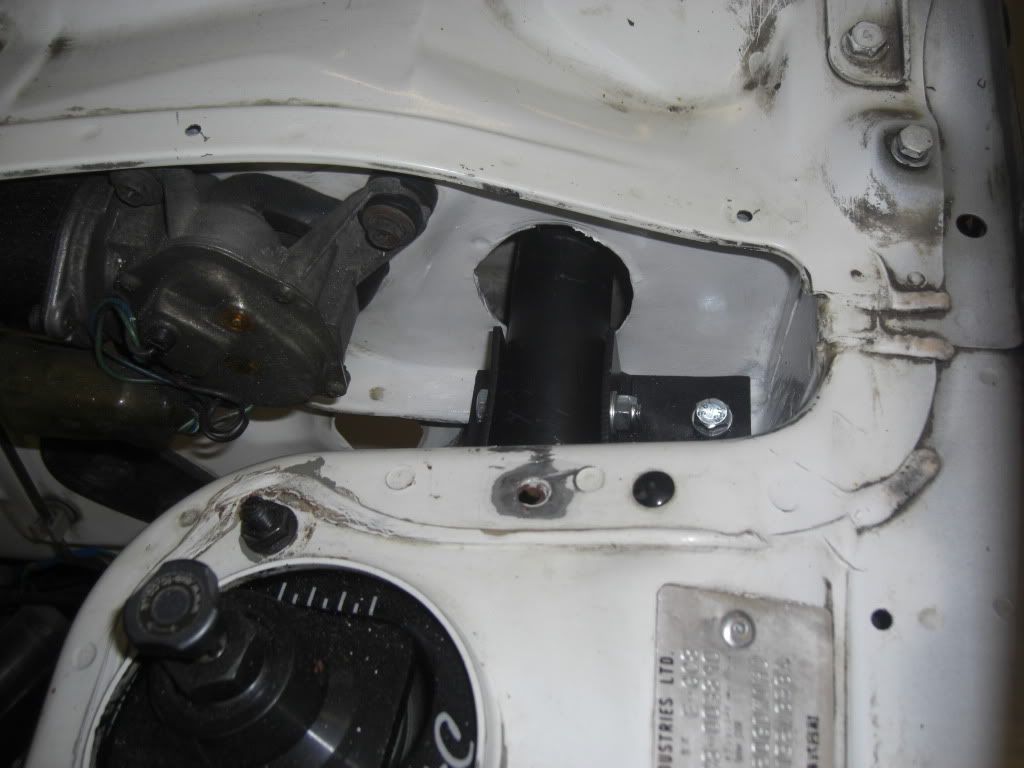
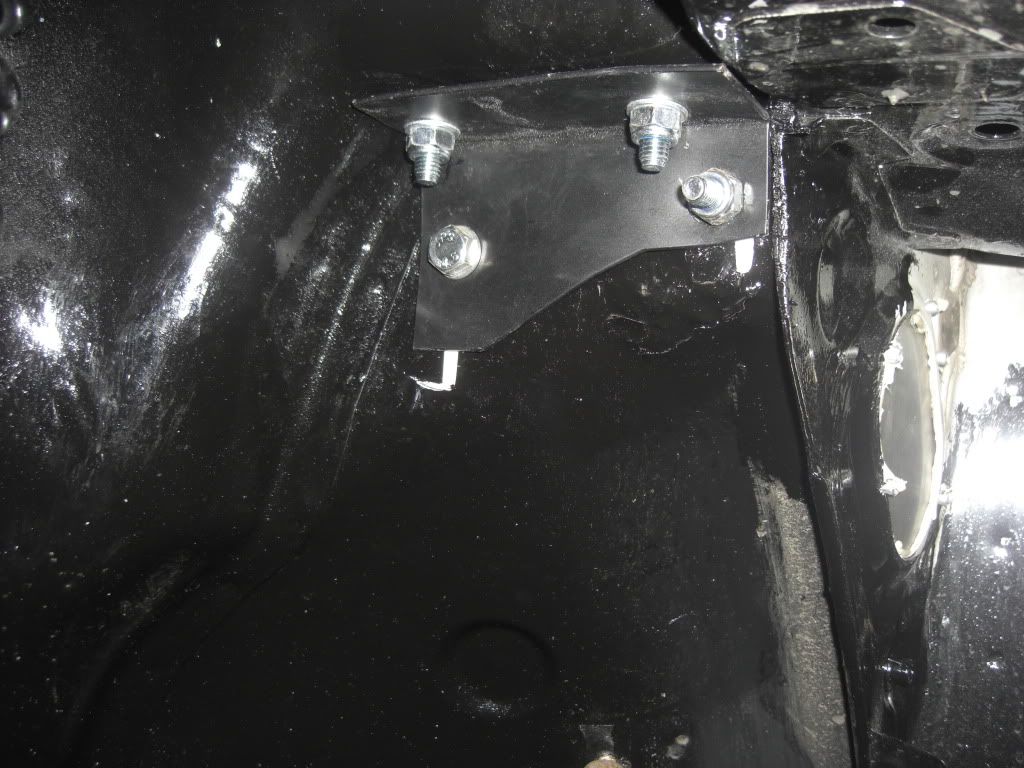
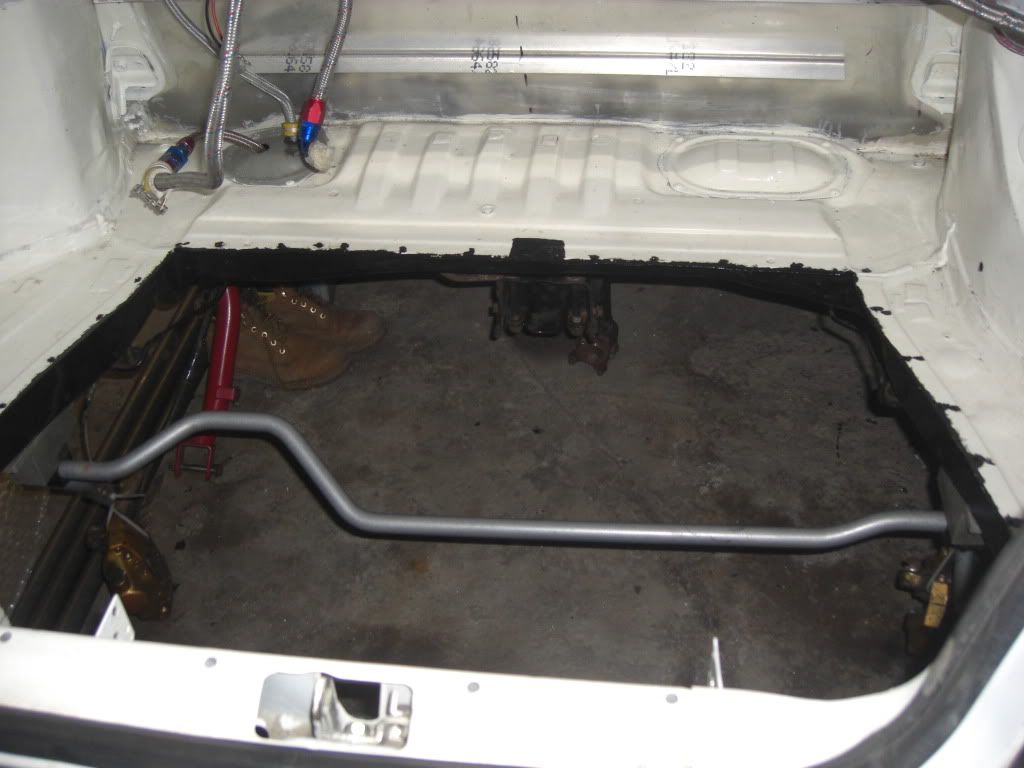
Now that its out I am now looking at finding the best route, within time limits, to do away with the T-cradle for the rear diff. The main reason for this is to make some space to take a side exit exhaust out just where the t-cradle bolts to the chassis. I cant see any other easy route to getting an exhaust out the side.
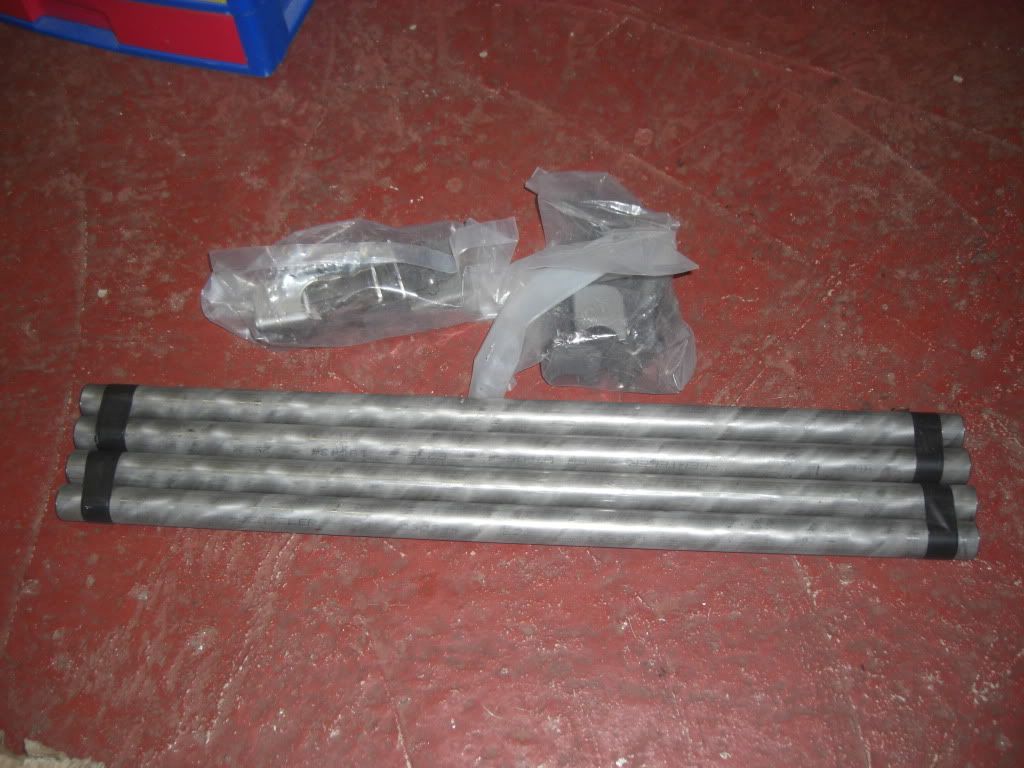
I had a look on the underside today at the possibilty of triangulating some roll cage tube across the chassis legs bit not convinced this is the best route. The other plan was to attach a couple of weld on saddle clamps to the roll cage. Need to find some use for the 18 metres of 38 x 2.5 MSA spec roll cage tube i have lol.
Then drop two bars down to a form a new mount for the diff. I know this is how several others have done it so prob go with this route. Would be interested to see any pics of how others have done it tho.
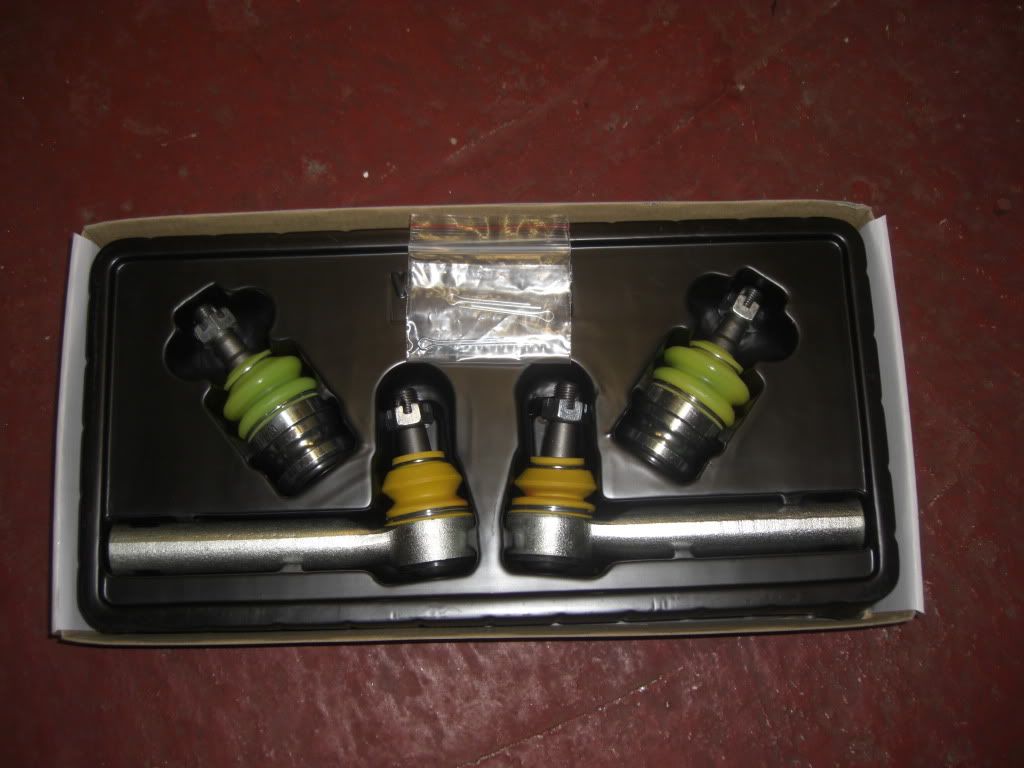
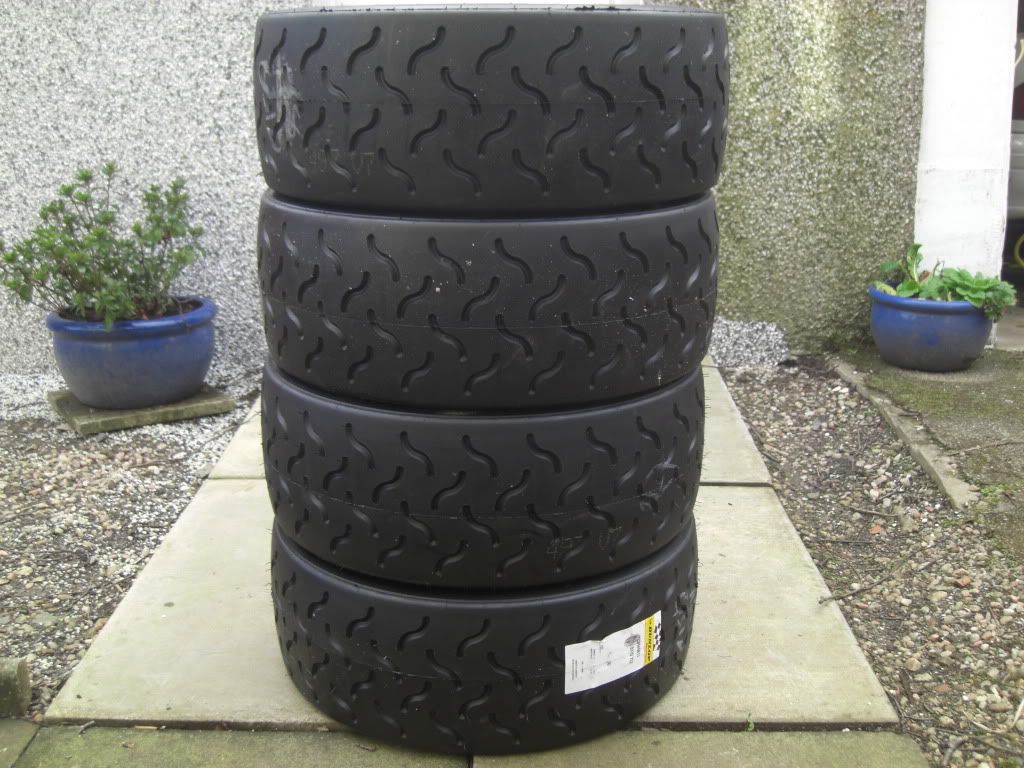
Had these arrive the other day but not sure when they will be used at this rate.
And thats pretty much it, so way behind where i need to be but hey plodding on.
-
Arch, given you have more of a mototrsport background... define "decent" levels of boost would you? Just wondering
 *chuckle*
1.51+

-
Alex there is oil and then there is proper oil.
Sure will, hoping for beginning of April but not sure its achievable, but wont be for the lack of effort.
-
I wouldnt put a drilled disc on my car as they have a tendancy to develop cracks across the holes. Grooved would have been my choice.
-
A lot of work going on there Arch, hat of to you my friend love to have your knowledge and as handy as the with the spanners. Have you got time to work lol a very dedicated individual here well done look forward to the end pics.
Chris
Thanks chris I almost said that i would swap places with you and have Steve do my car but then I had a think about your choice of career and decided to stick with working in the pissing rain at Glasgow Airport

-
Its very time consuming Chris I must admit. Its not just actually physically doing the car its researching parts, seeing what will work together with other parts, working round compatability issues etc etc. I am very fortunate that I have good people around me who are a constant source of advice and help, they have done it all in the past so many of the obvious mistakes that people make I try to avoid through taking advice.
An example of this is fuel pumps. There are so many options. A single aeromotive, two 044's etc etc. There are loads of things to think about like current draw, reliability, flow rates, redundancy, distribution of the fuel system it goes on and on and that process is the same for virtually every aspect of the car. Most of these self builds tend to focus on bits being bolted on and pics of the shiny bits but the stuff that goes on in the back ground takes 10 times as long. This is a relatively simple build so the research is not as difficult but imagine the research required for something like Andy's EG33 build!
-
You still got yours Chris?
-
No I have a fair selecton of UJ's and the option to cut and shut the newage and classic UJ's has been there all the time and one I knew about before I went down this route, that is the fall back position, I have just chosen another option for a few reasons. The spacing I refered to was the mounting points on the dash bar its not just a bolt on affair it needs a little mod to the mounting points which is a 20 min job. Looking at the lengths of the columns and the UJ's the overall lengths are the same.
Hawkeye quick rack arrived today but just like buses I may have another on its way so will prob have a newage 2.25 turn rack for sale soon.
-
The busy bit starts now Baz the whole car is changing pretty much only the shell and gearbox will be the same.
-
Well quick uppdate.
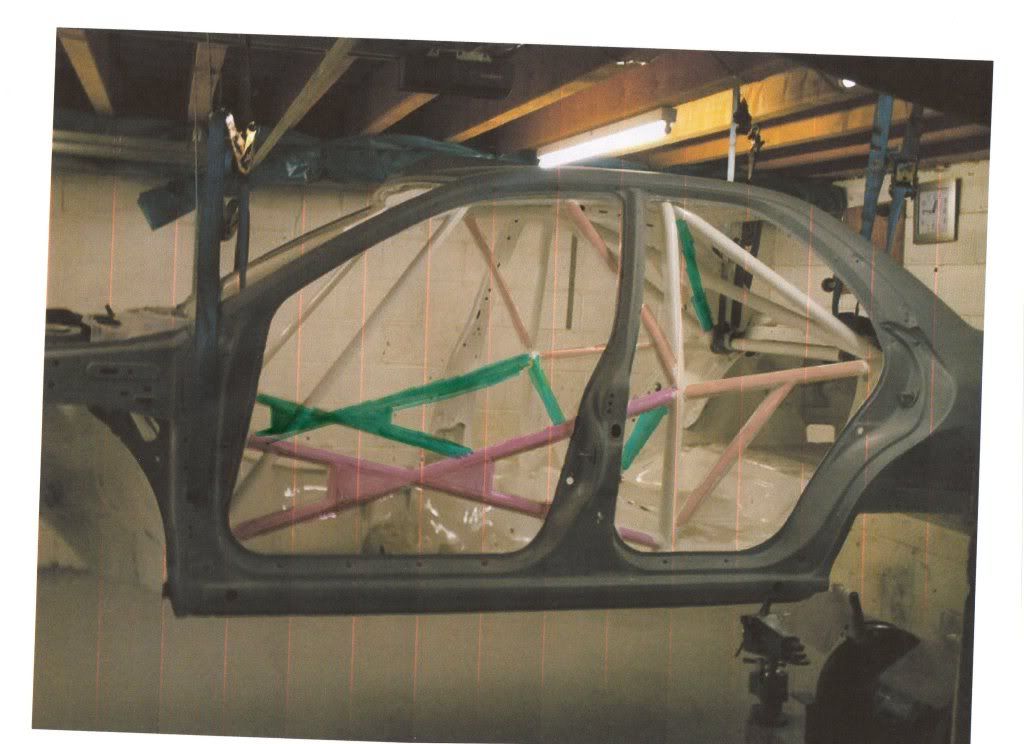
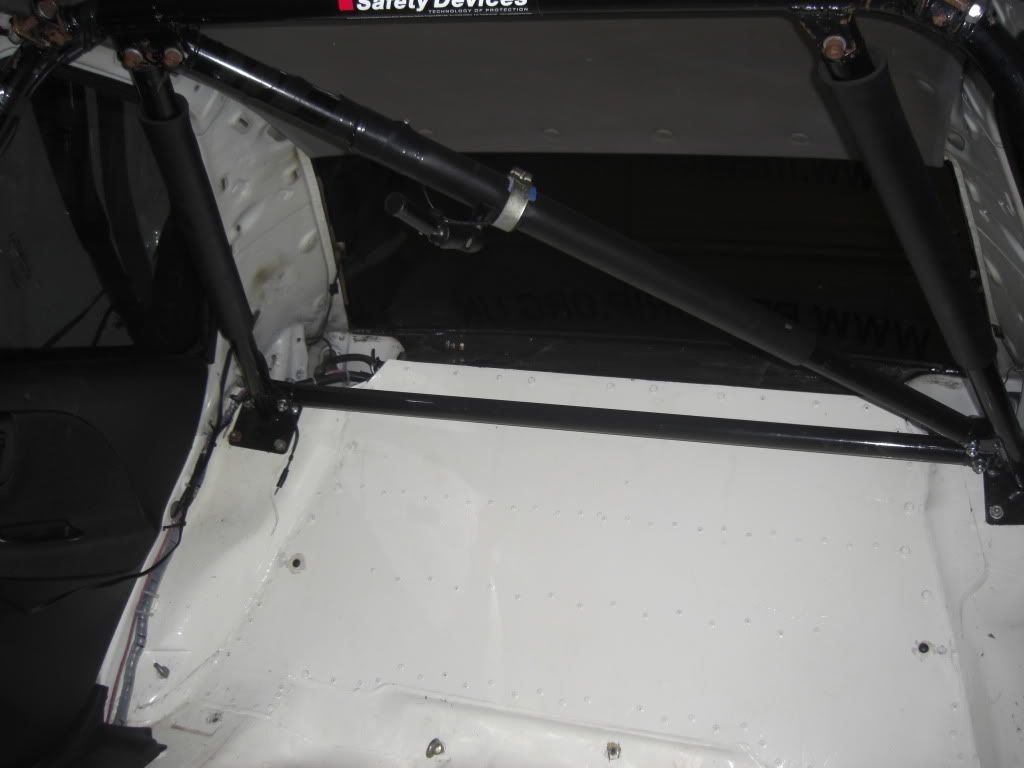
Lots happening, car still a shell tho but hopefully things will progress quicker now that a major hurdle has been overcome. The cage that was in the car was pretty good, but I wanted to stiffen the chassis. initially I had thought about adding to the existing cage but both time and cost made that a non starter so decided to go for this.
Big big thanks to Graeme Jerame at Whiteline for helping with this and thanks to Kev at Scoobyclinic for getting it out so quick and also thanks to Steven for his help.
There will be a weight penalty when compared to a full weld in T45 cage but that is just something I will have to live with. My hope is it will stiffen the chassis to something approaching that of a full weld in but obviously not to the same degree.
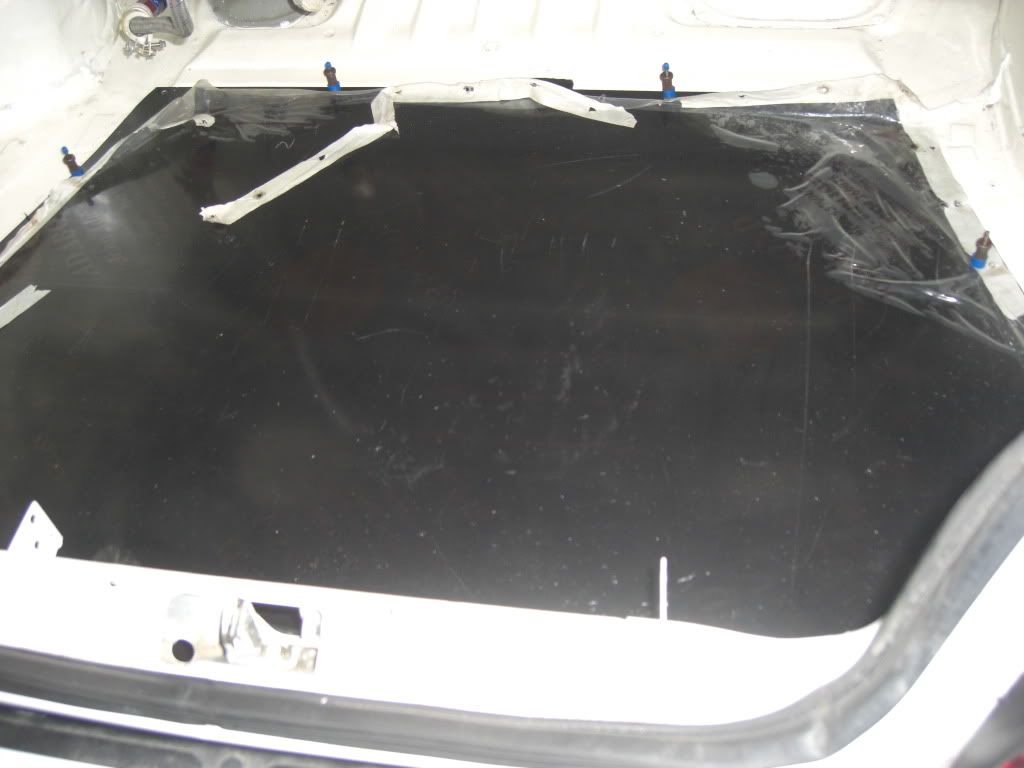
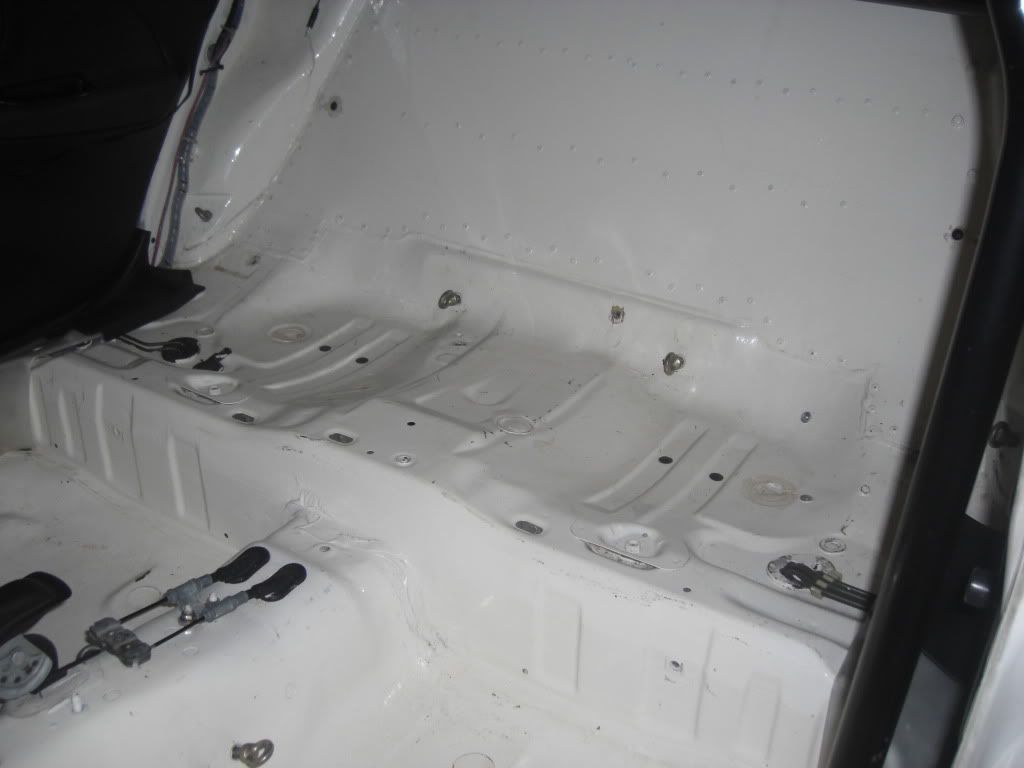
Decided that it was time for the obligatory where's my boot floor gone picture.
Next step cut and shape some 3mm Alluminium Composite. I then used aircraft skin pins to hold it in place while i drilled the holes for the rivets.
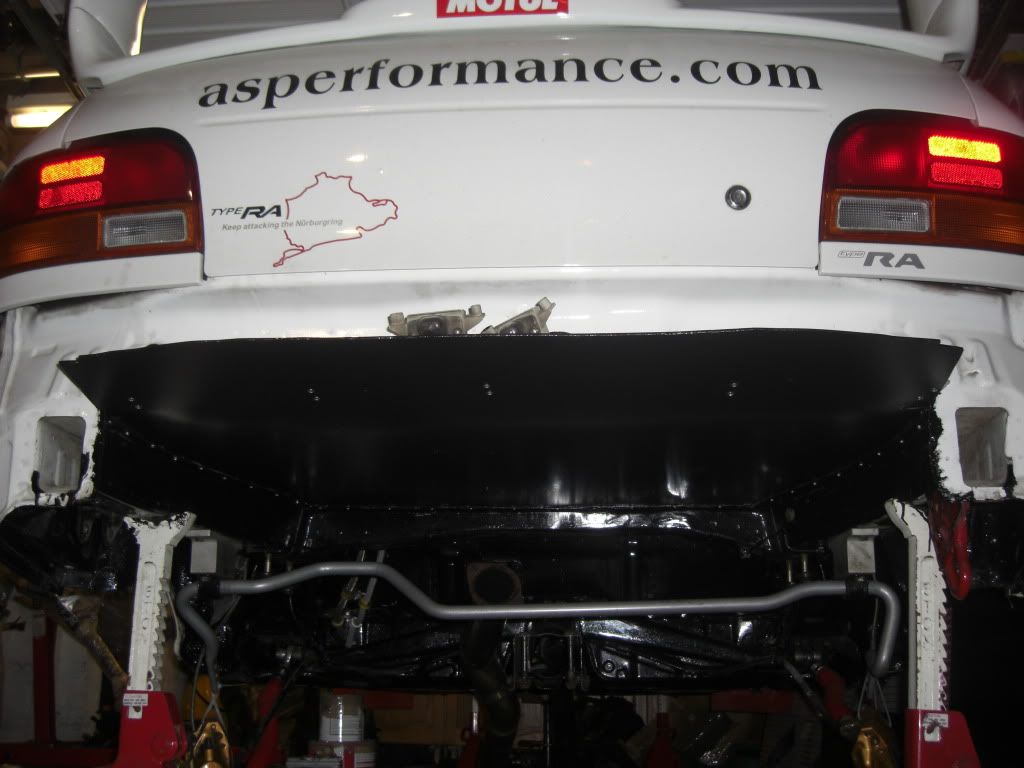
I extended it beyond the boot so that it would mate nicely with the back side of the bumper. It needed a slight bend but produced a neat solution.
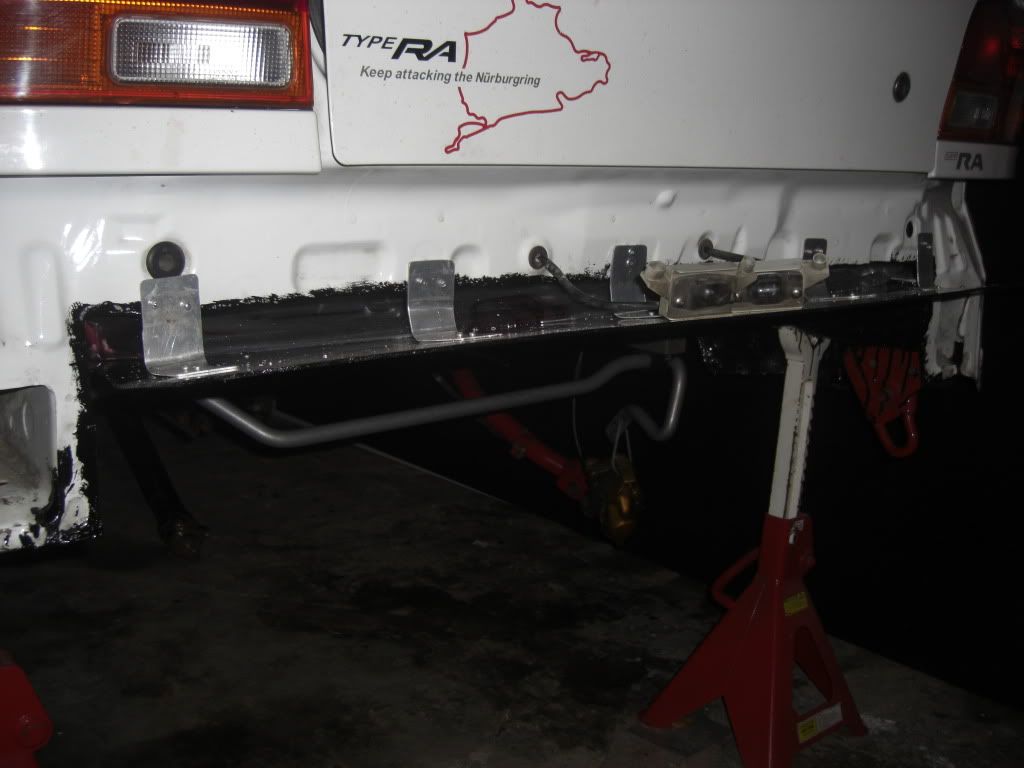
Then it was just a case riveting it in and making some brackets up to support the rear section.
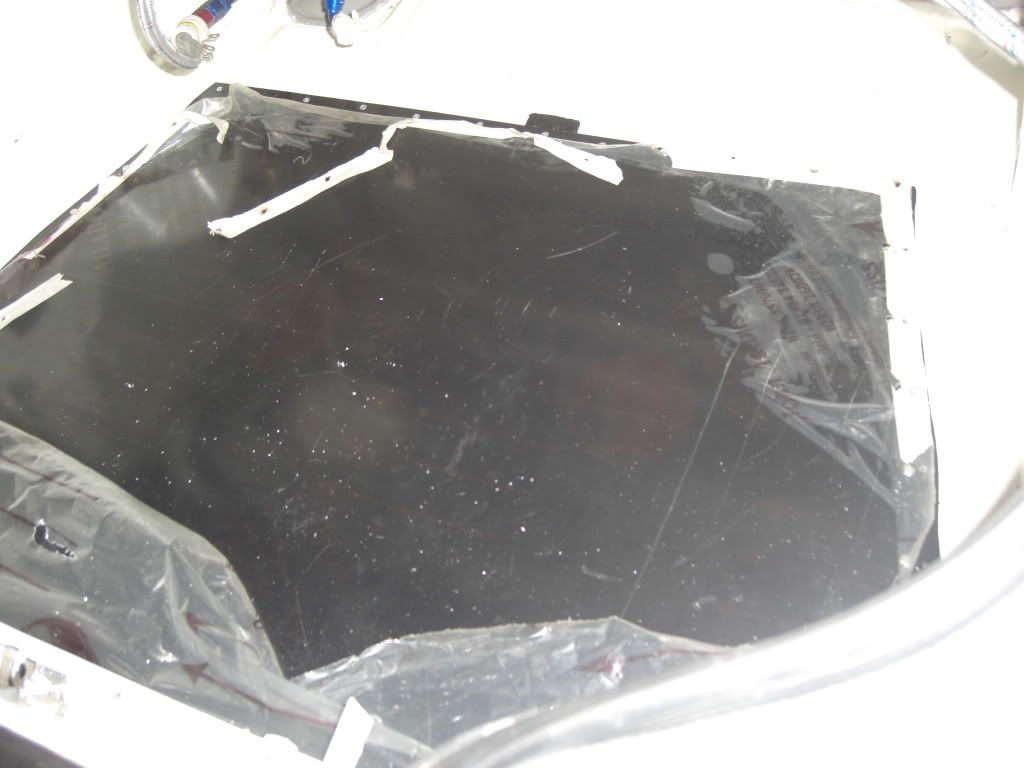
With the bumper cut and back on the sheet mates really well with the bumper asnd now just needs the sides filled in. will do that at some point later tho.
Not the best picture but it shows the sheet bending up slightly and meeting snuggly with the bumper.
The next stage is to get the car back on the ground so that the cage can be installed which is the critical bit time wise.
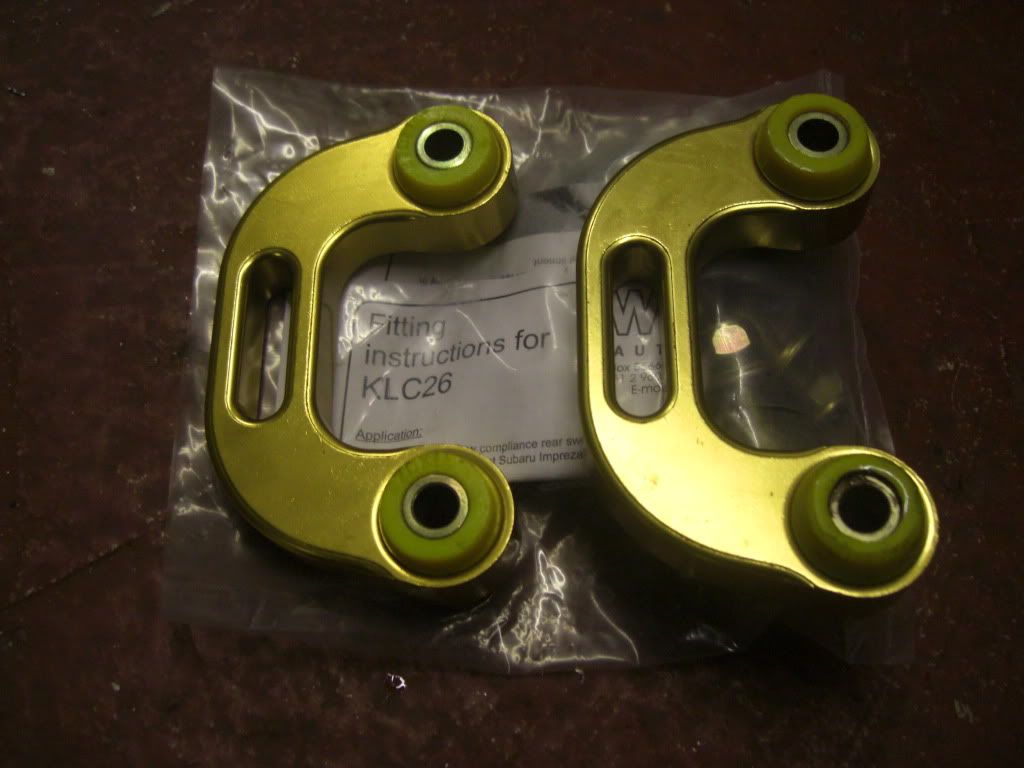
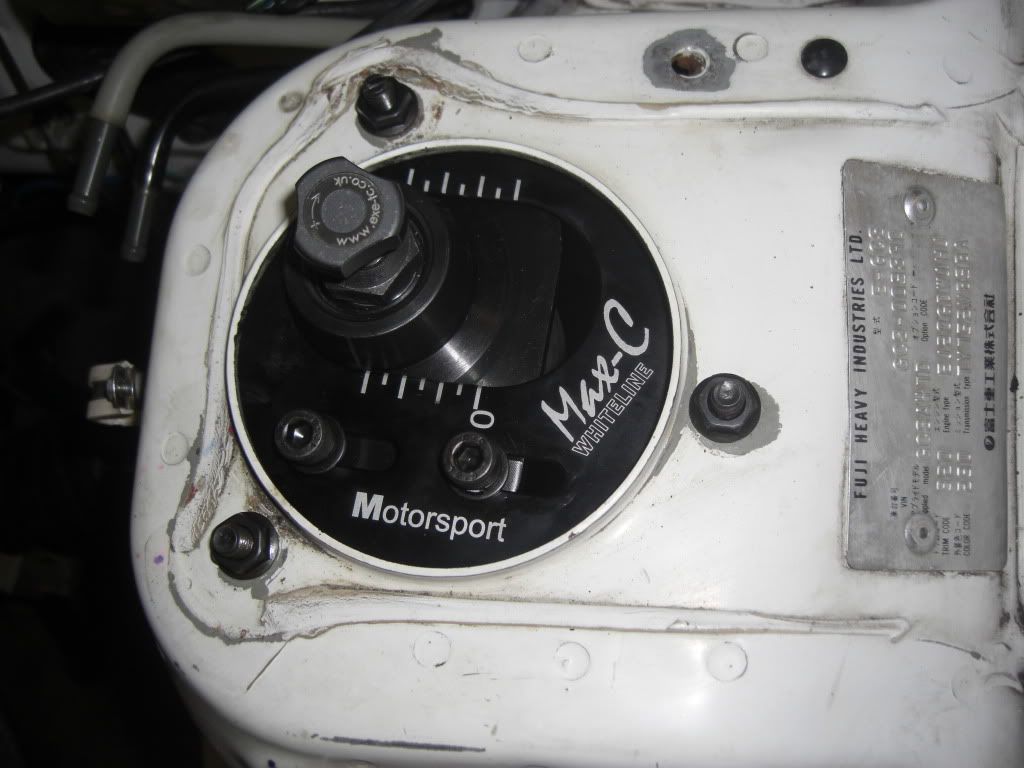
Managed to get a set of these from Graeme through at whiteline, thanks graeme.
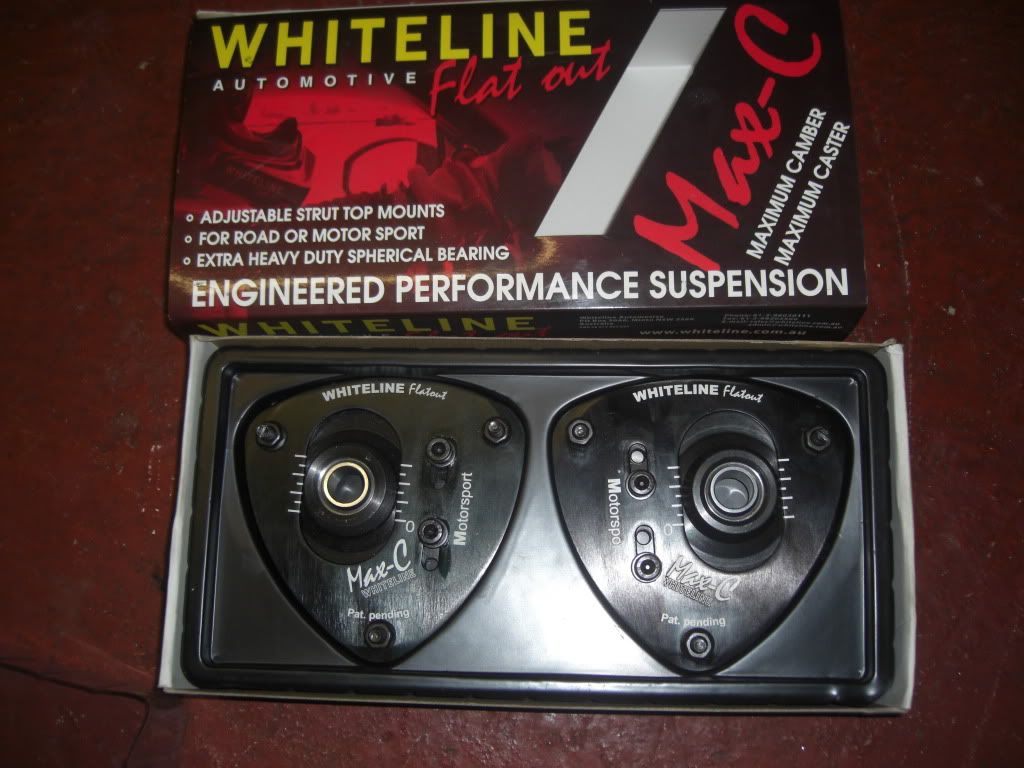
Really good idea the way these have been designed. Last year I turned the top mounts to achieve caster but that was at the expense of camber adjustment at the top. These use an offset mounting point which allows both. I have measured the position when compared to last years top mounts and they are almost identical and I achieved 5 1/4 deg of static Caster with no other mods so this should be similar.

Hopefully I will get the car down on the ground and the cage test fitted by the end of the weekend so kenny if you have plans for next week best turn your phone off
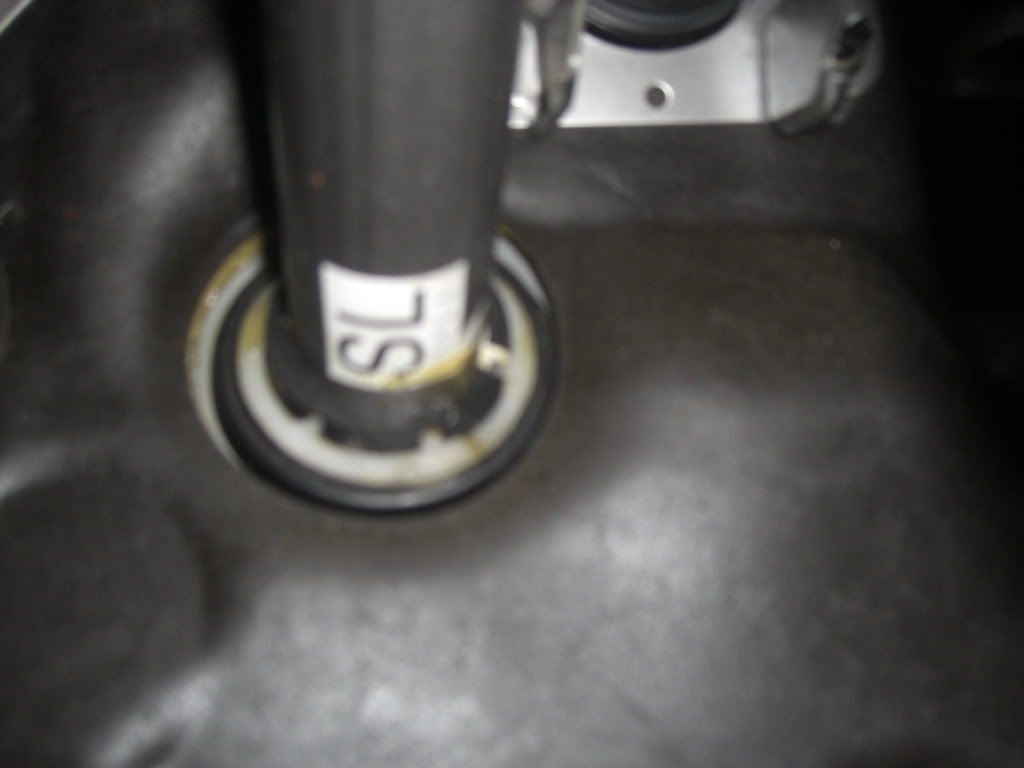
I have managed to source a newage quick rack so that should be here soon. I also have a newage steering column which i would like to use to eliminate the need to cut and shut a UJ. On an initial fit the column mounts are different spacings from the classic but thats not a major issue but the bung in the bulkhead where the column goes through is much larger diameter on the classic as the classic column has a metal sleeve with an end stop, the newage one doesnt. so i need to source the correct bung to locate the smaller dia newage column.
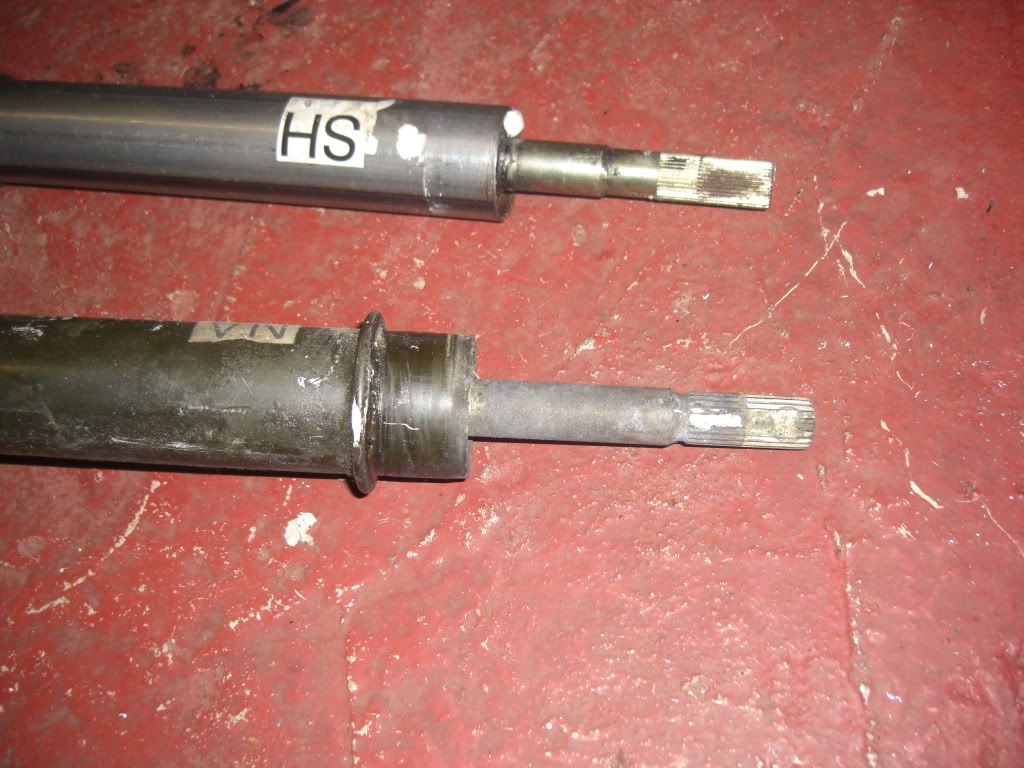
Newage column at the top.
The bung on the road blobeye looks like this so assume this is what i need.
I had intended to go to a pedal box this year but time and budget has seen that removed from the list. I have never been fully happy with the brakes on the car so decided to fit a newage servo and master cylinder. But as with all things subaru related nothing is easy. The RA master cylinder has 2 front and 2 rear ports as it does not have ABS. The newage one has one front and one rear since the split is done at the ABS module. So no point replumbing everything for one season so new plan is to fit the bigger and newer newage servo and have the RA master cylinder overhauled. So the master cylinder will be on its way down to Durham for Alyn to give it some TLC just incase there is any slight fluid bypass issues which is possible given the master cylinder is 19 years old :eek:
Thanks Alyn appreciate the help
-
Well lots going on at the minute. The car is fully stripped, subframes off and being fettled, hopefully have one of Steven Darley's tubular gearbox cradles in the near future which will solid mount the gearbox to the chassis.
Work will be starting on the custom Syvecs ECU loom and MOT spec car loom. Both will be stand alone.
Biggest job is the next on the list, that is to add additional support to the 6 point cage to stiffen the chassis. Looking at adding support bars in accordance with the blue book to create as close to this as possible.
Also working on a new rear diff mount.
So lots going on Jan and Feb will be a busy months.
-
Well thought i would resurect this thread and update it.
Well its been a while since i have updated this with any progress on the car.
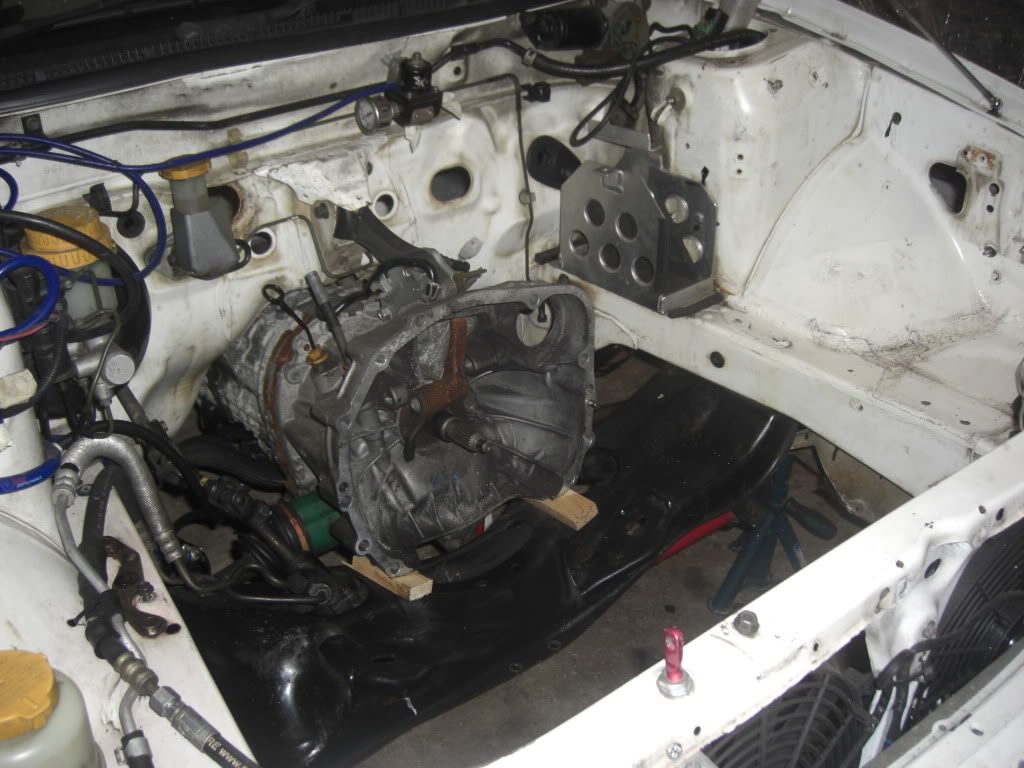
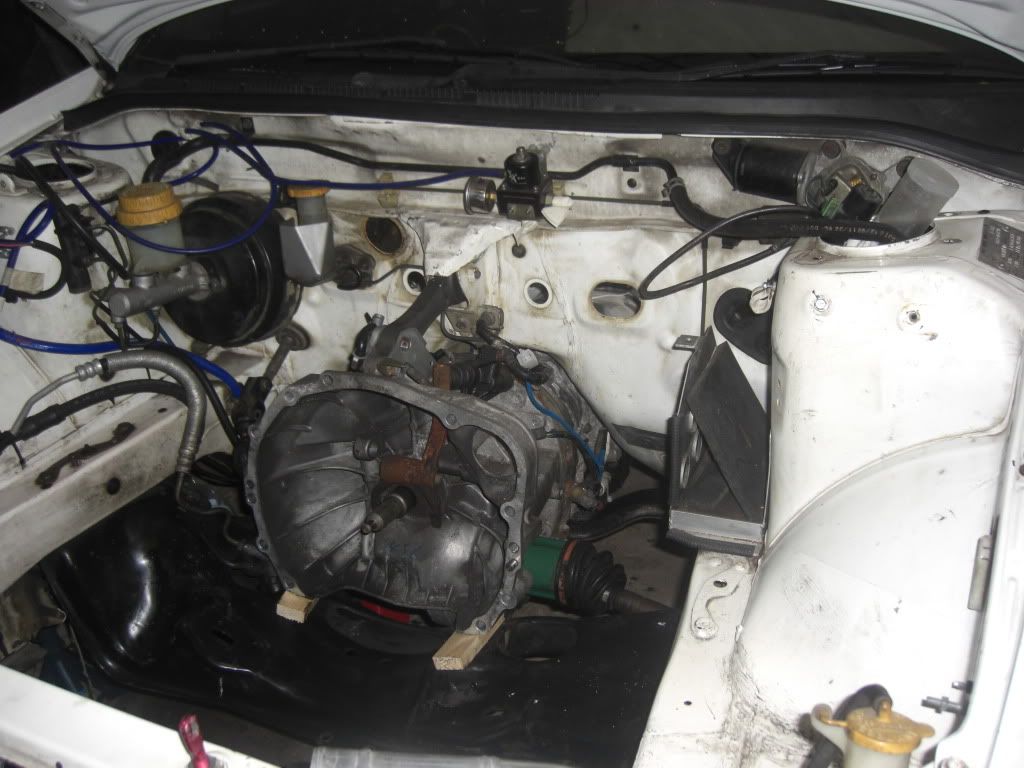
I had already decided that the 2.5 had to come out to be refreshed and had weighed up the options of going back out with the 2.5 refreshed or taking another route given that the 2.5 was prob at the limits of what a SCD block can take. The rest of the engine was always good for more power and boost but the block was the weak link.
In the end the decision was made for me when i stripped the engine down.
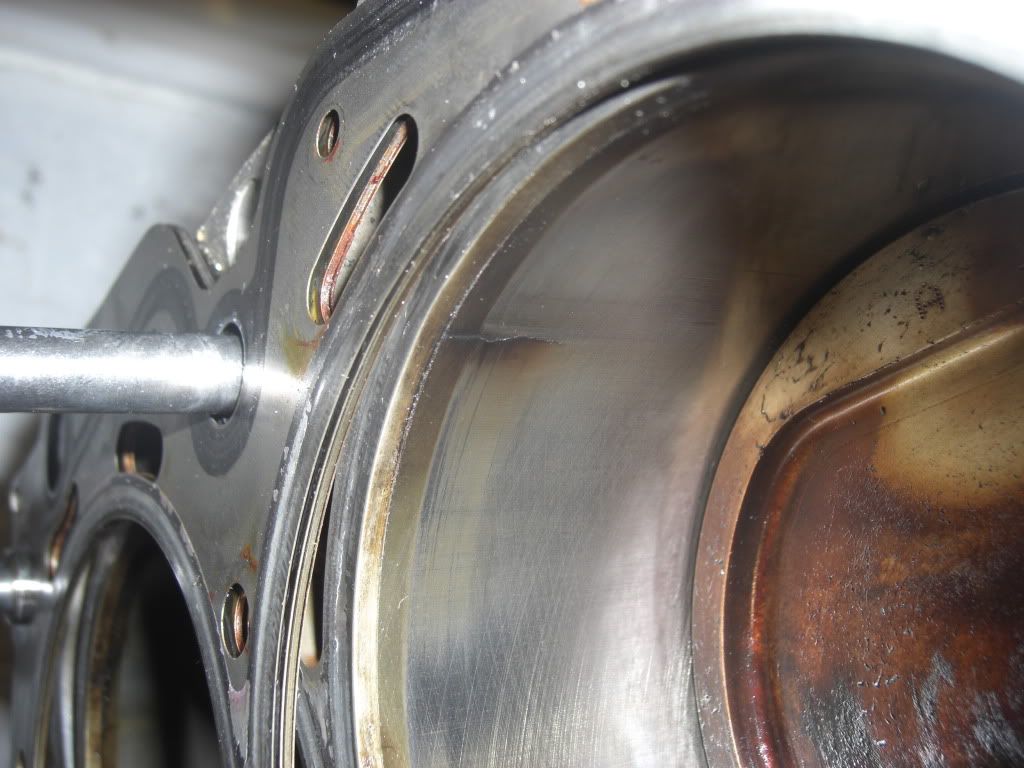
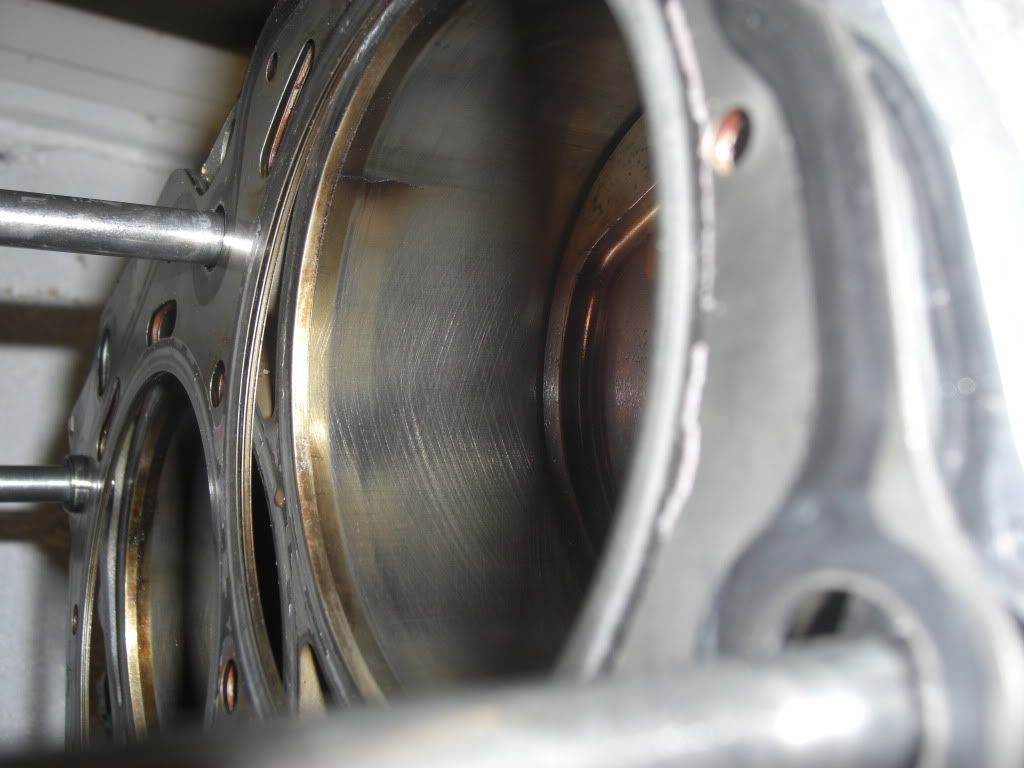
I removed the LH head first and found the bores were in excellent condition with the honing still in good condition which I suppose given the actual mileage of the engine could have been predicted. It was when i took the RH head off that things were decided. I found No1 bore was cracked at the 11 oclock position which would appear to be common on these engines when they are pushed to the limit. Not the end of the world really as the rest of the engine was on the whole in good condition.
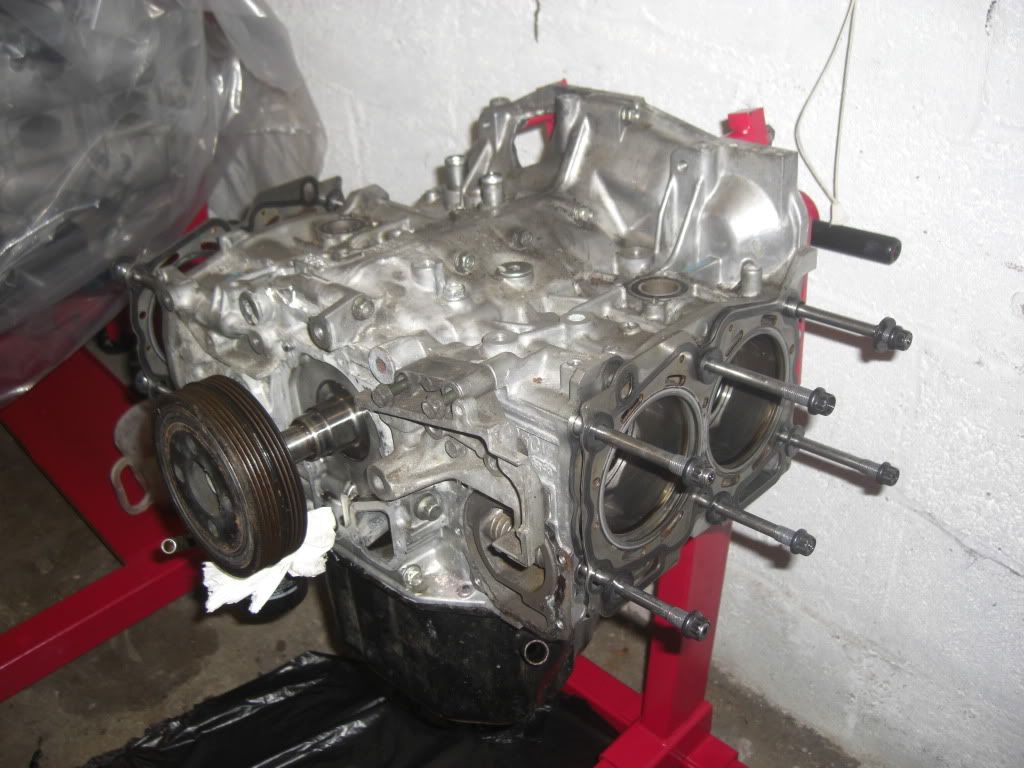
I had a spare block and had contemplated using that but in the end decided a change of direction was required. So this was sourced.

Sorry think the wrap makes it a little awkward to see the engine
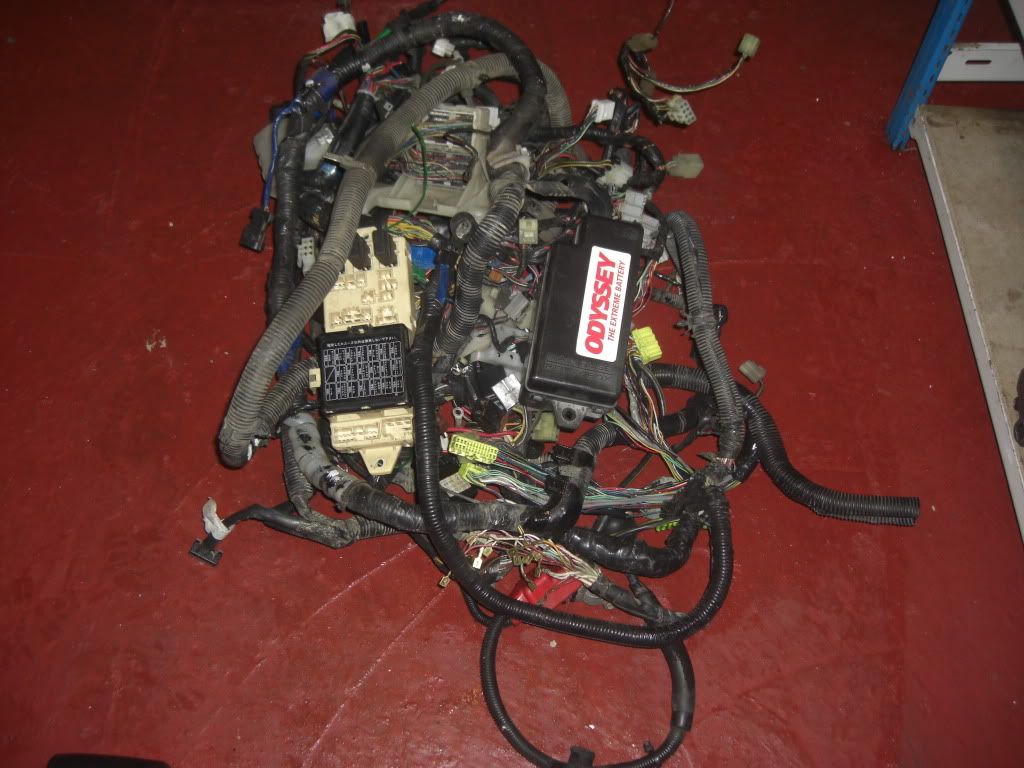
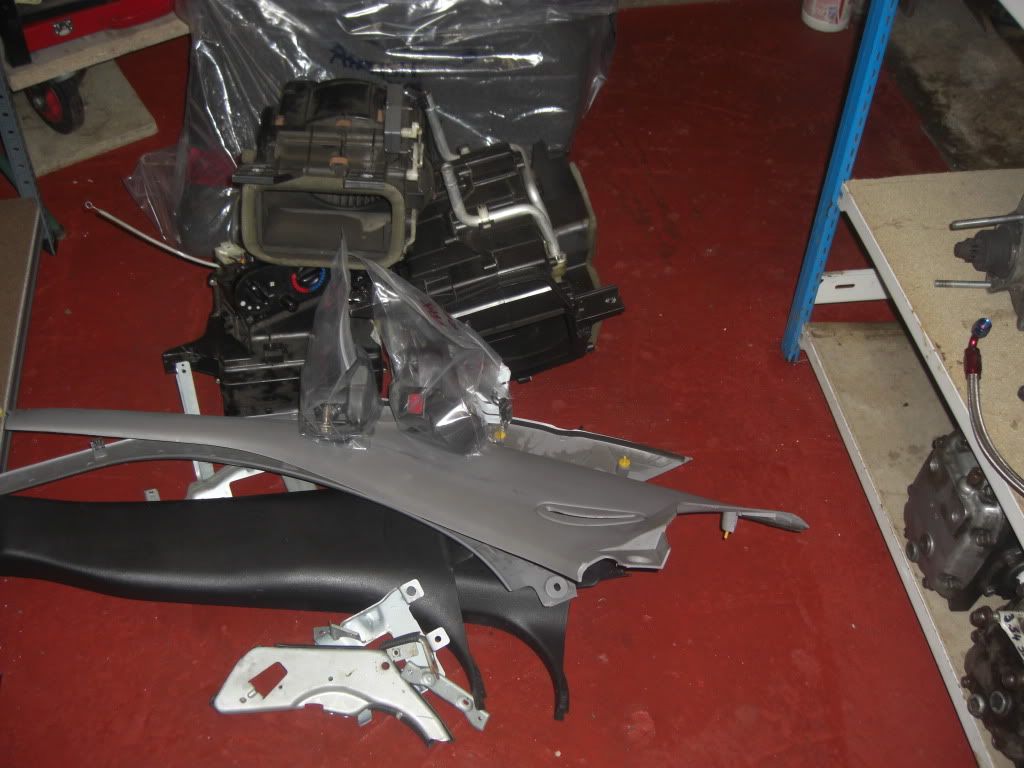
So decided while the engine was out that it was time to do some tidying up in the engine bay. So went from looking like this
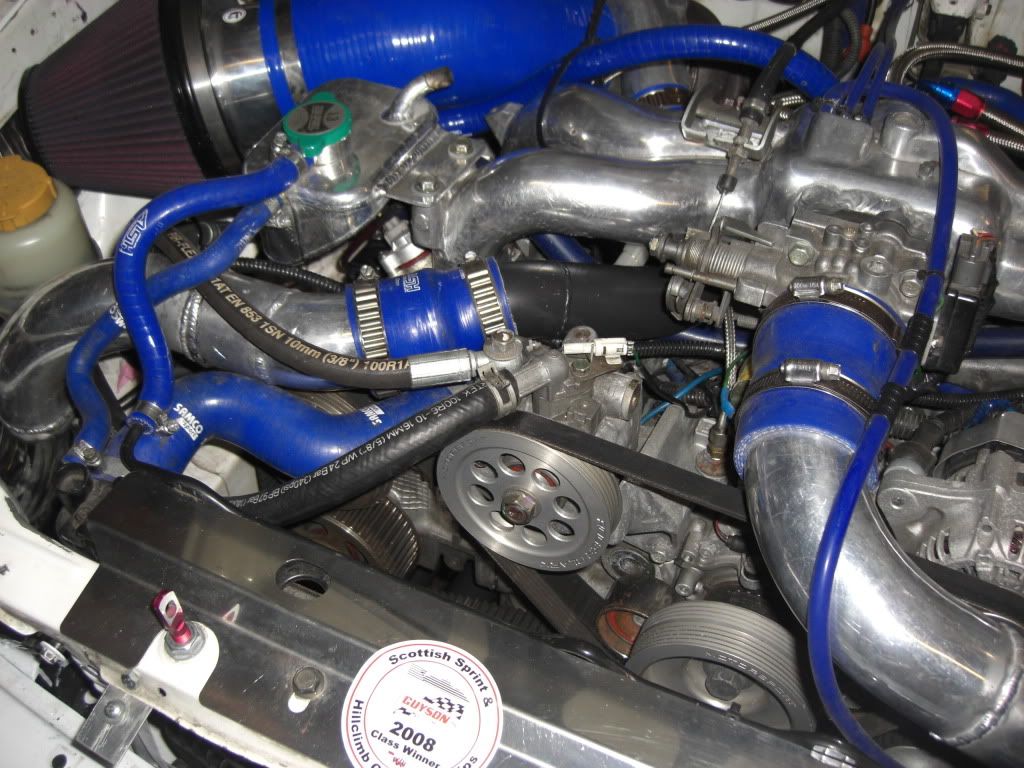
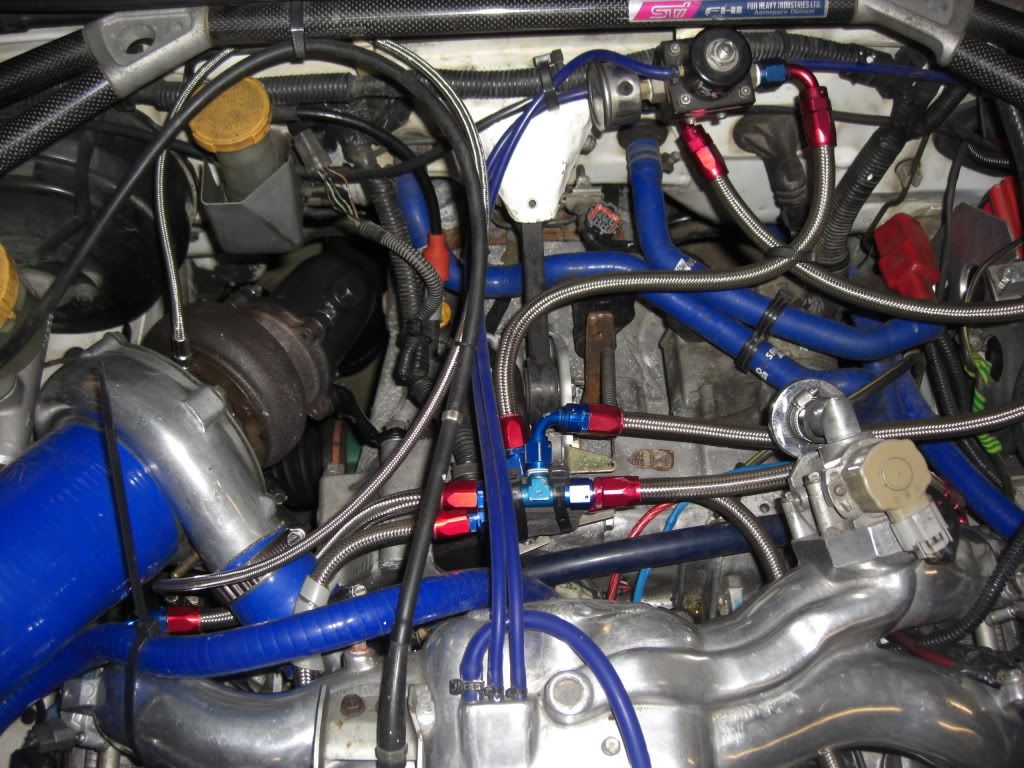
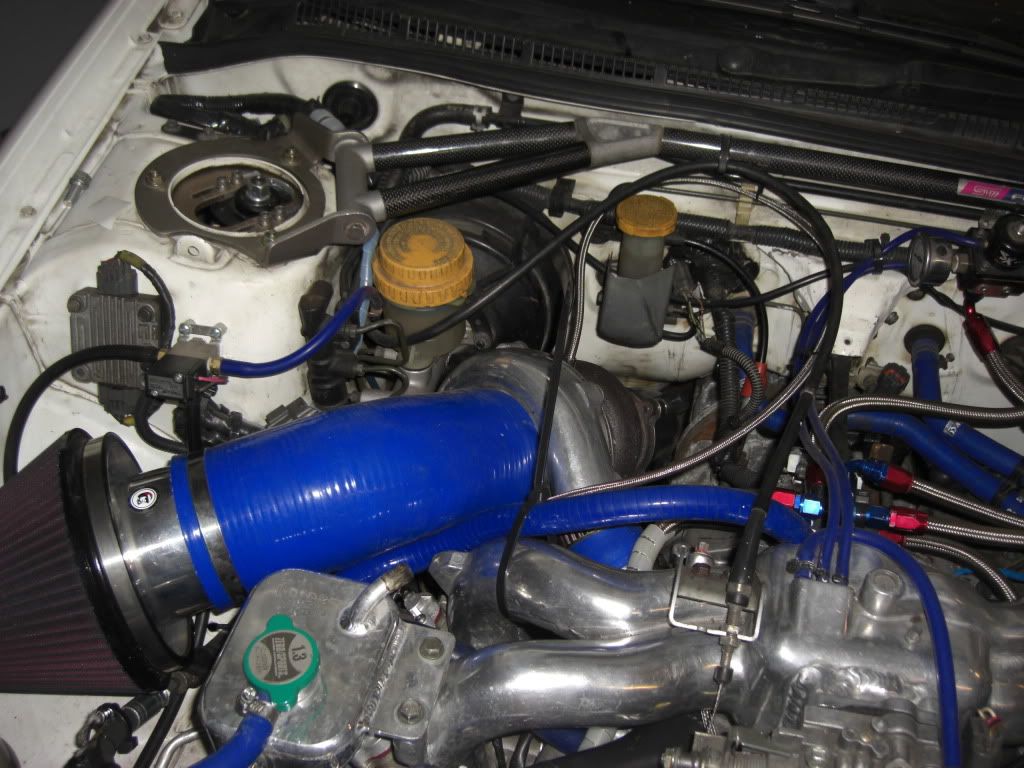
To this. Some cosmetic tarting up and some things to move around but not going mad as Gucciness doesnt make it faster and hurts more if things go wrong.
Still some more work to do in the engine bay in terms of tidying and decluttering but suppose it would have been rude to not start on the inside.
It now looks like this.
So the car has started its diet for next year with a healthy start to the weight loss program from this lot.
This is just the start of what will be a long and labour intensive winter to get the car where i want it for next year. I am hoping I wont have to make the compromises I have had to over the last few years but ultimately budget will dictate that.
Next up for the diet is the rear end it def needs some attention.
-
Alex if your box is a hawkeye box it will alos have the coated synchro's.
-
Poss the carbon coated synchro's helping in your box John.
I use millers CRX LS 75w90 NT.
-
As above
-
If you are using the car on track you NEED access to the data log info its critical to see whats happening with the engine and engine systems. You need to be monitoring fuel pressure, EGT, oil pressure, temps, boost, revs etc etc so that you can see if anything is changing. That is your first line of defence in protecting your investment if you dont do that and dont know what your looking at then you are going to have some expensive maintenace bills coming up if you intend using it to its full potential on track.
-
I'm thinking of just asking him to helicoil (8mm outer thread and 6mm inner thread) it for the mean time until I save a bit more cash for a proper build. Its just the access that is the hard thing! Maybe get a bit more room if the engine mounts are dropped on that side though. With the 8mm thread not being very good and not holding the 8mm bolt, I was thinking of asking him to put some of that metal putty round an 8mm helicoil just to give it a better grip?? Don't see there being much problem with that as there will be no pressure on the rocker cover anyway and as long as it seals properly I'd be happy enough with that for the mean time.
If you are going to use an M8 helicoil the hole would need to be drilled out to 8.3mm then tapped for the helicoil insert. So as long as the 8mm thread isnt to damaged you should be ok with an 8mm insert but access is the issue.
-
Can duncan helicoil it in situ. May not be possible to get access even with right angled drill to drill it out.
-
I'm guessing there'll be something else going in the way there
Intercooler big enough????????
Ah yes forgot about that purchase lol
-
Looking good graeme. Tidy intercooler/rad set up seen one of these the other day nice set up. Surprised you ddnt rotate the manifold, the pipe work would have been very very short that way.
-
Standard pads are rubbish lots of options out there other than standard.
-
Wow I will do it for £400

Track Car Project Thread - Eventually
in Scottish Scoobies
Posted
LOL you could say you made a small error in judgement lol.