


badbaz
-
Posts
6,443 -
Joined
-
Last visited
Content Type
Profiles
Forums
Events
Gallery
Store
Posts posted by badbaz
-
-
Stephen,
How much certainty is there that other carriers will get the iphone, especially orange?
-
Has anyone got the new hardware?
Who's got the new OS and old phone?
What's the story? Any better, any faster? Please tell all!
And, is Orange to get it or not?
-
10 mins tryin - 1033
-
Just shows you the lengths these guys will go to for kicks!

-
Passed you in the the big banana today Grant, was in me Skoda, waved but you never stood a chance
-
Maybes a 4x4 Civic, but they keep up well with roadhog RB 320's in Lanarkshire...


-
Hi i wonder if anyone knows a David Brown from Bathgate in West Lothian, and how i can contact him?
Thanks
I know a David Brown tractor, is that any help?
Sorry, couldn't resist. Hope you find him mate!
-
Went to The Racewall today. It was a good day, weather held out, surprisingly, and it was good to see some old names racing. The F1's were good, think they are too powerful for round there though, some damage when they hit the wall!
F2s were always my favourite and it was good to see them at their best. Speak was strugglin with his car, he still can't take being pushed off, he went all out to get the Gold roof after being pushed off by him, end result finished about four cars except the Gold roof but including Speaks with a hard hit to the wall. Good to see John Fortune still racing and still mad for it by all accounts. Finish to the final was hilarious, 1st to 3rd were running pretty much a car length apart for the last 5 laps, on the last corner of the last lap 2nd gave 1st an almighty punt and slipped through only to be t-boned by the spinning former leader which allowed 3rd through to win. Button and co could take a few tips from these guys on how to put on a show!!
It's a good day/nights racing, plenty action but £15 seems a bit pricey to me.
I'll defo be back though.
-
Very nice Kenny, would like to have seen them in yellow though

-
When I first pushed the pads against the discs on the ramp they were bedded in!

Someone can correct me if I'm wrong but the only reason you need to bed brakes in is when you change one or the other. Think about it, rarely do pads, discs or drums wear evenly. If you stick in new pads your disc surface is uneven(from centre to edge). It takes time for the pad to wear off where the disc is high and eventually the pad will wear to mirror your disc. Bedded in. New discs and pads are perfectly flat, square, whatever and so have immediately got a full contact surface needing no bedding in. Same applys to drums and shoes.
As part of my job I prepare and present HGVs and trailers for test. A big part of that is busting the glaze on trailer brakes and then I have to bed them in. When I bust the glaze it removes the worn pattern from the shoes which fitted the drums uneven surface. To bed them in I wind the brakes on by hand and then pull the trailer for about 10 miles at around 40mph, winding the brakes on 3 or four times more in this run. They get very hot during this but it is accelerated bedding in, forcebly wearing the shoes to the drum profile. It works. Most of the time.
First test will be the Lanark Meet. No time before that!
-
but for heavens sake man do you not possess an iron?
Kenny,
Do you know how long that effect takes to create? I thought being a budding photoman yourself you'd have appreciated the nice ripple effect.

-
Lookin good Ross.
Was that what you expected to see power wise?
Love the flames, maybe you could light your afterburner and make it up to Lanark Meet on Thursday night?
-
Good write up there .Were is the ramp jack postioned at the front just won't to know were to stick a trolley jack for future reference .Its easy at the back i just stick the trolley jack under the diff .
The jack was positioned under the sub frame. If just jacking up normally then you should jack on the sills at the jacking points and support on stands before working under the car.
-
Young Kenny, time will tell, and by then you'll have pleased your bank manager by securing some extremely large calipers for extremely large sums of cash!
The deed is done. All fitted (and working) now. Thought I'd just do a photo run through of before and after and the fitting of the bits. Those who are less experienced amongst us but capable may undertake the job yourself, it ain't so hard!
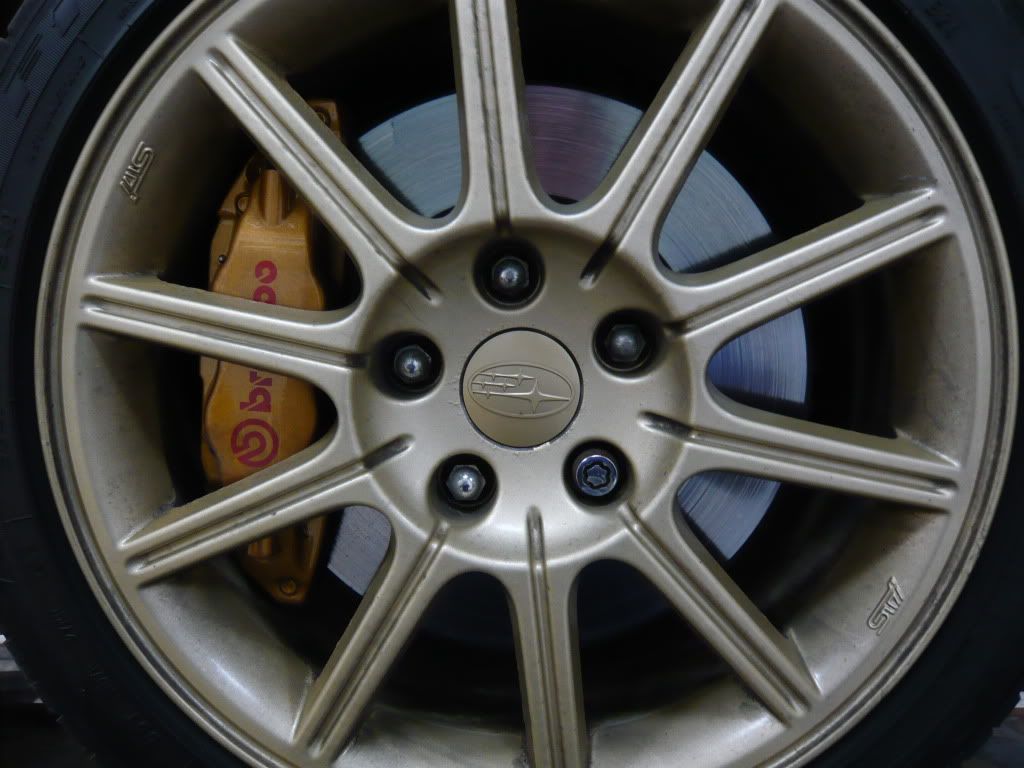
This shows the original brake disc, 30k miles plus, car had red stuff pads fitted here(not shown).
Forgive dirty and corroded wheels(see other thread for this problem/dilemma)
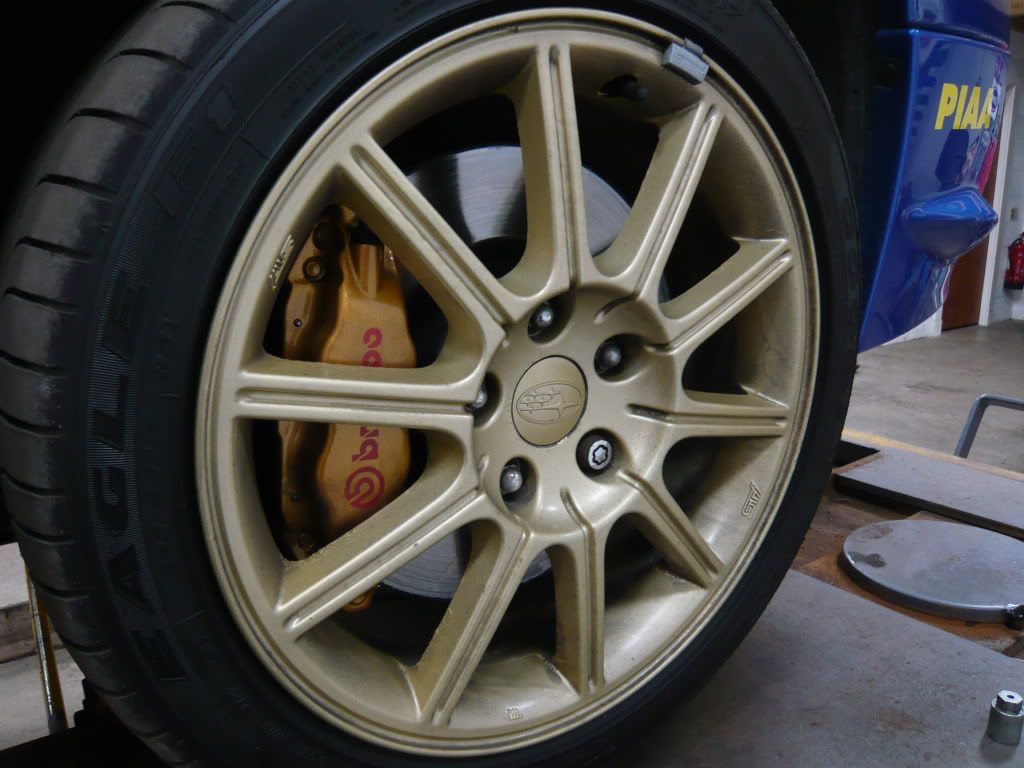
And another
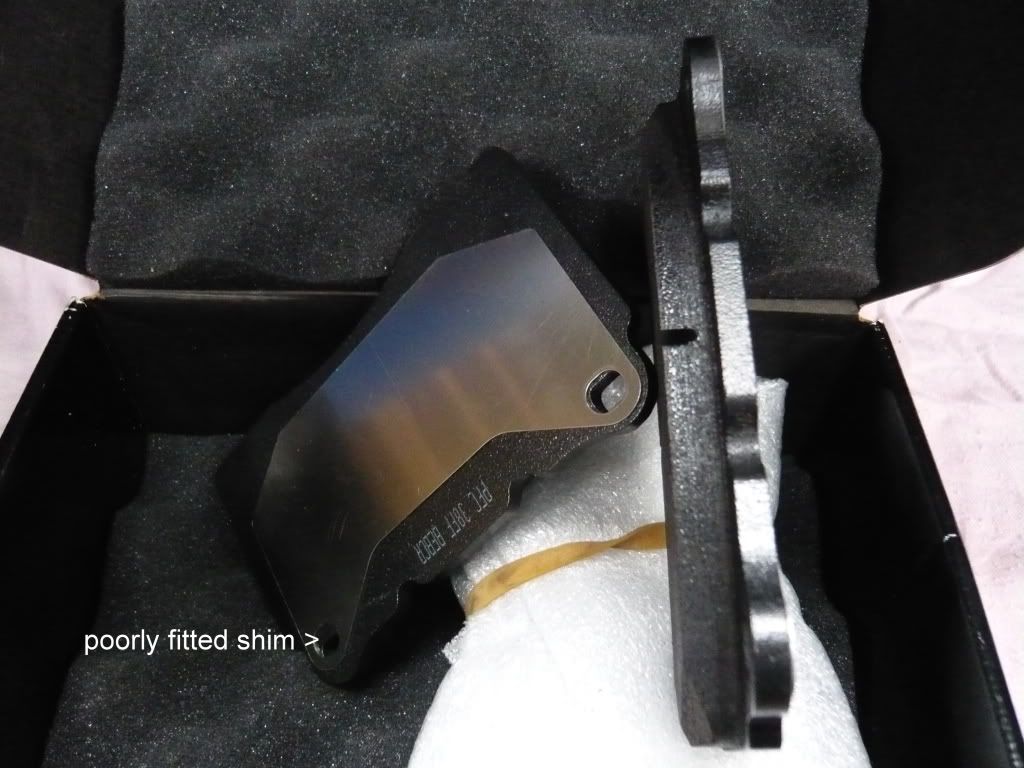
These are the brake pads, nestling in their protective box, no wonder given the price of them. You can see that the anti squeal shim is poorly fitted where shown. I had to rectify this as the brake pad retaining pin would never have got through. Pretty poor given the price and claimed quality but not likely to cause any problems! When you see them you think they don't have much pad thickness but this is the max that will fit in the brembos!
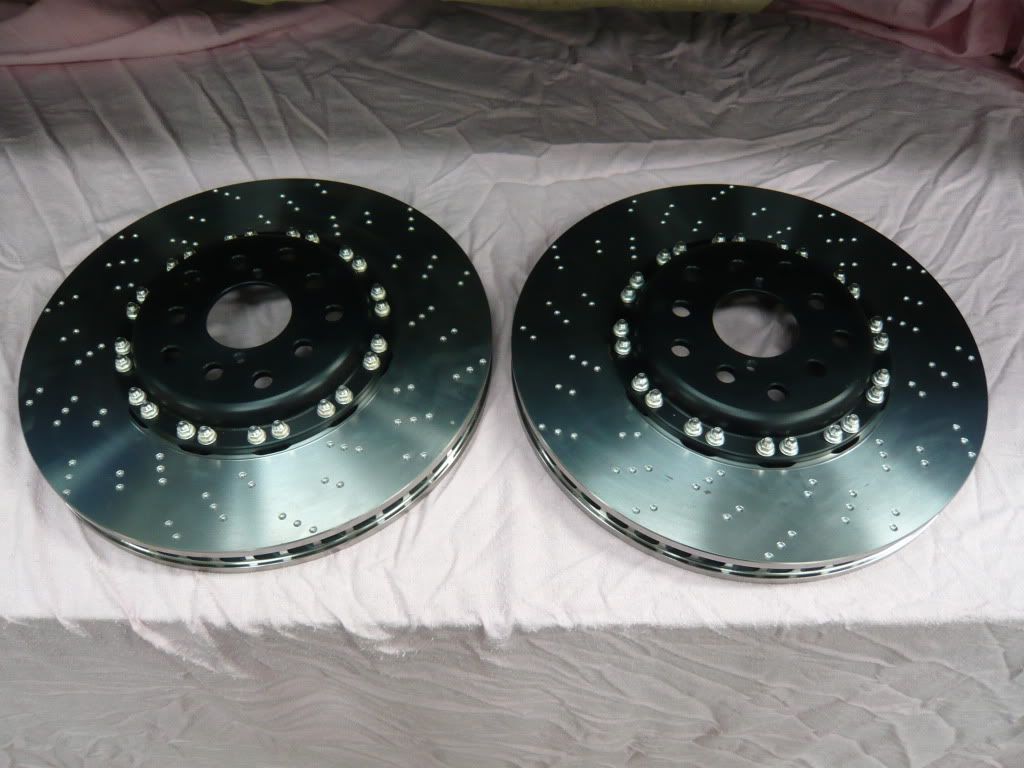
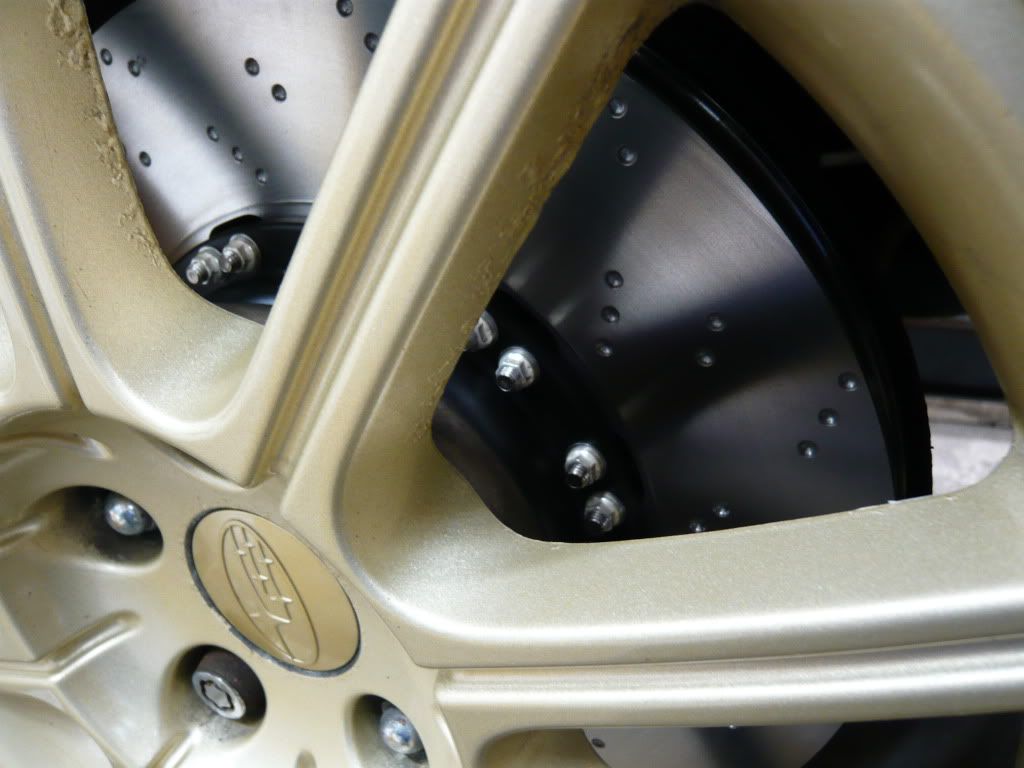
This is the disc, it is a floating type disc and the bell(black centre section) suits pre and post 05 STi as it is drilled with holes for both PCDs. This is the O/S disc as the dimples which can be seen have to rotate in a particular direction. The disc part(shiny with dimples) is called a rotor. When worn out this will be able to be changed independently of the bell thus saving money
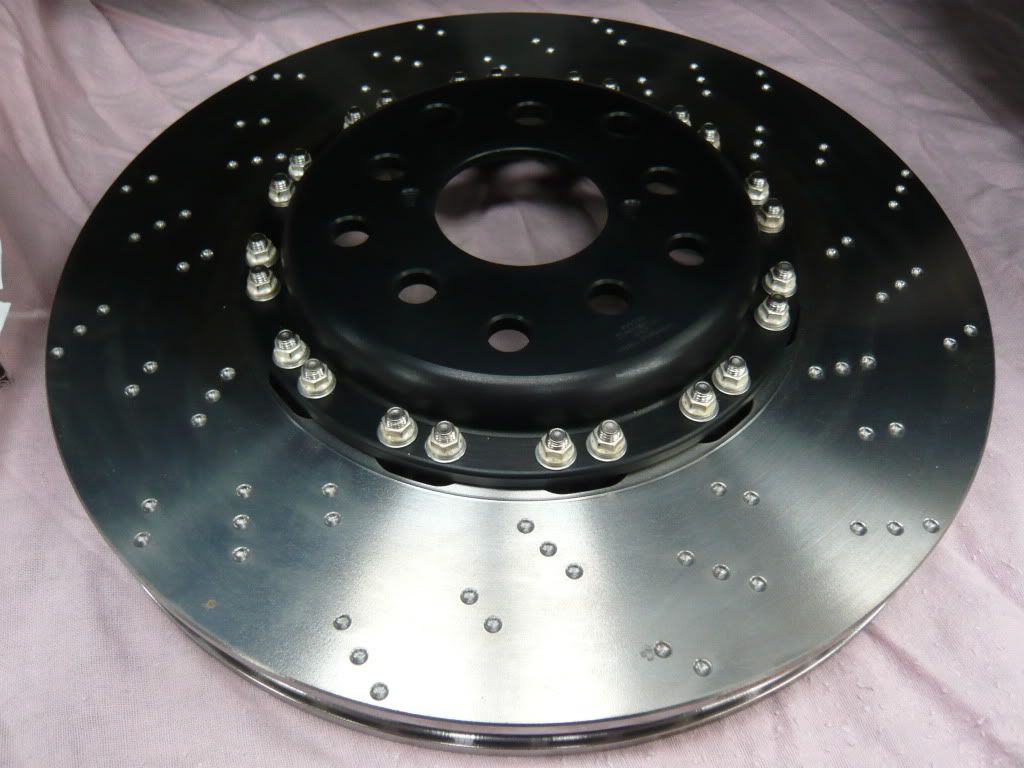
The two discs side by side showing the difference between O/S and N/S dimples/rotation requirement
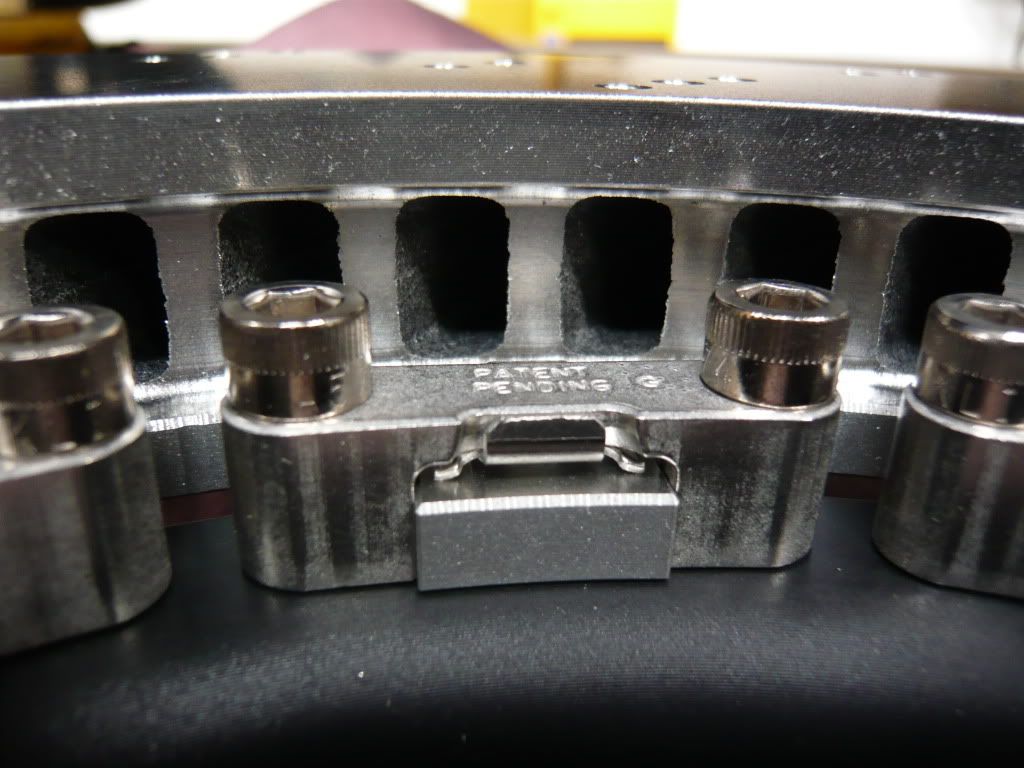
Here you can see the floating mounting of the rotor to the bell. I've got to say when you have them in your hand they seem extremely well engineered, looking and feeling very much a quality product
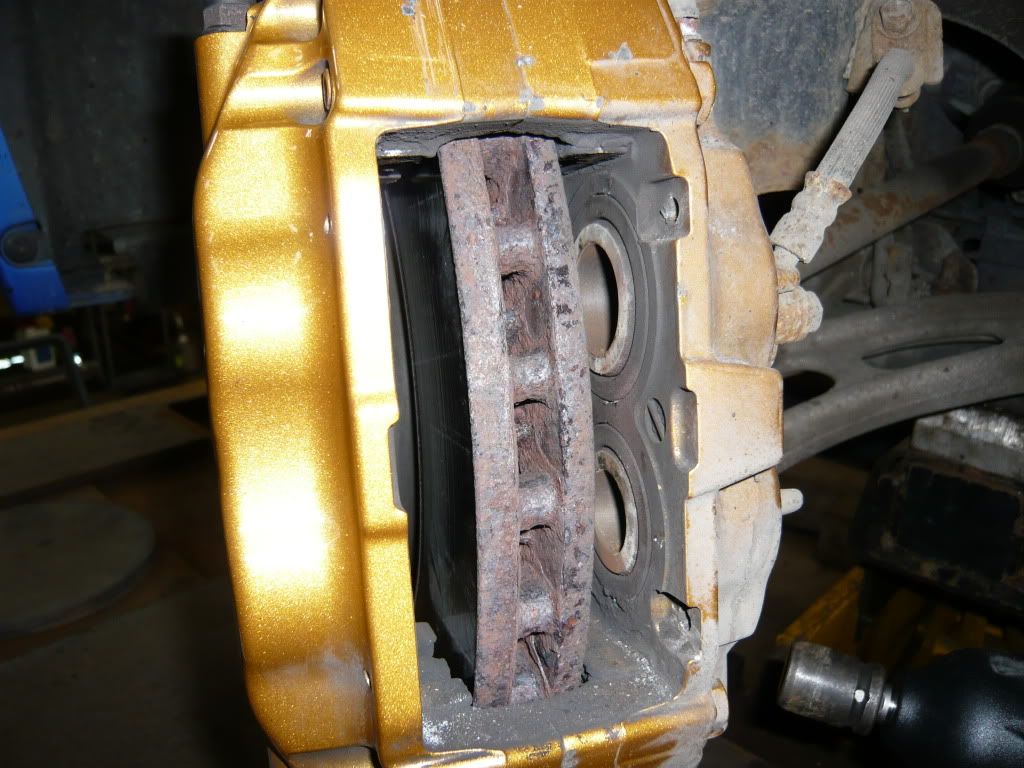
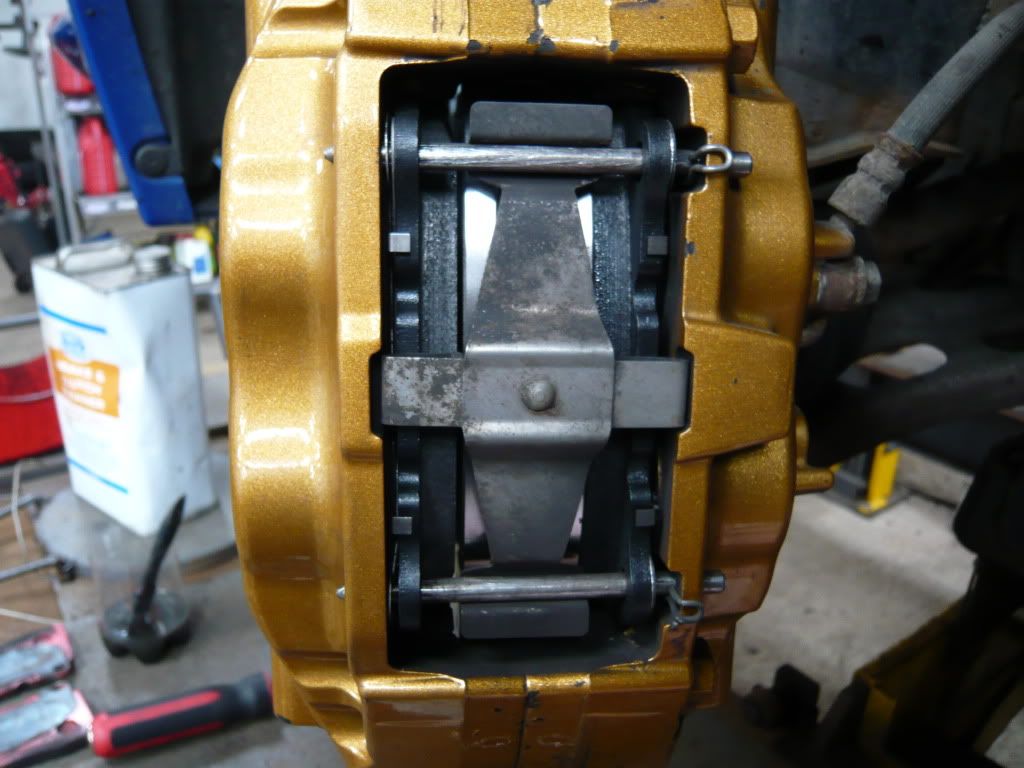
This is the caliper before removal of old pads, you can see they are red stuff pads as they are um, well, red!
To remove pads, first remove the r clips as indicated, try not to bend these as they are spring steel and need to be kept in good shape for refitting.
You can then use a punch to remove the brake pad retaining pins. I use a large punch for the initial hit(s) to make sure the pin gets moving then a small diameter one to drive pins through. Don't want to be damaging those lovely brembos (eh Kenny?). The pins should be able to be pulled fully from the caliper, mines weren't too tight and once the first is pulled out, the large anti rattle shim or clip whatever you want to call it, will ping out a bit and go loose, making the second pin easier to remove. Once the pins are out, you need push the pads outwards and away from the discs, this pushes the caliper pistons back in too. I was able to do this quite easily with my fingers but you may need to use a suitable srewdriver or small lever. Once the pads have been pushed back, a little bit of persuasion will remove them straight out towards you.

Pads removed, push each of the four pistons back into the caliper, don't damage the rubber seals. If you look into the gap between the caliper and disc where the pads sat there are 8 small flats (nearest piston sides) where the pads sat, 4 each side. Give these a gentle scrape to remove built up dust but try not to burst the caliper paint as this will accelerate corrosion and make your pads stick!
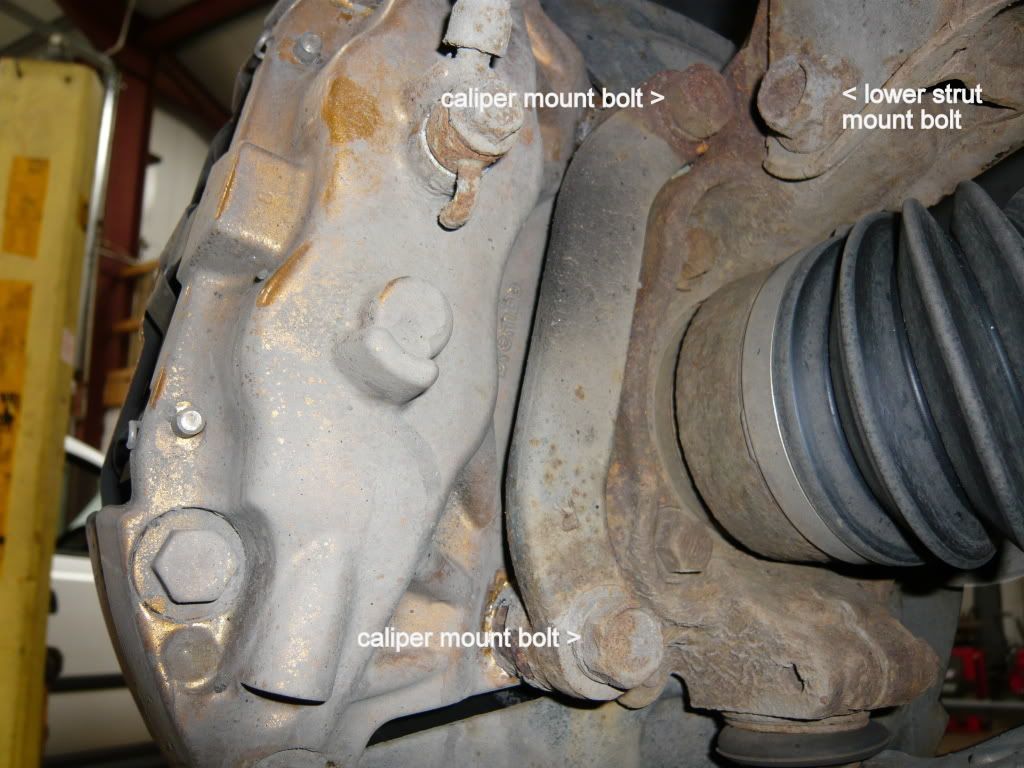
To remove the old disc you need to remove the caliper. The mounting bolts are shown here and are tight. They are metal into alloy which is never a good thing in a hostile area such as brakes. The top bolt is partially blocked by the strut bottom bolt also shown. It is better to remove this to allow better access to the top bolt. Suspension won't be affected as you don't need to touch the other bolt holding the strut. Take care when taking out the caliper bolts in case the threads pick up and you waste the calipers. They won't unscrew with your fingers but won't be too hard to turn with a spanner. If they start to go tight then you must work them in and out at the same time as applying some lubricant such as WD40. Mine unscrewed without drama but they were tight to crack. It's also worth noting that the bolts are fitted through some sort of spacer/brace before passing through hub into the caliper, the mounting bolts won't unscrew through this part. If everything was new it'd be easy but as things are a bit rusty and things start to move to the side it all starts to jam up so I found it easier to take the caliper away from the bolts as you unscrew and you must also undo them relatively evenly, can't do one completely then the other. To allow caliper to move away, disc must come off hub too. Mine wasn't seized in the centre, if it is, give it a good chap with a hammer or there are two bolt holes into which you can gently srew bolts which will force the disc off the hub.
Unless you are replacing hoses or caliper do not be tempted to remove the brake hose from the caliper for any reason. Hydraulic systems are best left well alone unless it is necessary to split them. Speaking from experience.
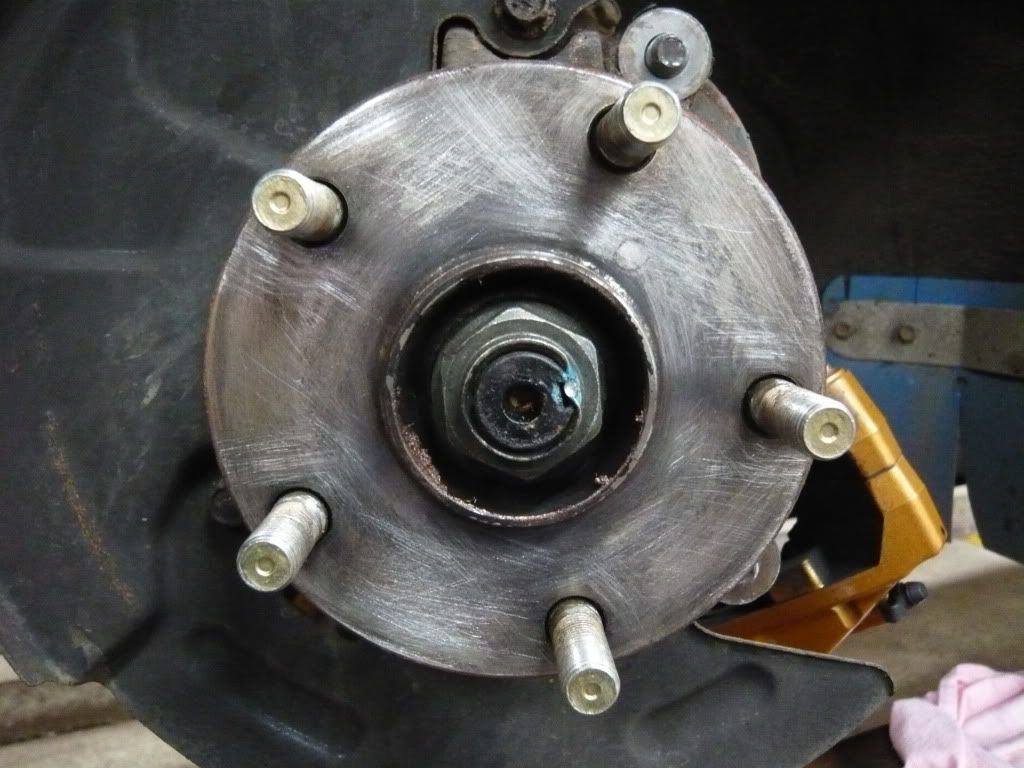
Old disc removed, hub shows slight rust, dirt whatever. It is essential this is cleaned.

I used emery(sp?) paper with my finger, don't need to go mad but it should be clean, if not you will have brake shudder, warping or worse still your wheel will fall off eventually
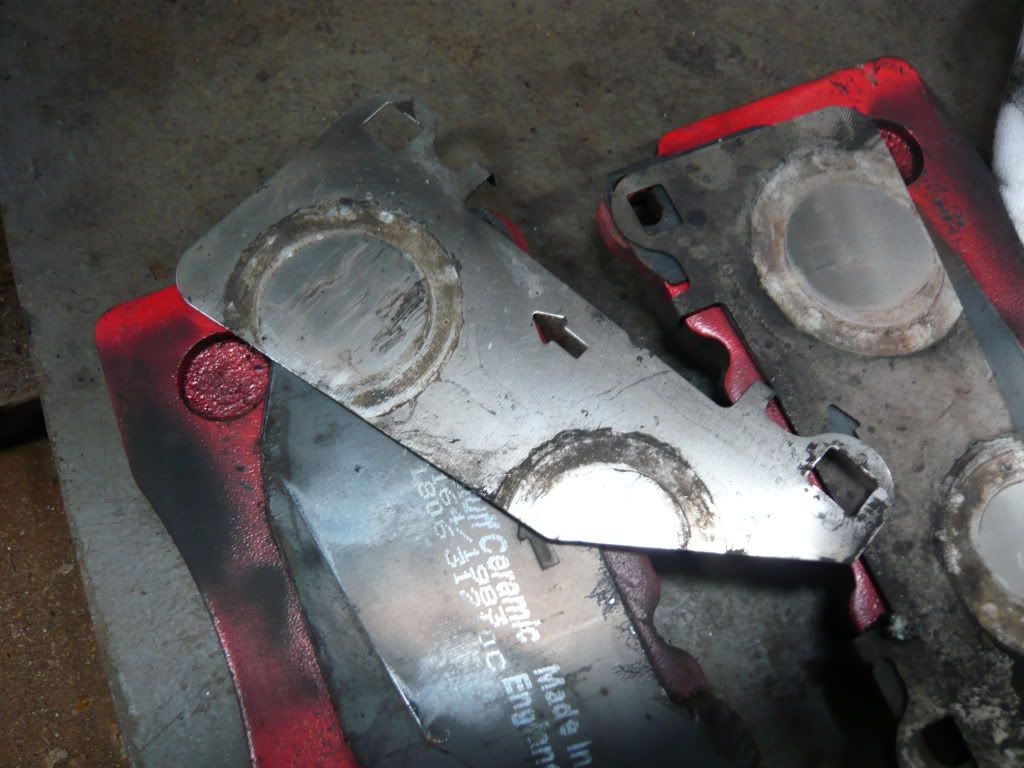
This is the old red stuff pads showing the original fit anti squeal shims. I refitted these to the new pads as I don't want squealing brakes. May sound cool at the end of a rally stage but not in your high street
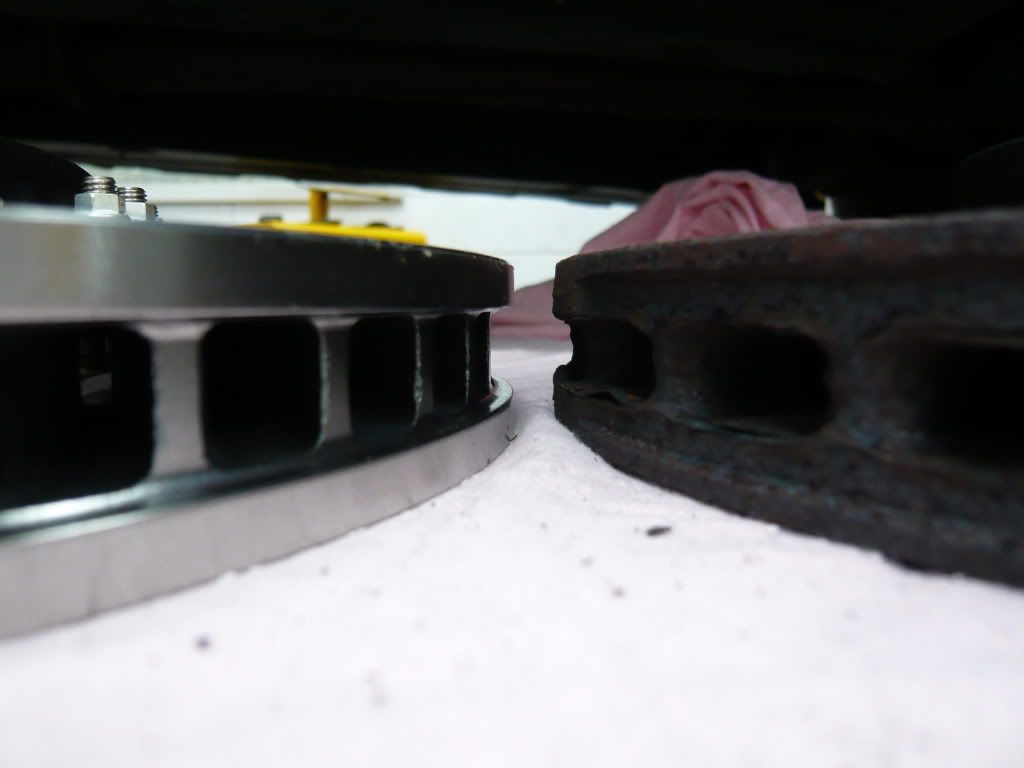
Old and new discs side by side. Same dimensions.
All fitted now. Straight forward, use copper grease on all bolts as you assemble. It makes them easier to go in, tighten up properly and you may need to remove them yourself in the future which will be all the easier to do. Don't go mad cleaning the brake retaining pins as I suspect they have a thin coating to stop rust, just rub off the old brake dust and they'll push in with your hands. Make sure all anti rattle squeal shims clips are in place and before you push pins home line up the holes for the r clips. My disc was a little tight to fit hub centre and I had to use the wheel to pull it on. Better cleaning of hub will help this. Just make sure it all seats properly as it'll all go pear shaped very quickly if you don't. Wheels back on, tightened properly then pump your brakes to push pads against discs. It would surprise you the outcome if you don't do this!!!
Pads in, all back as should be, cleaned caliper outside only. Pity about the stone chip damage but the calipers still look good nearly 4 years on. My advice is not to use copper grease around the pads. This is sometimes done to try to eliminate noise or seizing. In my experience it only accelerates seizing as all the sh!t sticks to the grease.
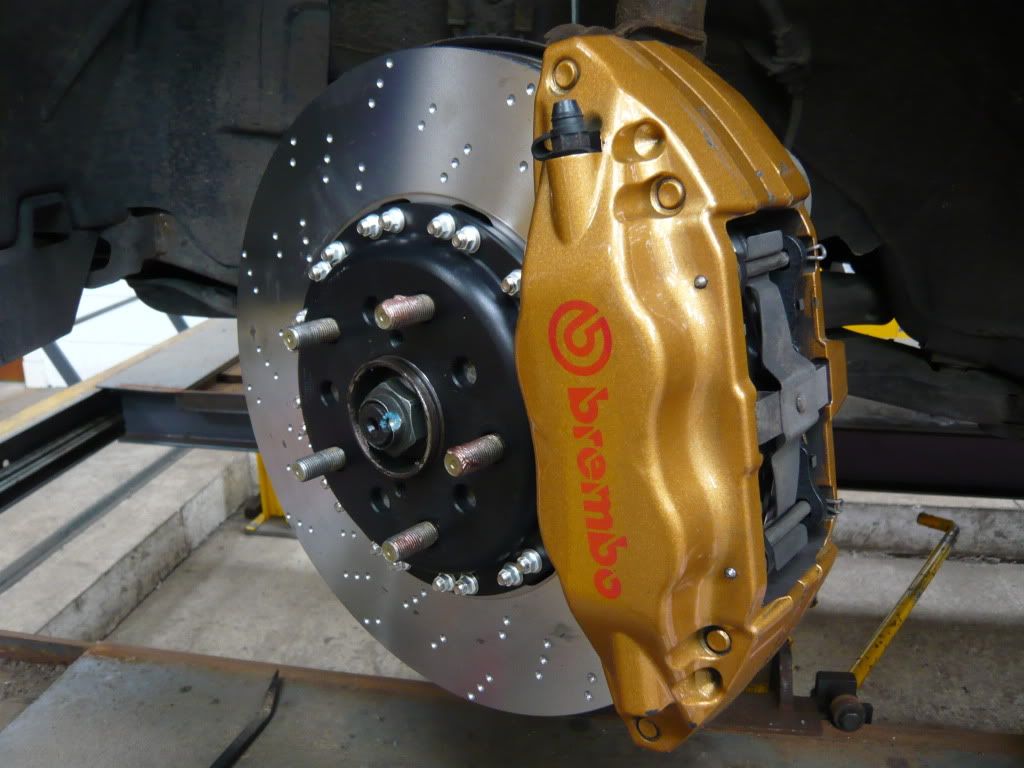
And finally some finished views, again, forgive the wheels. They badly need done.

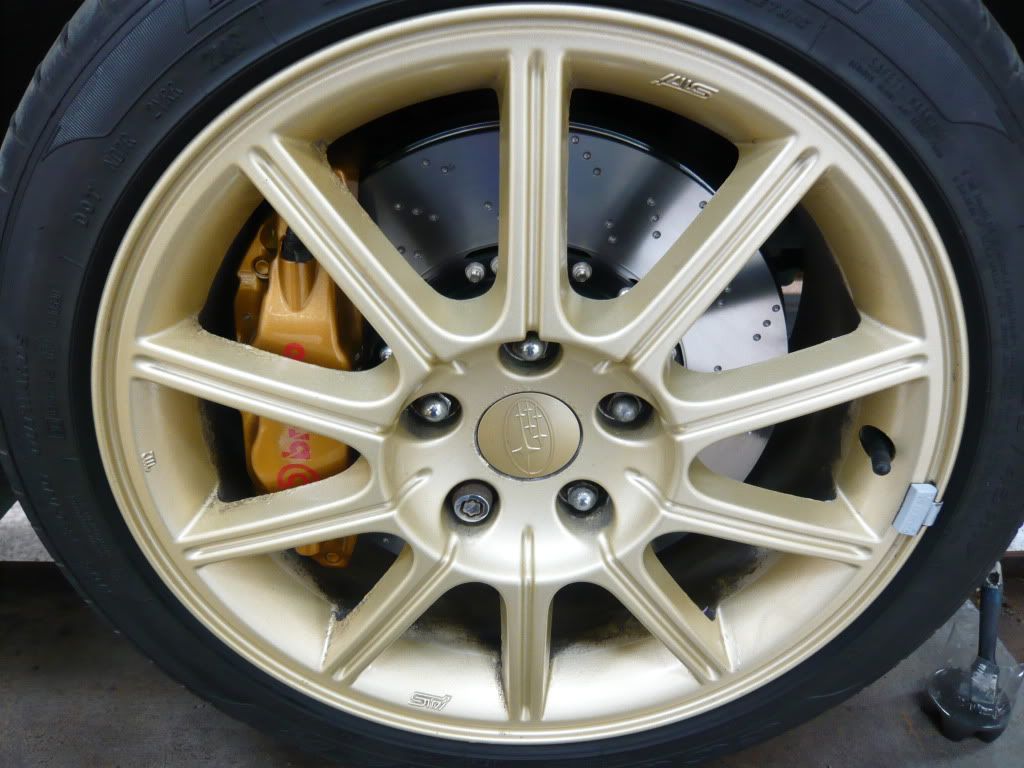
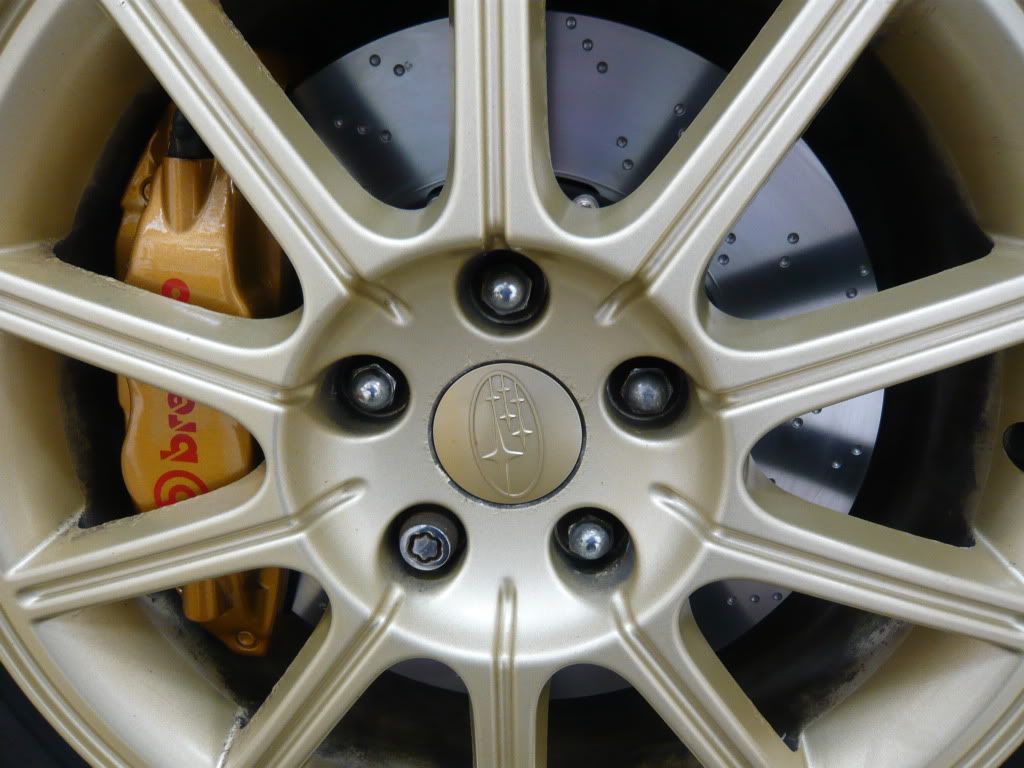
Job done! Two hours, mainly due to photography and cleaning calipers and one wheel!!
Verdict? Not sure, haven't used them in anger as yet but so far they look good, don't squeal and do in fact stop the car. I did sort of expect it to flip forward onto it's roof the first time I pressed them but it wasn't so. Time will tell if they are better, I just hope it doesn't need a track day to see the benefits. Noone seemed able to answer this question previously.
Hope I've not bored you all to death!
-
It's brake day!

Off shortly to fit the parts, i'll post pics up later for anyone who's interested. Hoping it's all straightforward!
-
Two names required I reckon as mentioned earlier.
Something following on from hawkeye, as in first version of totally new design, doesn't need to continue the eye theme as it's a new generation.
Something which follows the classic, newage pattern to refer to all versions to come of the hatchback.
Haven't any ideas yet though
-
Ok Mac, I'm not out of contract yet either so i'll just wait and see!
-
So tech guys: new phone - worth the wait or not? Should I be holding out for Orange to get this or am I wasting my time?
-
And that leads onto the next question! Who knows where to get wheels painted, a good job for a fair price. Gotta be nearish to Lanarkshire. Preferably with wheels to prove it!!
-
ive had a set of oz sprayed by a body shop,they looked very nice but!!!!!!were very expensive to do .
i payed 50 for bead blasting then 240 for them to be sprayed,.
so in the long run p/coating is the cheap way,but dont have the colours that you can get from any b/shop.
as they could match it spot on...
Did the paint work stand up to brake dust and the associated heavy cleaning required?
-
Cheers Stu
It does look good, when I first posted I wondered what yellow would look like. It certainly works on that one! If the coating could match the graphics exactly then I'd certainly be tempted.
Who knows if wheels can be painted with something that lasts? Rather than powder coated I mean!
Thanks for looking it up!
-
Stu, hate to think you're sitting around twiddling your thumbs
 did you find the photos with the yellow wheels at all?
 -
Hi guys looking for advice /opinions ,going to upgrade my brakes and have seen some groop buys on SN problem is they all seem good prices
what i would like to know is what do i really need?. Car will be getting engine upgrades to the tune of circa 300bhp ,handling is :- Whitline
front ,rear anti roll bars ,antilift kit ,front rear droplinks soon to be getting rollcentre adjust kit too ,car also has Tein Super Street coilovers
so want to do brakes before power .
The brakes . Ksport 8 pot 330mm discs ds2500 pads £824
I am offering a complete brake kit including 330mm x 28mm grooved 2 piece discs and bells , AP CP6600 4 pot calipers , alloy mounting brackets and Ferodo DS2500 pads for £895 including free delivery
Our 335mm kit with AP 6 pots is also on offer at £1200
What would be in your opinions be the best to get for the above mentioned car set up ?
Thanks in advance
cheers kenny
Brace yourself Kenny boy, you had this comin mate. The best you could go for are big shiny Brembos from an 05 STi, but ye canny huv them so tough sh!t!!
-
Every Saturday night. Check the websites, GMP Scotland.
Except this Saturday of course!
Where's the BOGOF offer?
A Wee Motorbikey Game
in Off-Topic Chat
Posted
How low is your score John?