


fmj
-
Posts
1,614 -
Joined
-
Last visited
-
Days Won
1
Content Type
Profiles
Forums
Events
Gallery
Store
Posts posted by fmj
-
-
Agree with previous comments. Whenever we use the Cambridge Park & Ride at Trumpington, I always park the WRX in the very first bay and at one end (at least one side is protected). It's the furthest point from the bus with loads of empty spaces, but almost always on return, there's an old heap parked right next to me. Is there some sort of magnetic attraction emitted from a parked Scooby?!!
John
I park mine right up against a wall to the rear and offside so only the nearside is vulnerable. I leave about 2 feet between the nearside and the white line giving plenty of room to the next space. STILL people dent the nearside on a weekly basis leaving loads of little dents all down the doors. To make it even more annoying its people I work with who know I love my car!
Pisses me right off and some people just don't get it.
I did have a women dent my door quite badly once and she left her details. She offered to pay but then basically told me how much she would pay despite all quotes being more then that. I gave up in the end and just took £100 from her and paid the extra bit myself. Couldn't be bothered with insurance companies as they still list your claims even if it is not your fault.
Basically very few people give a shit.
-
Thanks guys! Hopefully people can learn from it and make it easier for themselves if they ever have to do it.
-
Hi guys and girls,
So since I brought the car in 2006 I have been meaning to do something about the rusty bubbles on the sump. I assumed it was just surface rust and planned on cleaning it up and undershielding it. I didn't get around to it and after doing my last oil change found that a tiny amount of oil had seeped through the most rusty patch! I managed to clean the area up enough to seal it with two small aliminium plates and some liquid metal while I ordered a new sump which cost me £90. When the new sump arrived I noticed that the original paint/coating was very thin and scrapped off very easily. So I got it powder coated:
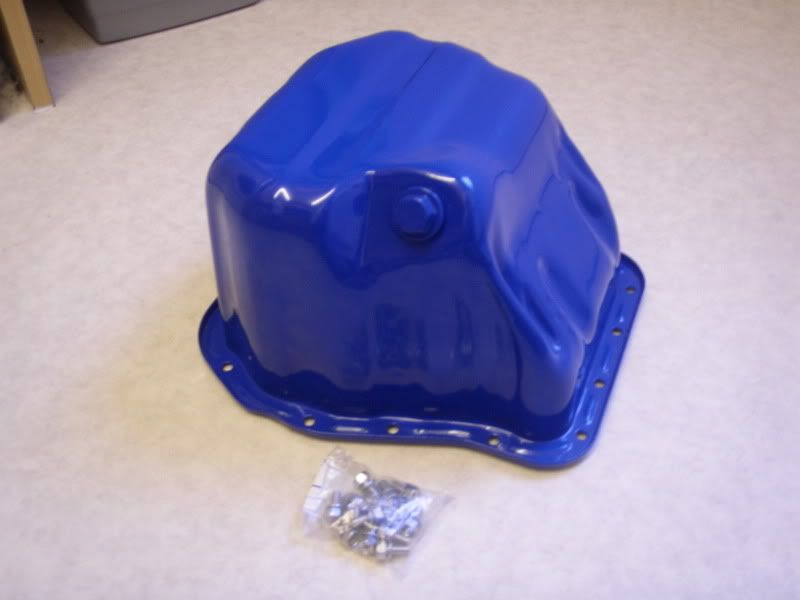
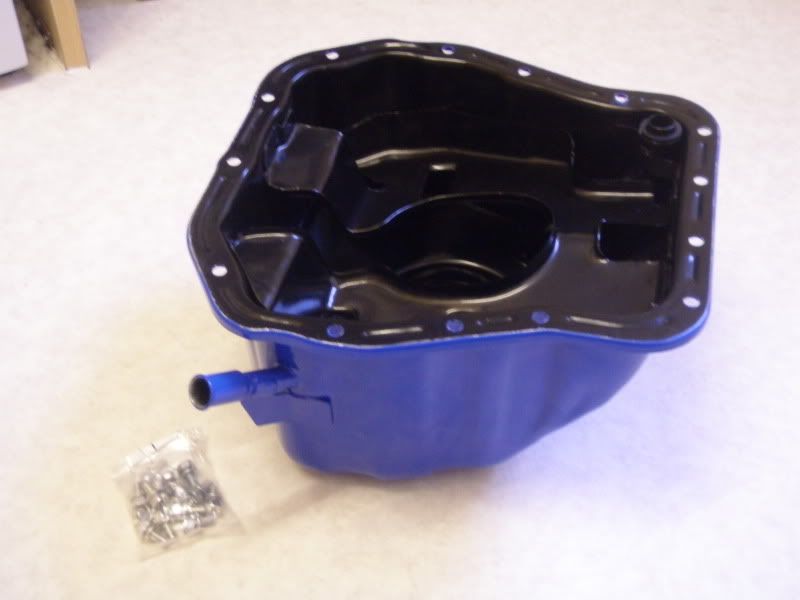
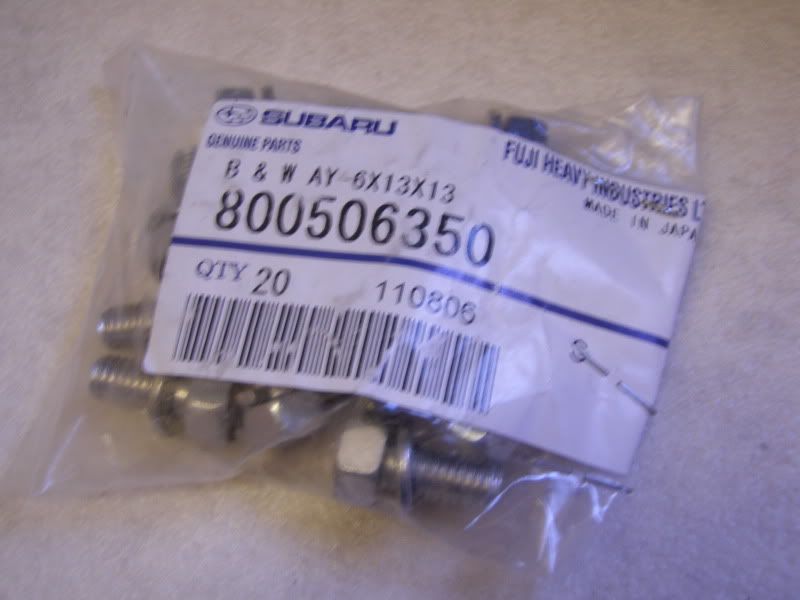
New bolts:
The powder coater actually told me after doing it that the original finish was crap and came off with no effort at all and that he wasn't surprised that it rusted at all. Nice...
Now to replace it. Now all I really had to go on was a Google search and the various posts I found on many forums about the job. Most said you have to lift the engine some said you didn't. I decided that if somebody had done it without lifting the engine that I could do it the same way. How hard could it be? lol.
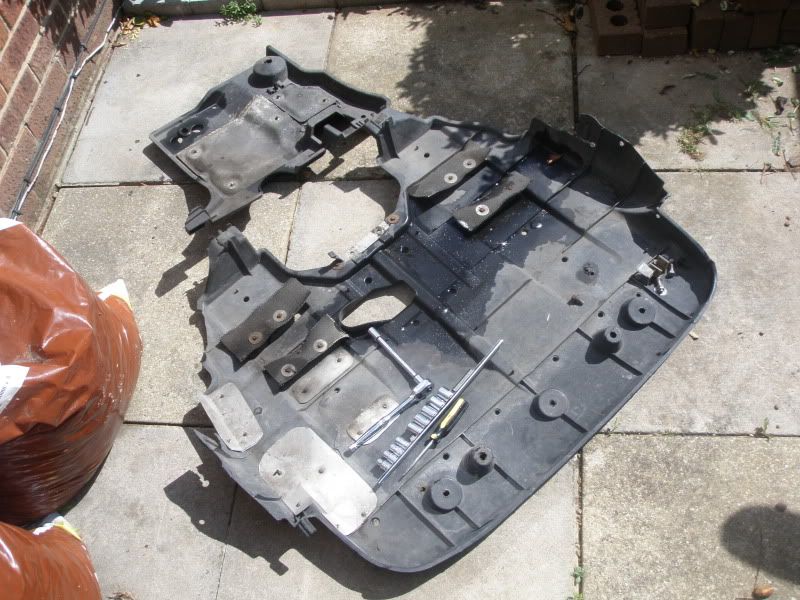
So first the under tray has to come off. I won't detail how to do this for two reasons:
1. My undertray flew off at about 90mph once and was ran over. Since that I had to make a new way of mounting it with ali brackets and stainless bolts. (Rusty fitting was the reason the onl mounts failed).
2. If you can't get this off you should not attempt this job lol.
So the car up on ramps, in fifth, with the rear wheels chocked and the handbrake very firmly on.
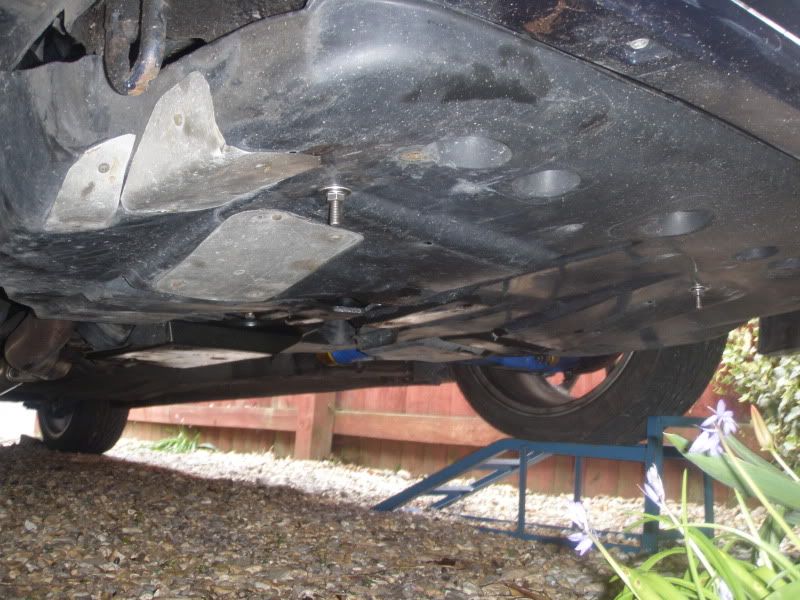
Tray off you can see the drippy oil mixed with rain water on the tray:
With the tray off you can see the messy sump. After two weeks my bodge repair started to let oil through but it did well to hold out for so long. I don't recommend anybody repair their sump like this. If the oil comes out big style your engine is dead. I was checking the level before I started the engine each time and staring at the oil gauges the whole time the engine was running. I just couldn't not drive the car as I had a few things I had to do.
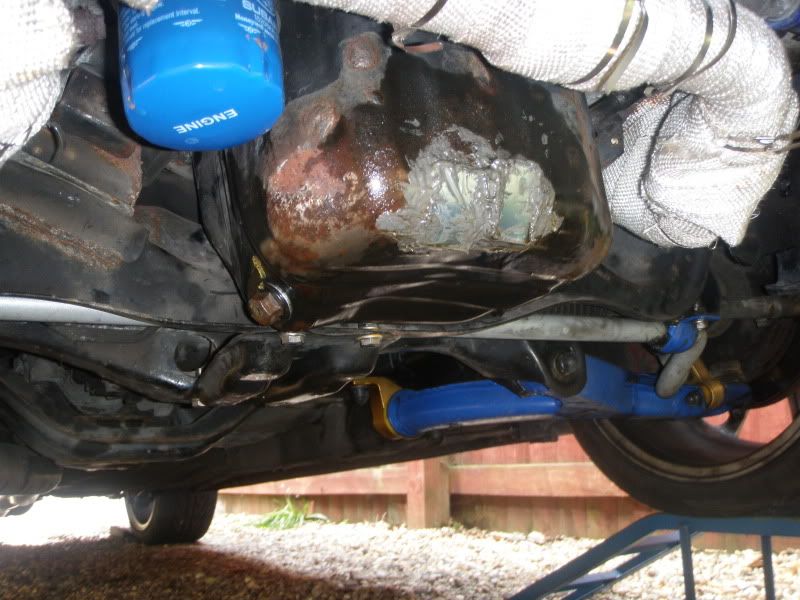
Now your problems may be greater then mine as I pulled the crappy heat shields off a while ago as they were rusty and annoying me and replaced them with less bulky wrap giving me a bit more room. One word about wrap while we are there. If you touch it your skin itches for ages and really REALLY don't get any of the fibres in your eyes!
First it was oil out while the engine was still hot (don't burn yourself here!)
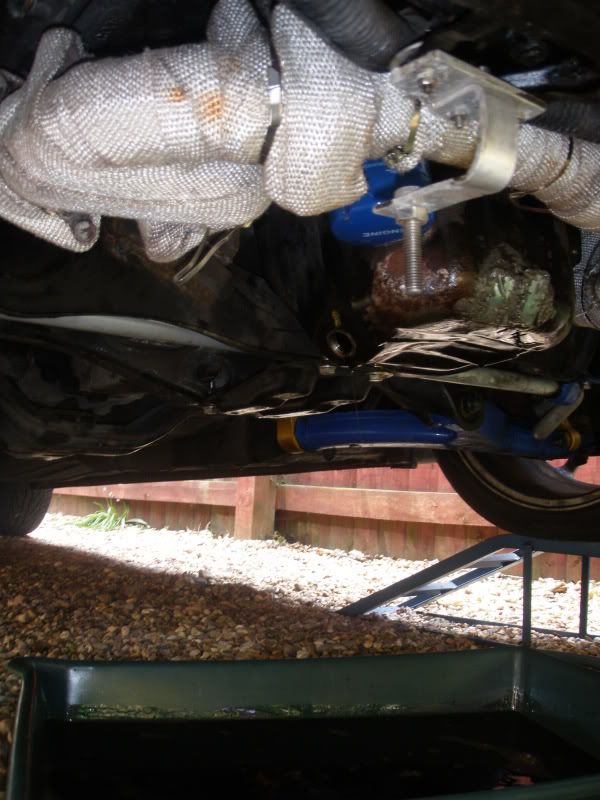
The sump is held on with 14 yes 14! bolts which require and 10mm socket with an extension. I used a 1/4 set as some of the spaces are very tight and the bolts are not very tight at all even after being there for 12 years they came undo with very little force.
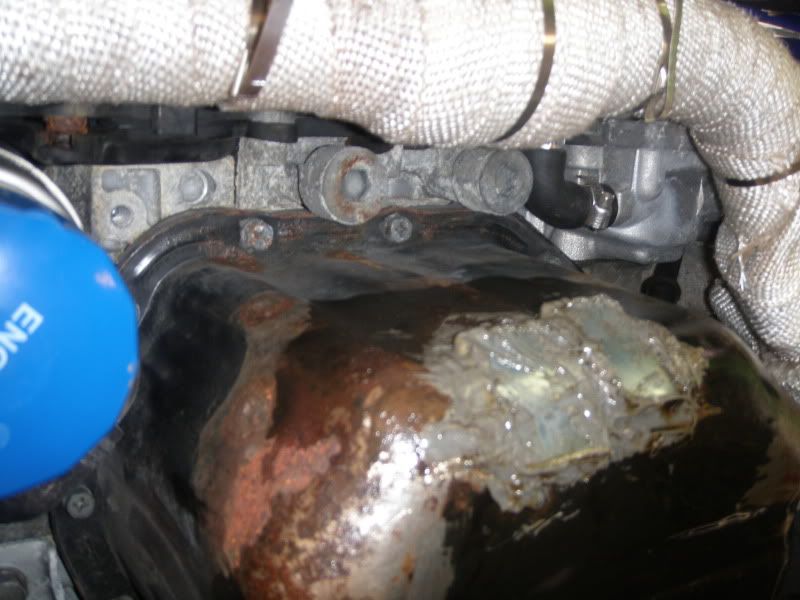

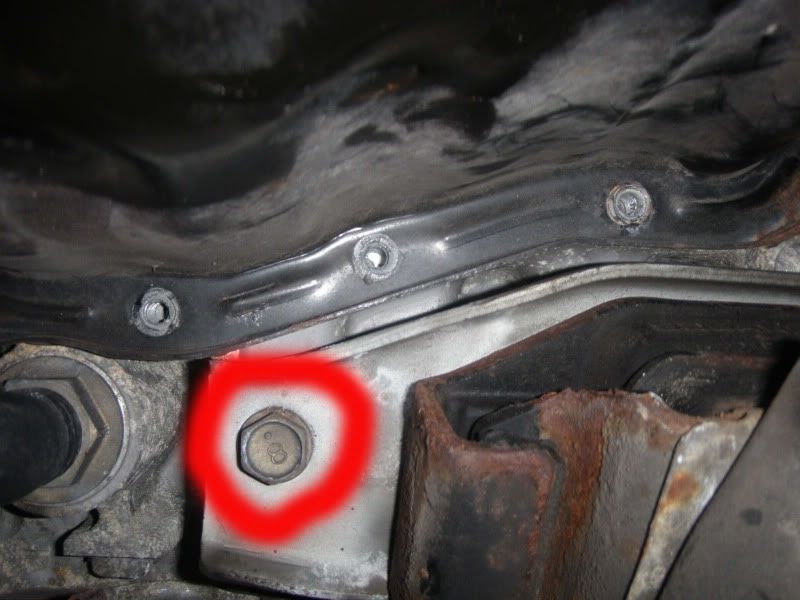
10 bolts around the front and sides of the sump come undone easily. The rear four are where the trouble starts.
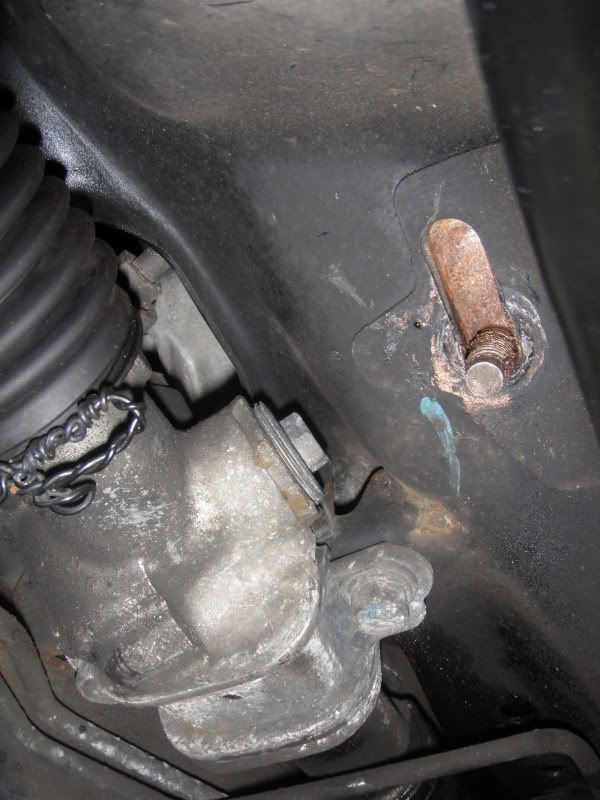
The way the sump curves and the fact the the front subframe has a lip mean that there is only about 15mm clearance to get your fingers into and the bolts are a good 100mm or so up behind the sump. The pictures below really don't do it justice. I have put red dots where the bolts are hidden
from view to give an idea of how hard they are to get to.
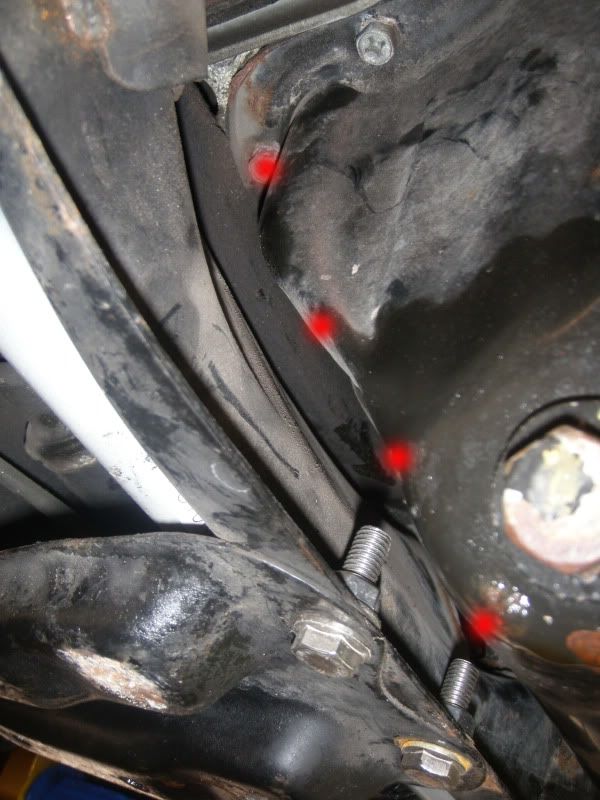

I could see the corner two bolts but the two near the centre you can't even see let alone touch or get to. With a 1/4 extension and knuckle you can just about wiggle it around until is seats on the bolts and then undo them.
Brilliant I thought that's it I did the hard bit. No... not even close.
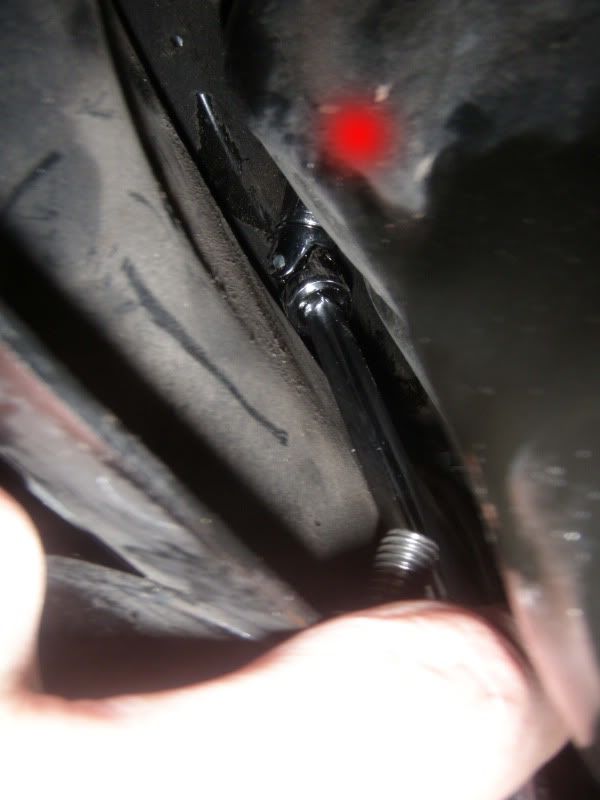
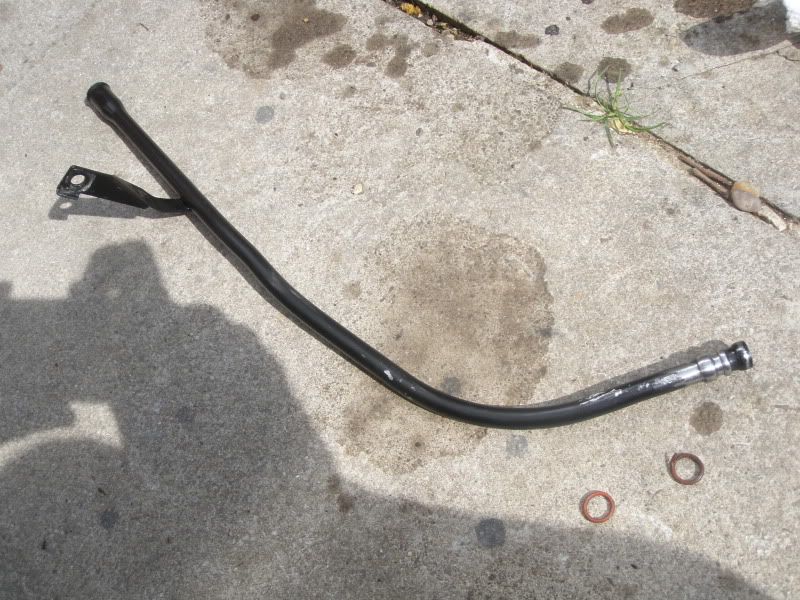
With all of the bolts undone I then moved to the dip stick pipe. You can't take the sump out with the pipe attached. The pipe is held with one bolt in the engine bay.
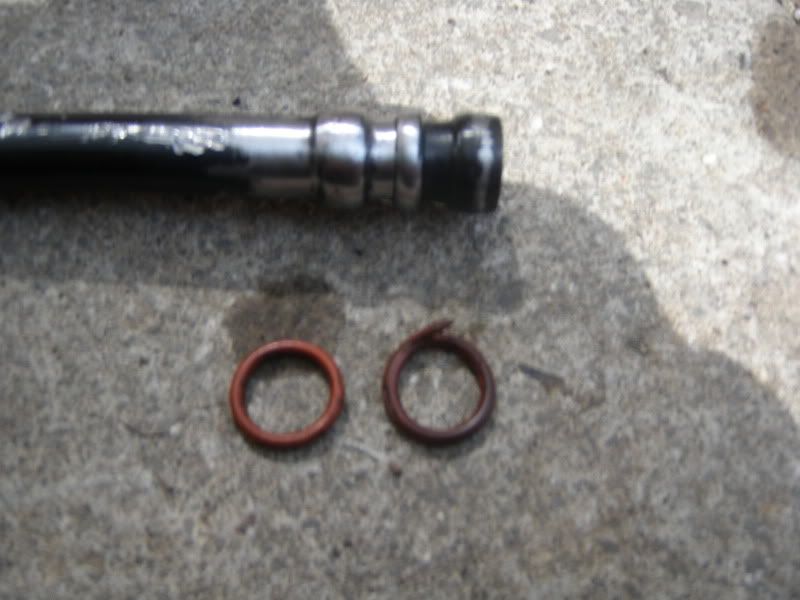
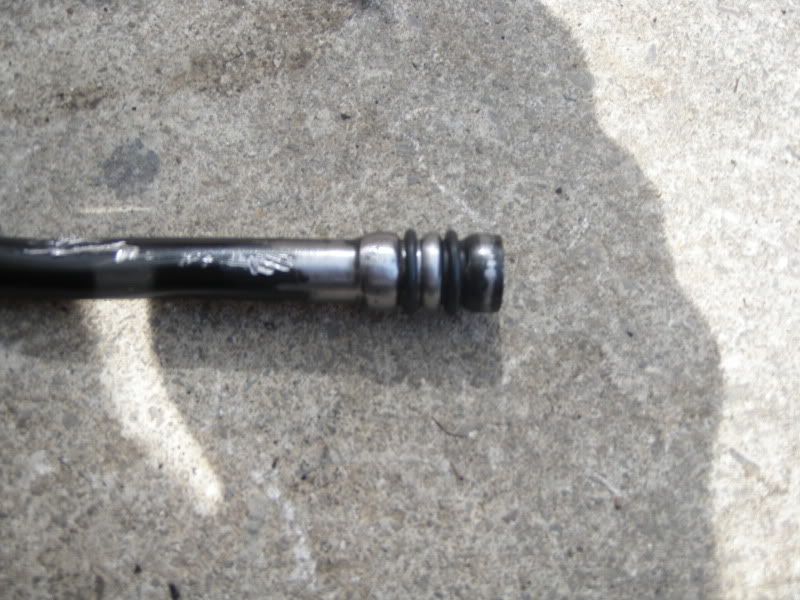
Once this is undone the pipe is held in the pan by two small o-rings.... and a pinch of rust. After pulling and twisting and tugging for about half an hour I eventually had to resort to laying underneath and clamping the pipe just above where it comes out of the sump with a small pair of mole grips. Eventually I wiggled the pipe out and found the reason it was so stuck. The end was all rusted up and the o-rings torn (probably where I pulled it out past the rust). Bugger I hadn't brought a new tube or o-rings not knowing that I needed them.
The tube removed with rust cleaned off.
Back under the car the sump is still held on with sealant. Bashing the sump with a rubber mallet did bugger all. In the end I had to pry it off with a screw driver being careful not to dent the block. Basically I bent the sump lip down at the edges until it popped off.
I thought at this point it would simply drop off. Nope.
Two things still hold it on.
1. The oil cooler modine is in the way so the sump won't go past it to drop down.
2. As the sump has the oil pick up inside it the pickup wedges inside and you can't get the sump over it due to it fowling the front subframe and the cooler modine. At this point you can't drop the sump down enough to undo the pickup either.
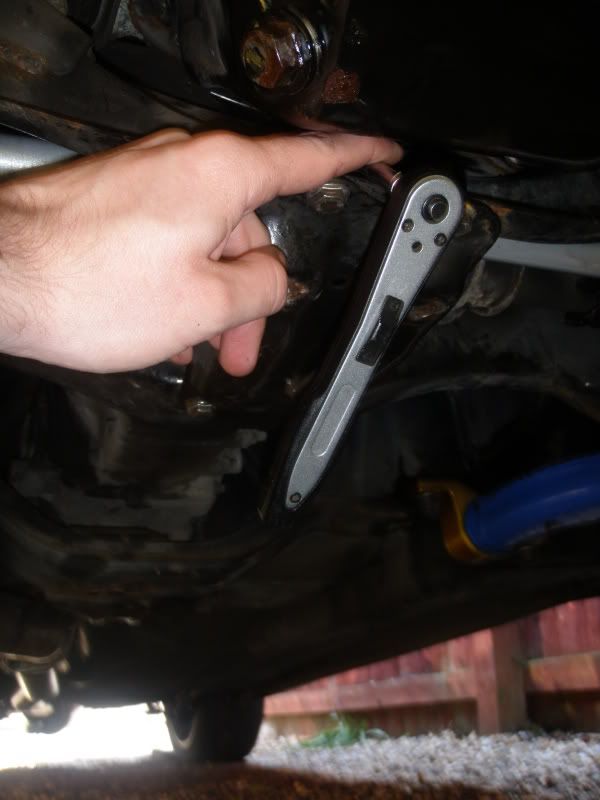
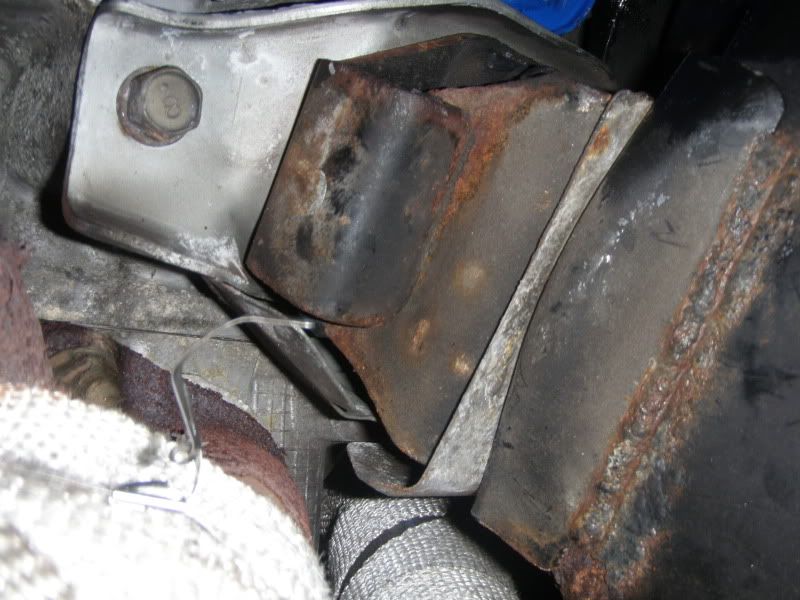
To solve this I decided to jack the engine. First I removed the jack plate. Next the two ARB mounts so I could pull the ARB out of the way of the engine mount bolts.
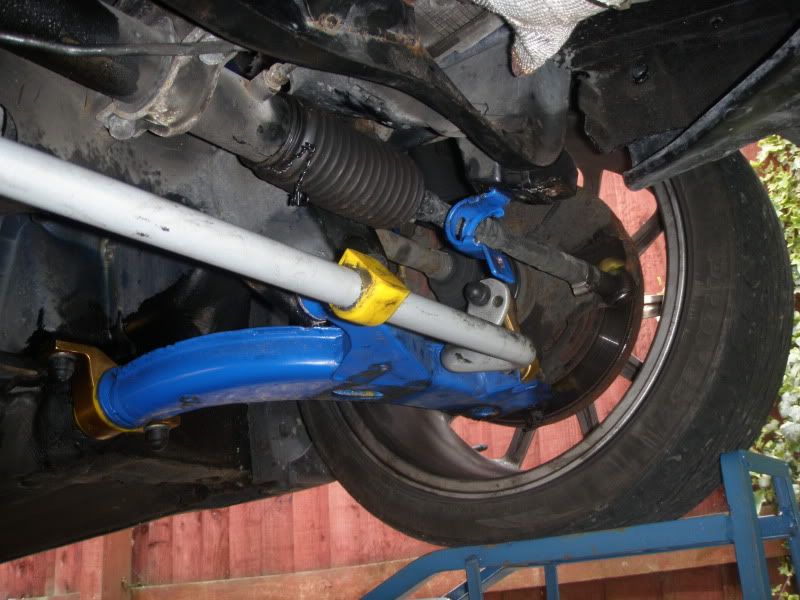
Next I undid both mount bolts.
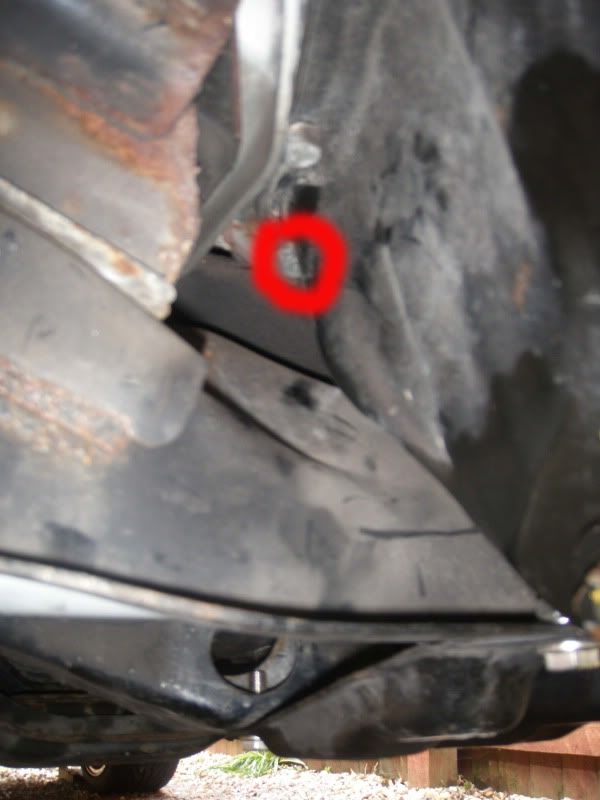
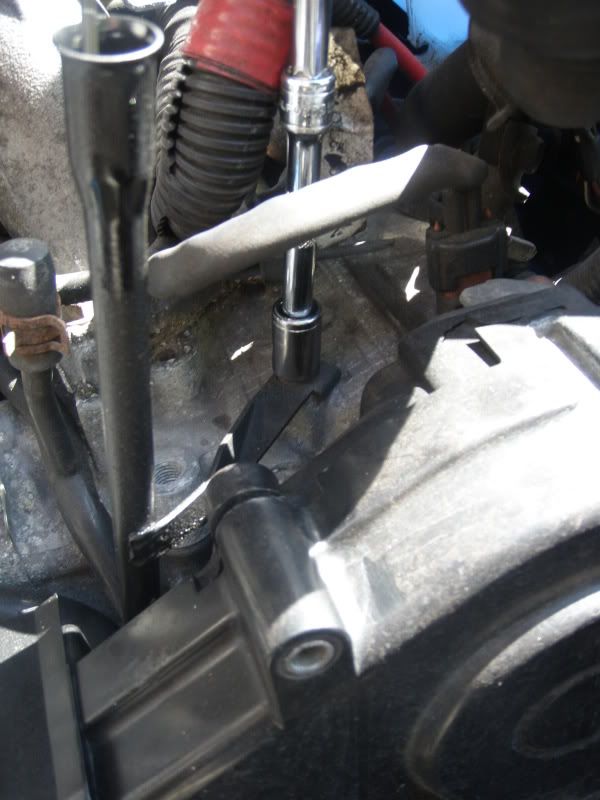
Lastly I jacked the engine using a thin block of wood with a sock set in it which I slotted under this bolt:
This is probably not a great idea but I decided I was happy with it and I was stuck as I couldn't jack the sump at this point without reattaching it. I don't recommend jacking the way I did as you should be using an engine hoist. After jacking the engine, slide a piece of wood or similar between the subframe and mount where the gap opens up.
Fingers make very poor engine mounts.
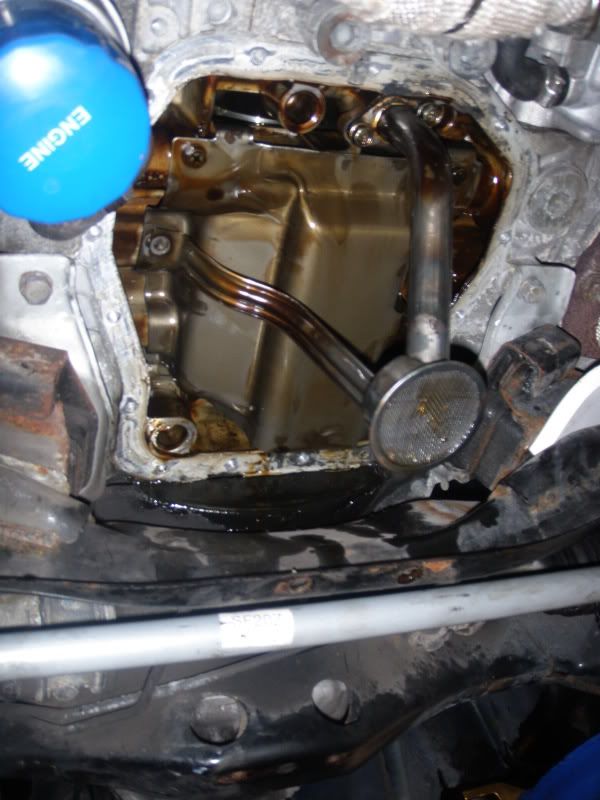
With the engine jacked up about 20cm you then get enough clearance to drop the sump down more. I still couldn't get it off as it still fowled everything but I had enough room to undo the pick-up bolts a bit. This allowed me to wiggle the pick-up and let the sump come off.
Victory!

The view with the sump removed:
All of the old sealant then has to be removed. I used a stanley knife blade for this. I also found the the rear inner edges of the block are razor sharp and cut my fingers four times!
All cleaned up.

I then left the car for a while to allow all remaining oil to drip down as this will interfere with the new sealant. I then took some kitchen roll and cleaned all of the oil out as much as possible for the same reason. This gave me the maximum possible time before more oil dripped down making a mess again.
I applied a bead of 3 bond gasket sealant around the rim of the new sump and got it into position. Getting it in was again bloody difficult and I found that once you get it partially in you have to rotate it slightly to get past the modine. Once past the obstructions I re-tightened the pick-up bolts (you can't do this first as you need to be able to move the pick-up to get the sump on).
Then the sump was pushed on and the bolts done up. The first 10 were easy...
Now the rear four are even harder to get back on then to get out in the first place! When you get them out they are held still. To get them started in their threads on the end of a wobbly knuckle with no room for your fingers is near impossible. I got the two corner ones done as the jacking of the engine gave me just enough room to get my fingers up there. The middle ones were impossible.
I gave up and jacked the engine another 20mm or so which gave enough room to get my finger up there further and with a lot of patience and swearing got the last two to start in their threads. It's worth saying that it you jack the engine too high the mount bolts pop out of the subframe slots. Chances are that then when you lower the engine they will not fall back into the holes and you will have to fight the engine block until they drop back into place. If they are a little out you can slide a flat blade screw driver into the gap and tap the bolt so make it drop down into the hole. WATCH YOUR FINGERS!. From then on it's easy.
With all 14 bolts tightened (not too much as the block is pretty thin here) the engine can be dropped back into it's mounts.
Nuts are reapplied to the engine mount bolts the ARB put back into position and the brackets done back up. Jack plate is reattached.
Then the dipstick tube which I had forgotten about!
I cleaned all of the rust from the end and replaced the two o rings.
I will buy a new tube and o-rings but needed to use the car before these parts will arrive.
To replace the tube you simply wiggle it back down from the engine bay making sure it takes the same route behind the coolant pipes as it did before. Once the end of the tube is in you need to push the top of the tube the nearside so that the bottom of the tube is levered towards the offside and into the sump. I then applied a small blob of 3 bond around it where it enters the sump to prevent moisture causing more rust before I replace the tube with a new one.
Obviously bolt the tube back onto the block afterwards.
New sump!!!
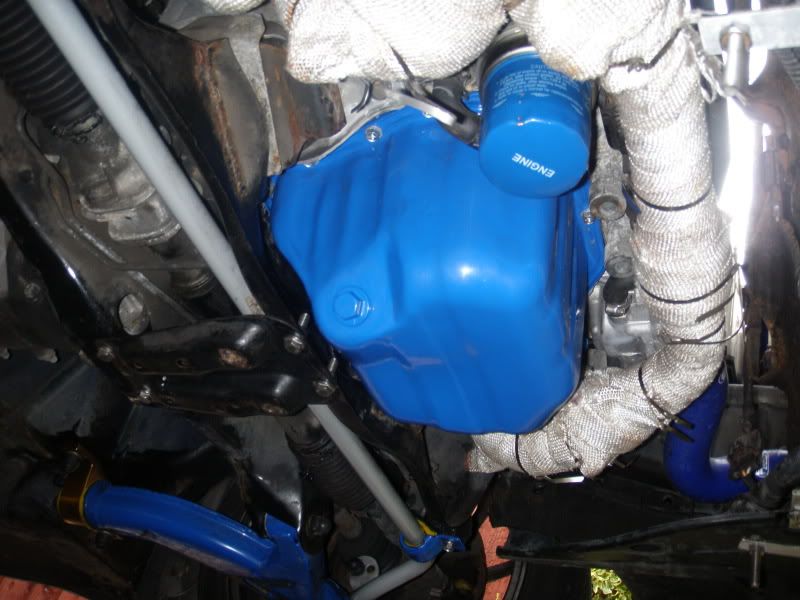
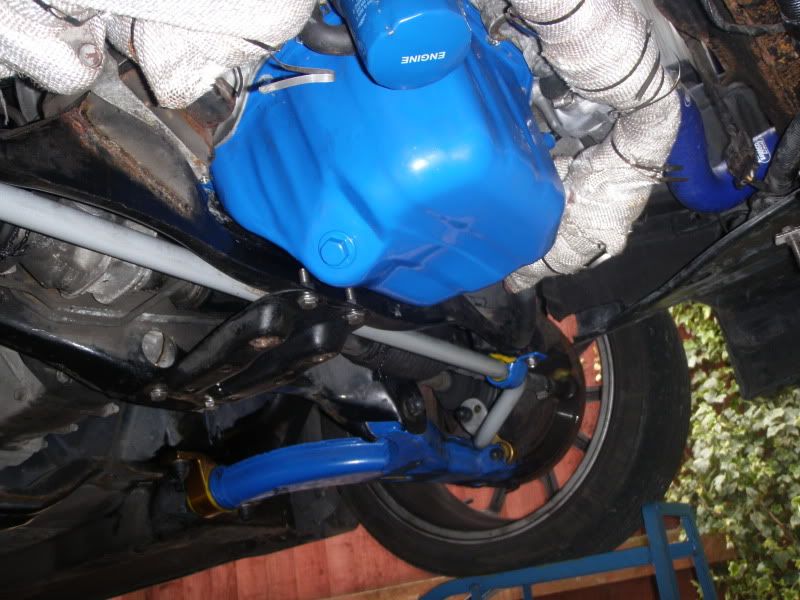
Tighten plug with new washer and refill with oil.
Under tray back on and jobs a good'un (obviously check level etc as per oil change).
What have I learnt?
1. If your sump is rusty one day it will leak.
2. Changing the sump on an Impreza is a SHIT job.
3. You can undo all the bolts without jacking the engine.
4. You cannot get the sump off without jacking the engine or removing important things like the oil cooler modine.
5. The dipstick tube is a bitch to get off and quite hard to get back in.
6. If you are changing the sump just get a new dipstick tube and o-rings too.
The simplest method to do this would be to initially remove the engine mount nuts, jack the engine up on the old sump using a wood block and then chock the engine mounts with wood so you can remove the jack and keep the engine raised. Remove the old sump and replace with a new one. With all bolts fitted jack the engine on the new sump again using a block of wood being careful not to damage it and remove the chocks and then bring the engine back down into its mounts. I wish I had done it this way but I chose to believe the thread I read about being able to do it without raising the engine.
-
 1
1
-
-
coming out of the drive and gave her a boot and straight away felt like it was faster then glanced at my boost gauge and it peaked at 1.86 bar!!! so turned around of boost and went home to check. i found the the hose at the wastegate was off so put it back on with a tight jubilee clip and tested, all good so far. would my turbo keep boosting up and up till engine throws a rod or what would happen? if the wife drove it she would not have noticed
If boost increased too much you would probably just hit the fuel cut and get an ECU warning light on the dash. Do you mean the little vac hose?
-
looking for some advise have the chance of a prodrive ecu for my 99 uk wagon was wondering if there was any difference to a standard ecu, i'm planning to get the car remapped soon would this ecu make and difference over standard one.
cheers
The Prodrive ECU is just differently mapped. If you are getting a remap then that will get you more power then the Prodrive ECU so don#t bother. The only reason people went for the Prodrive ECU was to keep the warranty (which is clearly not an issue 13 years later).
-
know what you mean but when i was looking i saw a popular jap breakers site and a few other places selling bits that are covered with carbon effect vinyl and that was £300 for some vinyl wrap,rip off.
Yeah I have seen those too and laughed out loud when I saw the price! They do seem to ask a hell of a lot for some stuff... Even more then Subaru lol!
-
they look the mutts nutts matey would love some for my impreza he will have a full order book cos im well intrested let me know cheers

Would love some but £250 is a bit pricey for me just for the centre console bits... But they look good!
-
I should imagine it's for liability purposes...
-
My car also failed on the high level spoiler light. Most of the LED's had failed and it look crap half lit so I pulled the plug. I didn't realise it was a failure!
As for the exhaust, I can see his point. It is making a mockery of the MOT which he is entrusted to do properly by law. Yes it's a pain but its the rules.
Ball joint is pretty easy to be honest and won't effect the tracking if its the lower one. You can get a new joint for about £20.
What is wrong with the handbrake? New shoes are fairly cheap but a bit of a pain in the arse to fit if they are rusted up.
-
Im just doing a head count on how many folks here would possibly want steel replacement/repair arch panels.These are stamped panels which have the bumper mount lip.The dies are being made now.Price tbc but approx £60 per side.(..reasonably priced..remember low volume production means I cant compete with similar type arches sold by Hadrians or svg/Veng etc ..As far as Im aware im the only supplier of these in steel.
How much could they be delivered for? I may be up for a set.
The problem is that the actual rust comes from the outer side of the suspension turret. I.e. if you were to look into the wheel arch and put your hand straight up to the top were the strut mounts to the car you will find the side nearest to the outside (arch) is rusted trough inside this box section water ends up dripping down into the arch corner causing rust. So replacing the outer arch inst going to cure it for ever unless you can somehow weld up the inside of the turret too (Strut out job and not much room). Of course this may just be my car but I have been trying to work this out since I got the car six years ago and a recent suspension removal located this to be the problem.
Another thing I have noticed on mine is that the weld seal stuff is starting to crack leading to more rusty seems.... really want to bang my head against the wall as the car is getting old and I can't keep up with the work or money needed! Subaru real do seem to use thin paint and rust prevention is not good.
-
You won't be disappointed

-
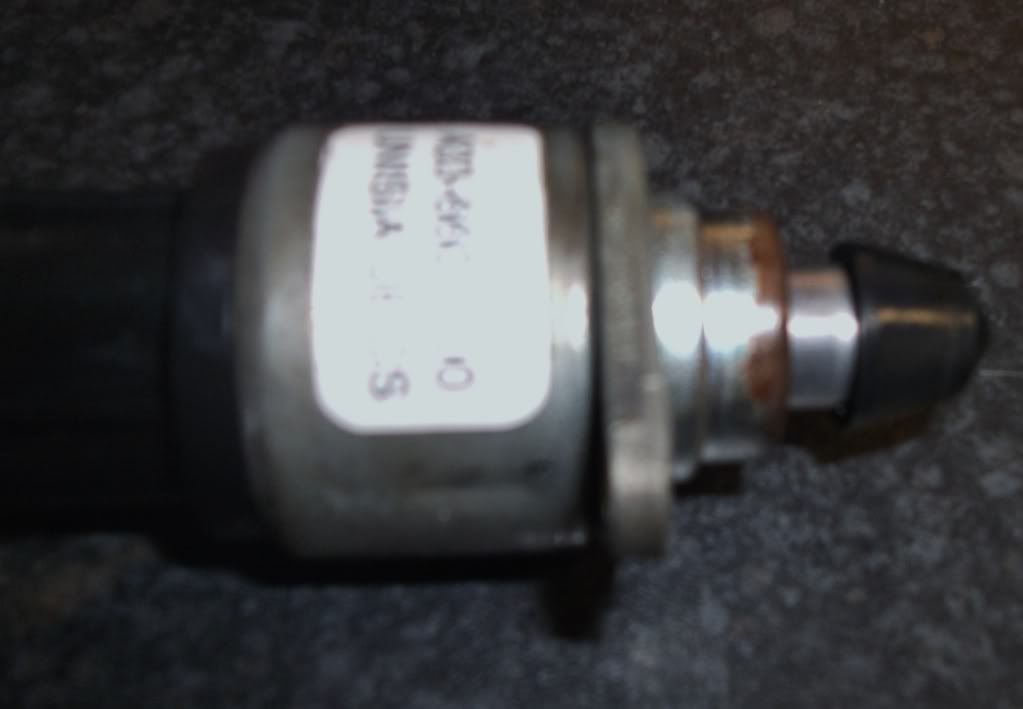
Hi guys, anybody with a 99-00 Impreza will no doubt have changed their MAF for the sum of about £90-£100 from Subaru. I know you can save a couple of quid buying genuine Subaru parts from various other companies like import car parts etc.
But has anybody tried these?
I appreciate that is not the correct model but the seller does list the right one. It appears to be a Nissan MAF of the same design. Anybody tried it? They are half the price!
-
yes mine has a 3 plug connector and i think earlier are one long connector i think, oh well worth asking cheers m8
Your car can be remaped with ECUtek software for good results if you are thinking of remaping
 .
. -
aye theres nothing? is yours got coil packs on the plug? i have the 1 on top of the manifold, i have just been out in the snow and got the idle control valve which was black with soot and also the maf sensor
before
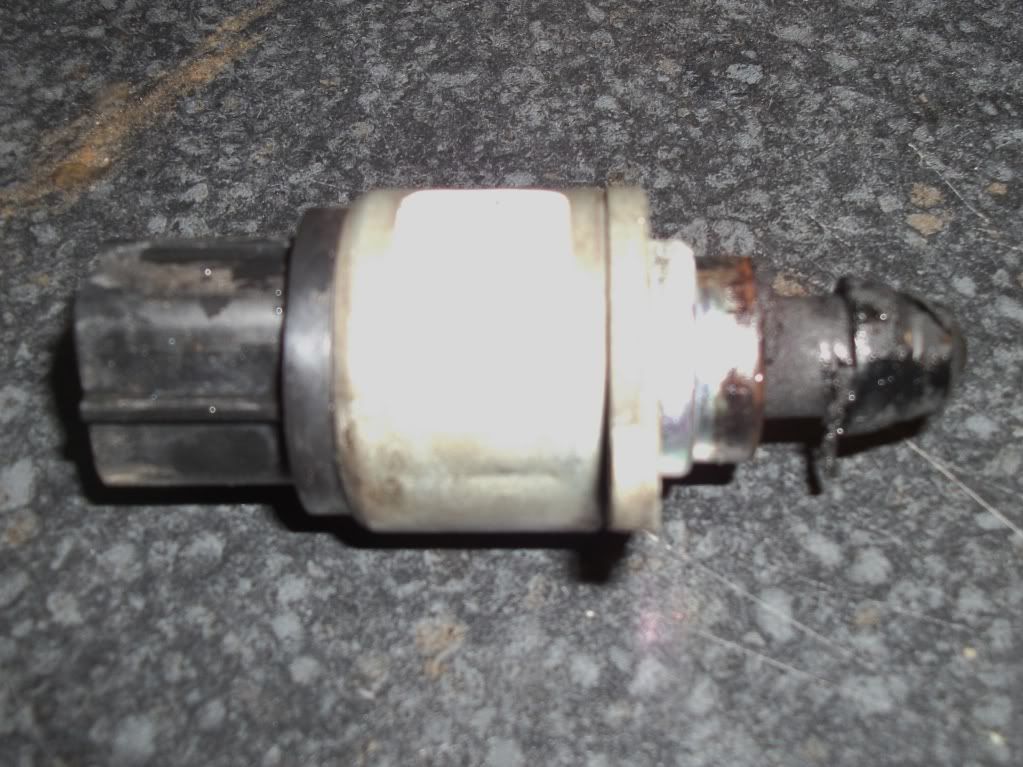
after
so will see what happens tommoro if not snowed under
I would say it sounds like the ICV or stepper (same thing). But I have heard MAF's also causing the same same problem. Just a word of warning ICV's are bloody expensive!!! About £250 for a new one. A maf is about £90 so if you have to try one I would go for MAF first (you will need a spare one day anyway).
-
Agreed, just go HKS. The difference is that it's a pull open type of valve. So the boost keeps it closed meaning it doesn't leak. A lot of cheaper inferior valves end up leaking causing performance problems. I am sure other makes are also ok, but HKS always gets a lot positive feedback from people who have them. I have had mine for years and it rocks! You can also get different fins for different types of noise
-
wow that was quick both the answer and the work cheers m8
Hmmm mine took about 45 mins at powerstation and that was with all new parts.
-
I'm no expert but I wouldn't have thought thats a good idea. For a start the RA would have had a different turbo, injectors and gear ratios. Also the loom will be different.
-
Just noise. But over other valves it performs better as they don't tend to leak. They also result in the occasional pop from the exhuast
 .
. -
I have been recomending these for years. I still have mine and its been brilliant for the last 5 years or so. When I brought mine I got it from a place called Nengun. They import direct from Japan and it only cost me about £130!!!! The downside was the delivery time was about 28days. Also the £ was worth more then so the deal won't be as good now.
P.s. just looked on nengun and things have gotten so much more expensive!
-
I would say if you are changing to grooved discs or drilled then you techically should tell them. But where do you stop? If you fit pattern parts rather then Subaru do you tell them? If you fit fast road pads do you tell them? I wouldn't. The tyres on my car are vastly different to the OE tyres. They know about the wheels but would they say the tyres are not manufacturers spec? I had a heavily modified car previously that was written off by an idiot hitting the back of it at a red light. I had every mod declared and paid through the nose. When the assesor turned up he said "OH I DIDN'T REALISE IT WAS MODIFIED". He then went on to say that the mods lessened the value of the car and gave me less then I paid for the car before I modded it.
-
I would say that was about right. My car sits at about 80c when warm and goes up to 90-100c when in traffic in summer or when driving hard. Depeneds how much you reved it but if you were driving fairly hard and then sat reving the engine that would be fairly normal.
-
As has been said 22B every time! They are the same body shape as the proper WRC car (97-00 I think). The P1 is just a UK type R. Still very nice but nothing like a 22B. I know when the 22B was released the general opinion was that it was too harsh for UK roads and was a bit rough around the edges but it really is something else. I think there were about 7 UK official imports. One is for sale in Total Impreza at the mo for about £35,000! but it only has 7,000 miles! Awesome!
-
Hey I am also in Salisbury and didn't know where to go for a full setup. In the end I drove up to Powerstation. A fair distance but great service and they did the job properly. Would be good to know if there is anywhere decent local.
-
Thanks chaps!
Sump replacement with pics
in General Subaru Discussion
Posted
Lol, so true of everything I find myself doing!