


badbaz
-
Posts
6,443 -
Joined
-
Last visited
Content Type
Profiles
Forums
Events
Gallery
Store
Posts posted by badbaz
-
-
When I first pushed the pads against the discs on the ramp they were bedded in!

Someone can correct me if I'm wrong but the only reason you need to bed brakes in is when you change one or the other. Think about it, rarely do pads, discs or drums wear evenly. If you stick in new pads your disc surface is uneven(from centre to edge). It takes time for the pad to wear off where the disc is high and eventually the pad will wear to mirror your disc. Bedded in. New discs and pads are perfectly flat, square, whatever and so have immediately got a full contact surface needing no bedding in. Same applys to drums and shoes.
As part of my job I prepare and present HGVs and trailers for test. A big part of that is busting the glaze on trailer brakes and then I have to bed them in. When I bust the glaze it removes the worn pattern from the shoes which fitted the drums uneven surface. To bed them in I wind the brakes on by hand and then pull the trailer for about 10 miles at around 40mph, winding the brakes on 3 or four times more in this run. They get very hot during this but it is accelerated bedding in, forcebly wearing the shoes to the drum profile. It works. Most of the time.

First test will be the Lanark Meet. No time before that!
-
but for heavens sake man do you not possess an iron?
Kenny,
Do you know how long that effect takes to create? I thought being a budding photoman yourself you'd have appreciated the nice ripple effect.

-
Lookin good Ross.
Was that what you expected to see power wise?
Love the flames, maybe you could light your afterburner and make it up to Lanark Meet on Thursday night?
-
Good write up there .Were is the ramp jack postioned at the front just won't to know were to stick a trolley jack for future reference .Its easy at the back i just stick the trolley jack under the diff .
The jack was positioned under the sub frame. If just jacking up normally then you should jack on the sills at the jacking points and support on stands before working under the car.
-
Young Kenny, time will tell, and by then you'll have pleased your bank manager by securing some extremely large calipers for extremely large sums of cash!
The deed is done. All fitted (and working) now. Thought I'd just do a photo run through of before and after and the fitting of the bits. Those who are less experienced amongst us but capable may undertake the job yourself, it ain't so hard!
This shows the original brake disc, 30k miles plus, car had red stuff pads fitted here(not shown).
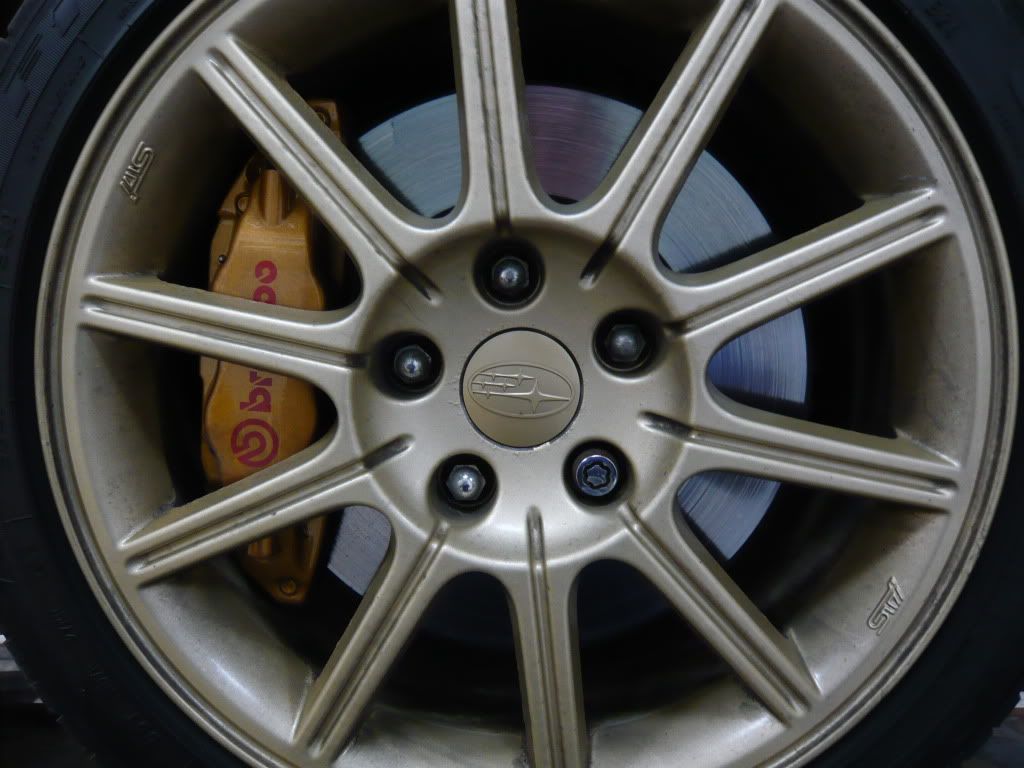
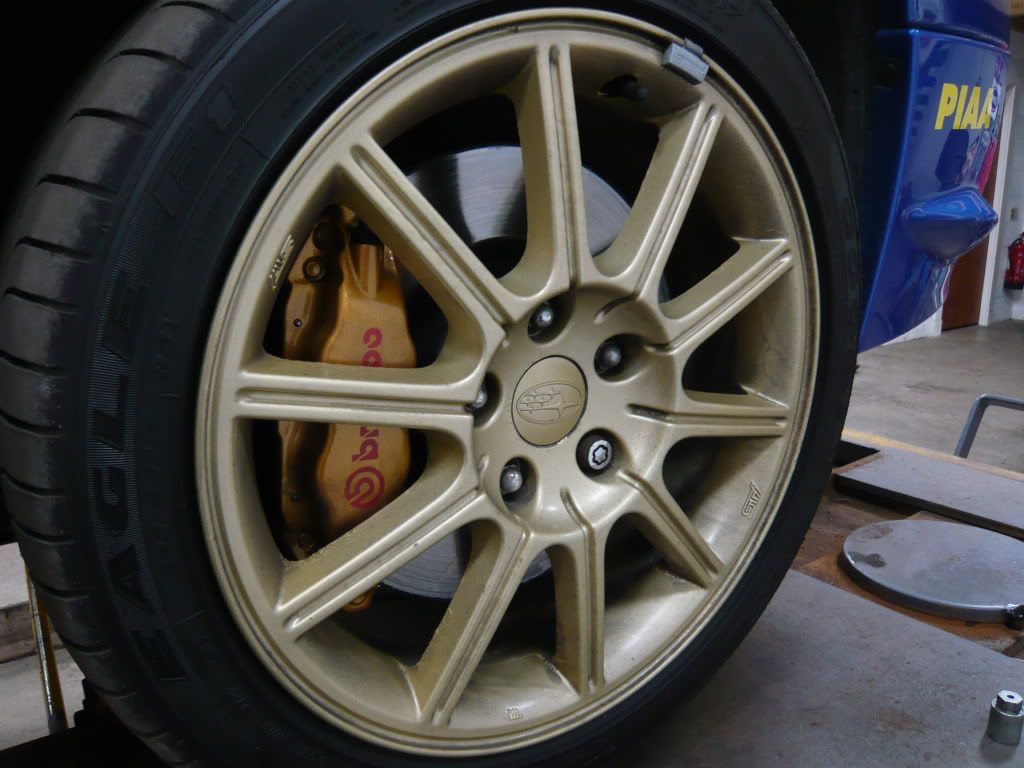
Forgive dirty and corroded wheels(see other thread for this problem/dilemma)
And another
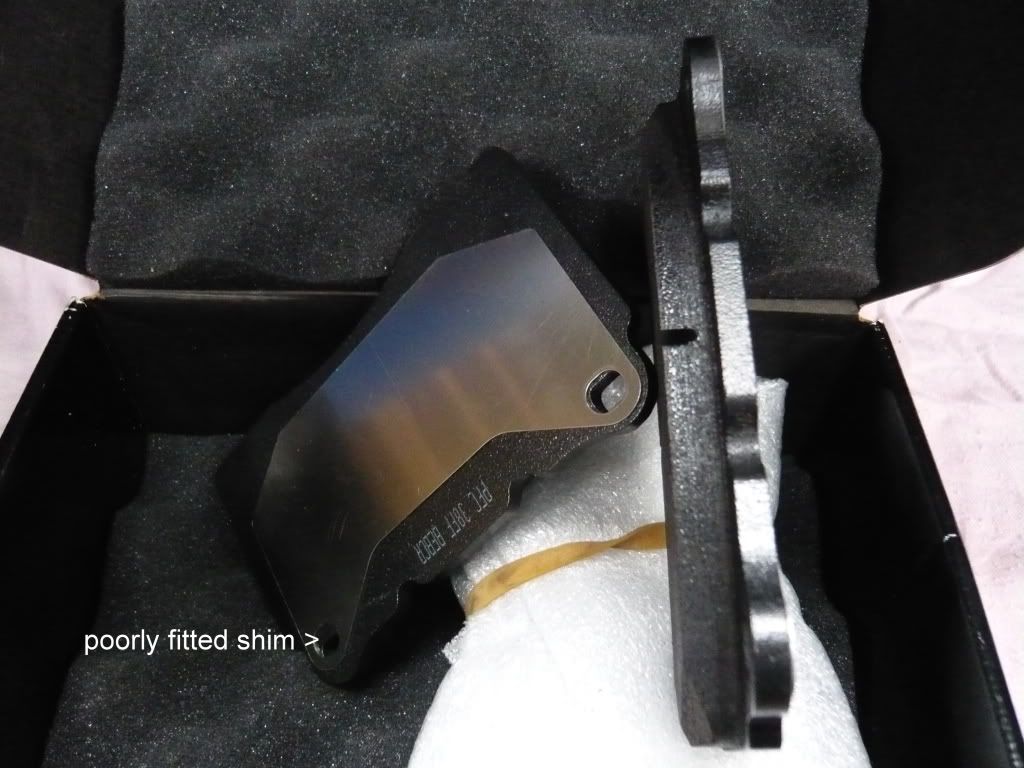
These are the brake pads, nestling in their protective box, no wonder given the price of them. You can see that the anti squeal shim is poorly fitted where shown. I had to rectify this as the brake pad retaining pin would never have got through. Pretty poor given the price and claimed quality but not likely to cause any problems! When you see them you think they don't have much pad thickness but this is the max that will fit in the brembos!
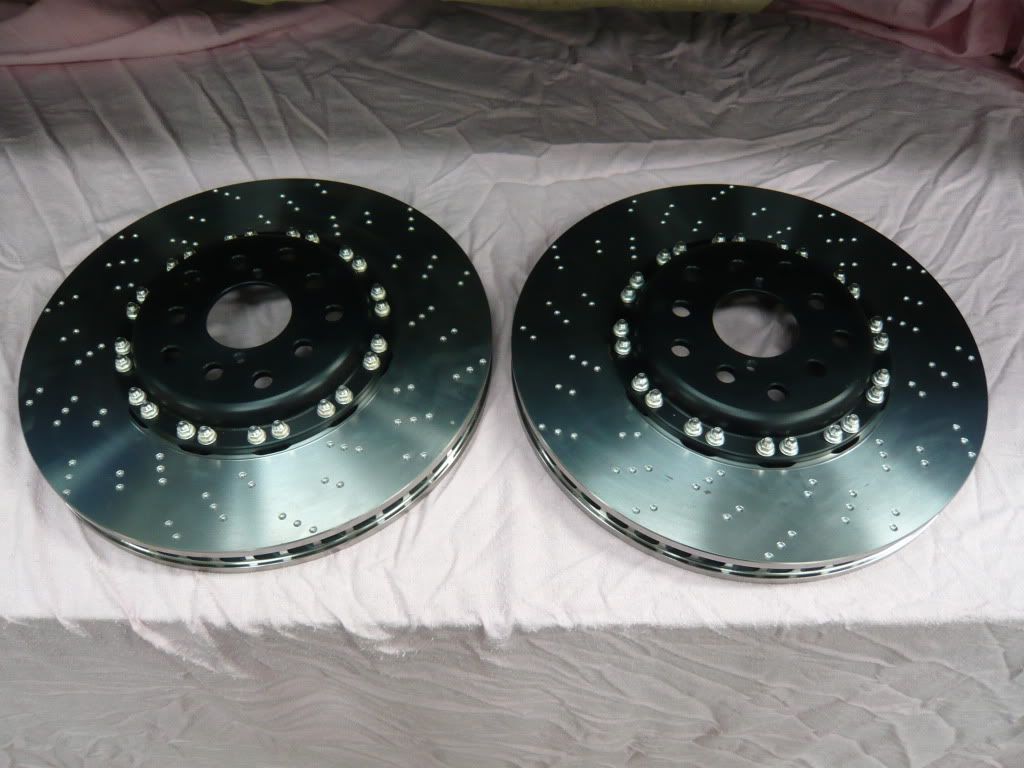
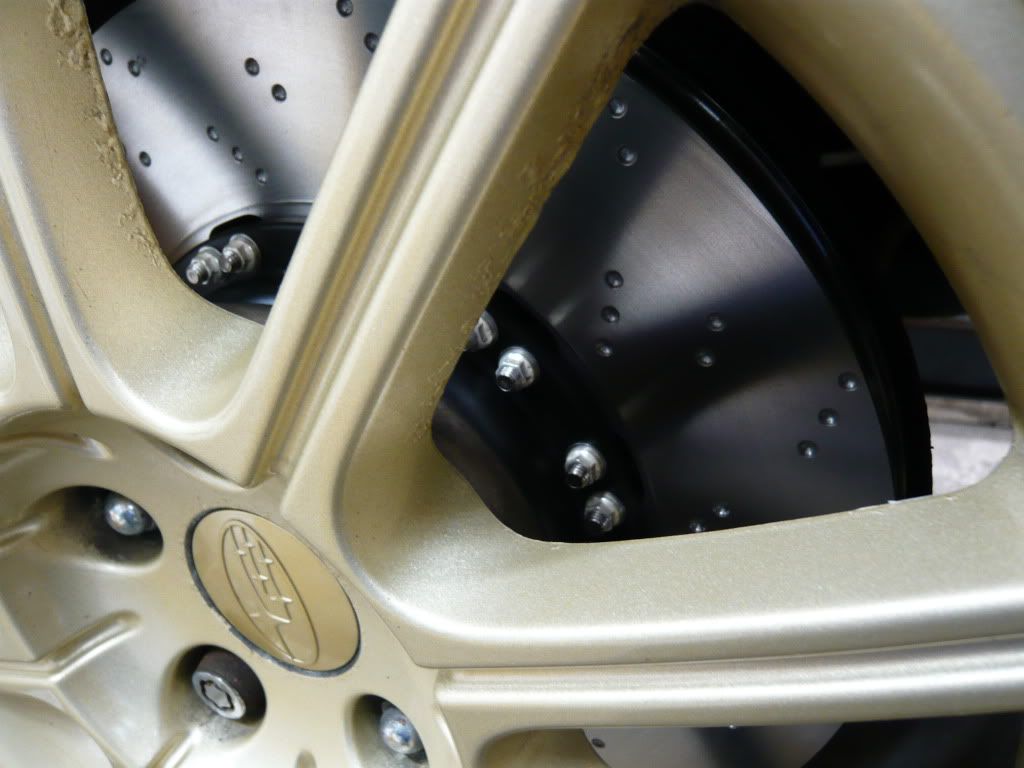
This is the disc, it is a floating type disc and the bell(black centre section) suits pre and post 05 STi as it is drilled with holes for both PCDs. This is the O/S disc as the dimples which can be seen have to rotate in a particular direction. The disc part(shiny with dimples) is called a rotor. When worn out this will be able to be changed independently of the bell thus saving money
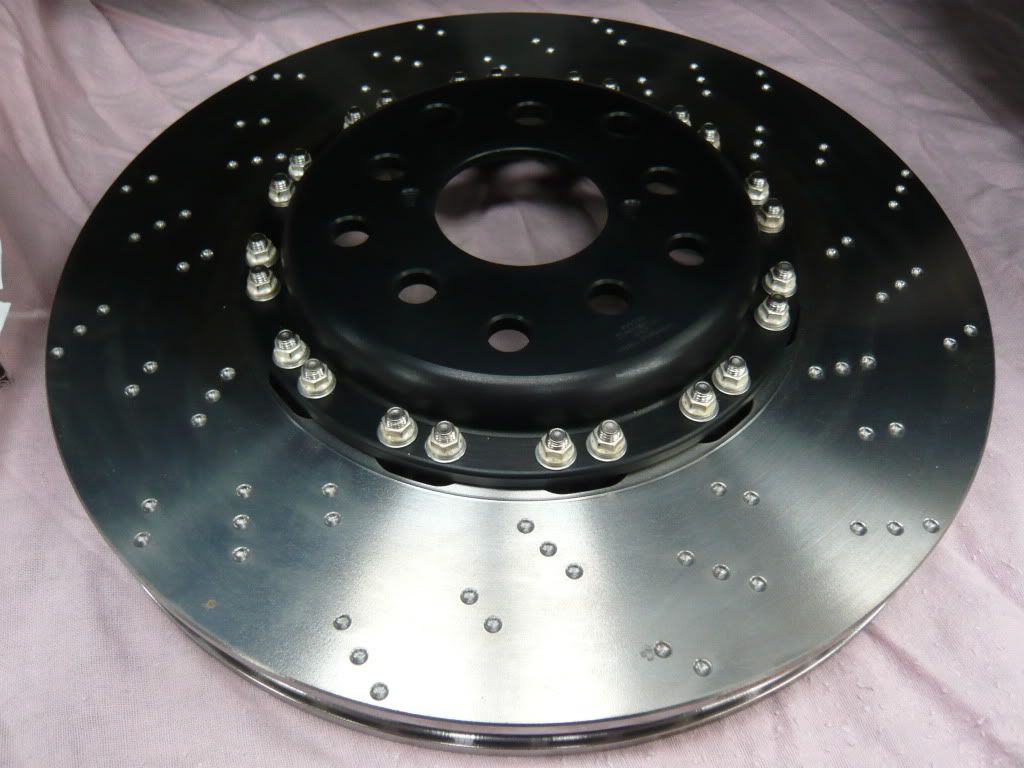
The two discs side by side showing the difference between O/S and N/S dimples/rotation requirement
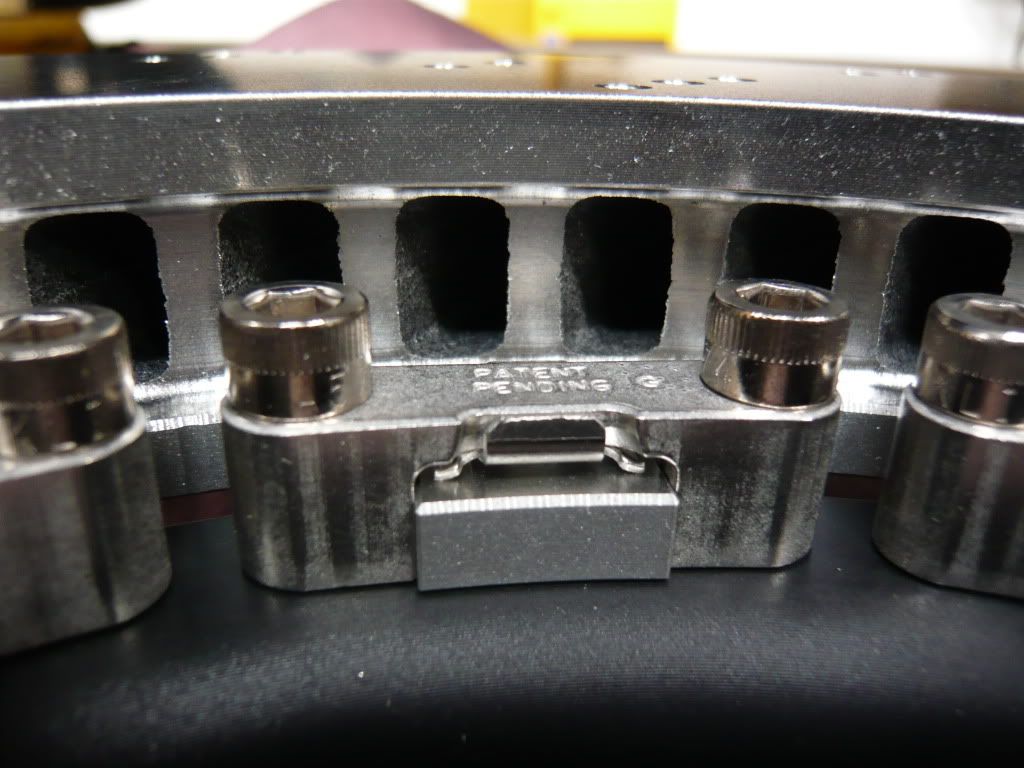
Here you can see the floating mounting of the rotor to the bell. I've got to say when you have them in your hand they seem extremely well engineered, looking and feeling very much a quality product
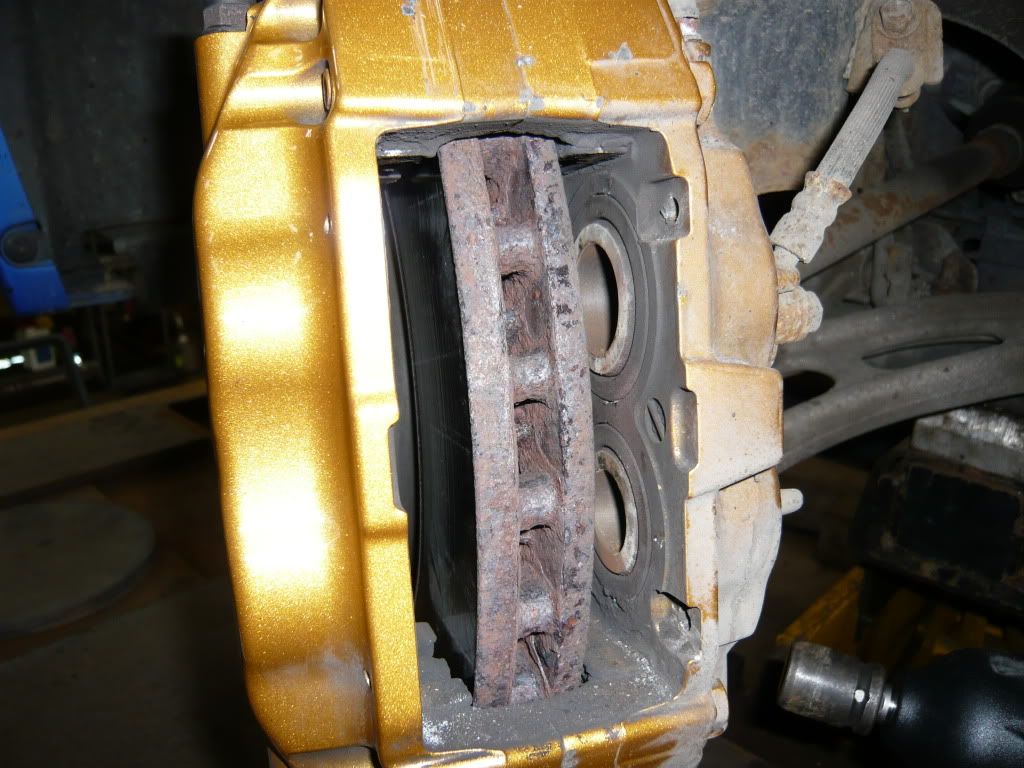
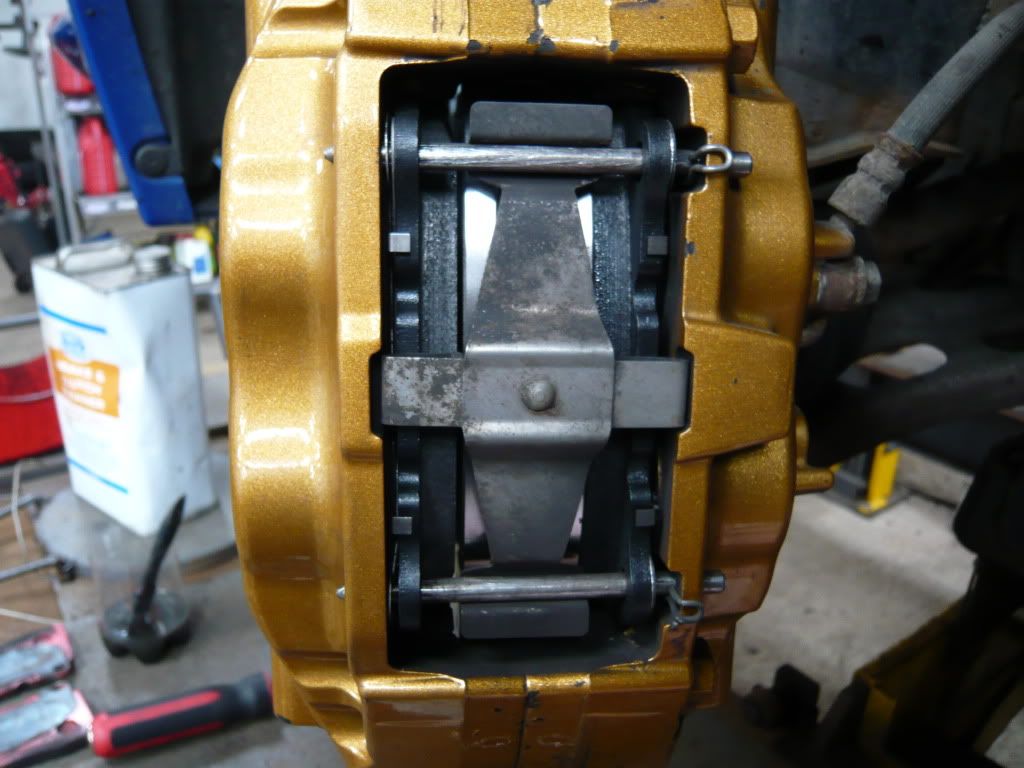
This is the caliper before removal of old pads, you can see they are red stuff pads as they are um, well, red!
To remove pads, first remove the r clips as indicated, try not to bend these as they are spring steel and need to be kept in good shape for refitting.
You can then use a punch to remove the brake pad retaining pins. I use a large punch for the initial hit(s) to make sure the pin gets moving then a small diameter one to drive pins through. Don't want to be damaging those lovely brembos (eh Kenny?). The pins should be able to be pulled fully from the caliper, mines weren't too tight and once the first is pulled out, the large anti rattle shim or clip whatever you want to call it, will ping out a bit and go loose, making the second pin easier to remove. Once the pins are out, you need push the pads outwards and away from the discs, this pushes the caliper pistons back in too. I was able to do this quite easily with my fingers but you may need to use a suitable srewdriver or small lever. Once the pads have been pushed back, a little bit of persuasion will remove them straight out towards you.

Pads removed, push each of the four pistons back into the caliper, don't damage the rubber seals. If you look into the gap between the caliper and disc where the pads sat there are 8 small flats (nearest piston sides) where the pads sat, 4 each side. Give these a gentle scrape to remove built up dust but try not to burst the caliper paint as this will accelerate corrosion and make your pads stick!
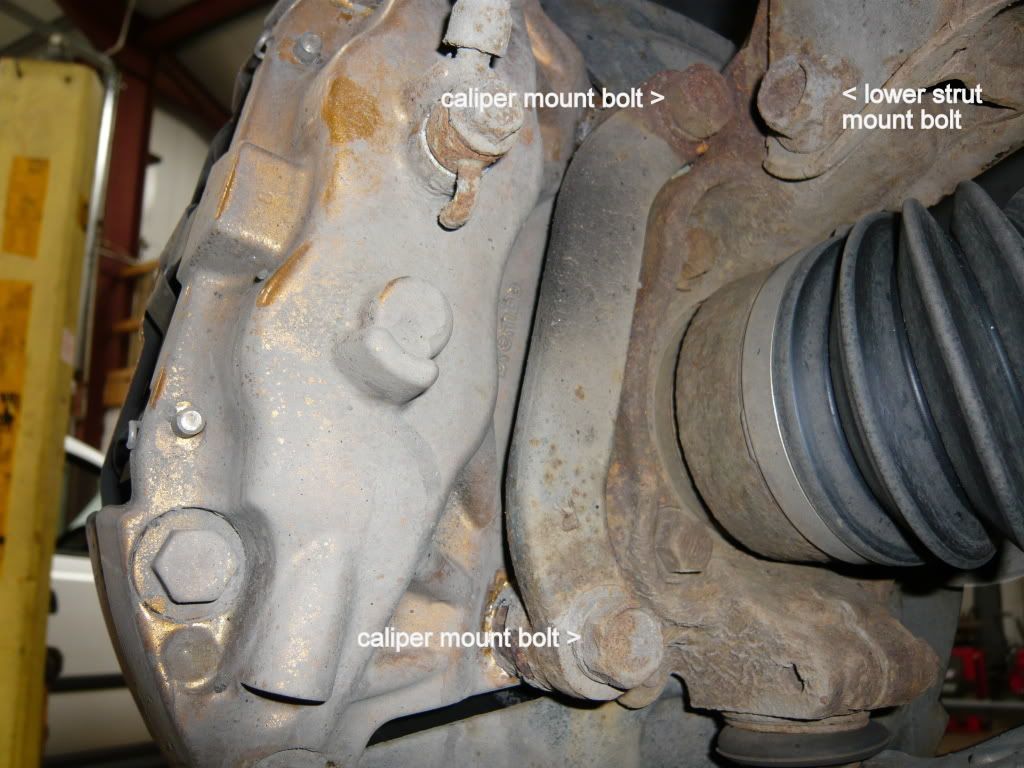
To remove the old disc you need to remove the caliper. The mounting bolts are shown here and are tight. They are metal into alloy which is never a good thing in a hostile area such as brakes. The top bolt is partially blocked by the strut bottom bolt also shown. It is better to remove this to allow better access to the top bolt. Suspension won't be affected as you don't need to touch the other bolt holding the strut. Take care when taking out the caliper bolts in case the threads pick up and you waste the calipers. They won't unscrew with your fingers but won't be too hard to turn with a spanner. If they start to go tight then you must work them in and out at the same time as applying some lubricant such as WD40. Mine unscrewed without drama but they were tight to crack. It's also worth noting that the bolts are fitted through some sort of spacer/brace before passing through hub into the caliper, the mounting bolts won't unscrew through this part. If everything was new it'd be easy but as things are a bit rusty and things start to move to the side it all starts to jam up so I found it easier to take the caliper away from the bolts as you unscrew and you must also undo them relatively evenly, can't do one completely then the other. To allow caliper to move away, disc must come off hub too. Mine wasn't seized in the centre, if it is, give it a good chap with a hammer or there are two bolt holes into which you can gently srew bolts which will force the disc off the hub.
Unless you are replacing hoses or caliper do not be tempted to remove the brake hose from the caliper for any reason. Hydraulic systems are best left well alone unless it is necessary to split them. Speaking from experience.
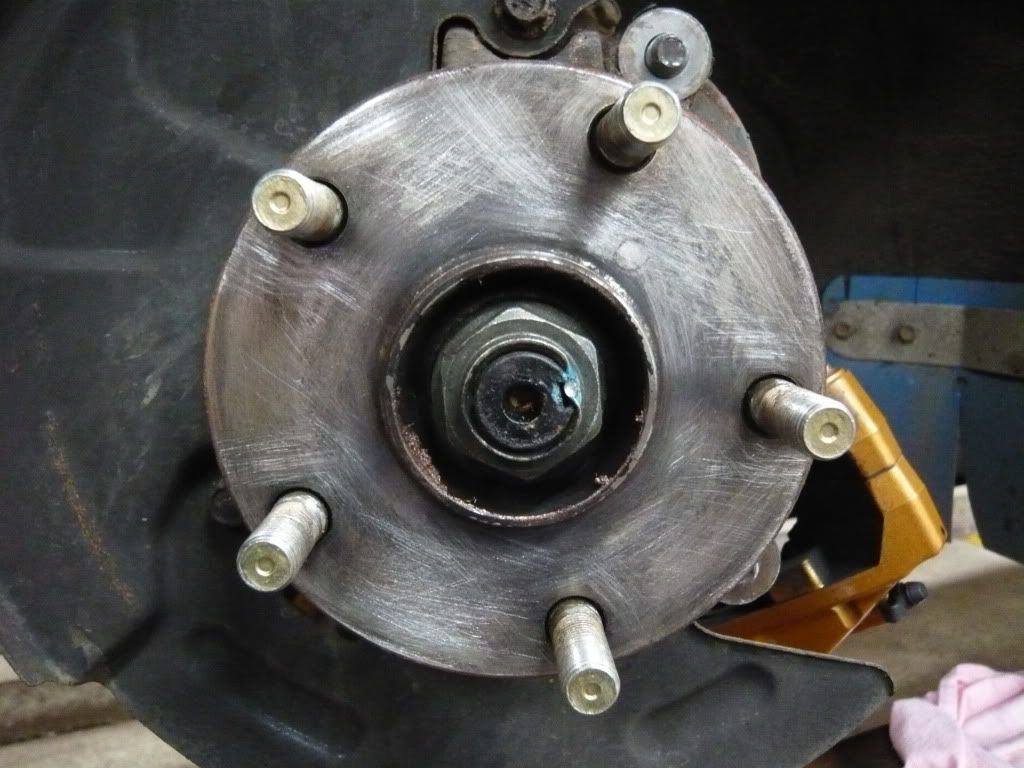
Old disc removed, hub shows slight rust, dirt whatever. It is essential this is cleaned.

I used emery(sp?) paper with my finger, don't need to go mad but it should be clean, if not you will have brake shudder, warping or worse still your wheel will fall off eventually
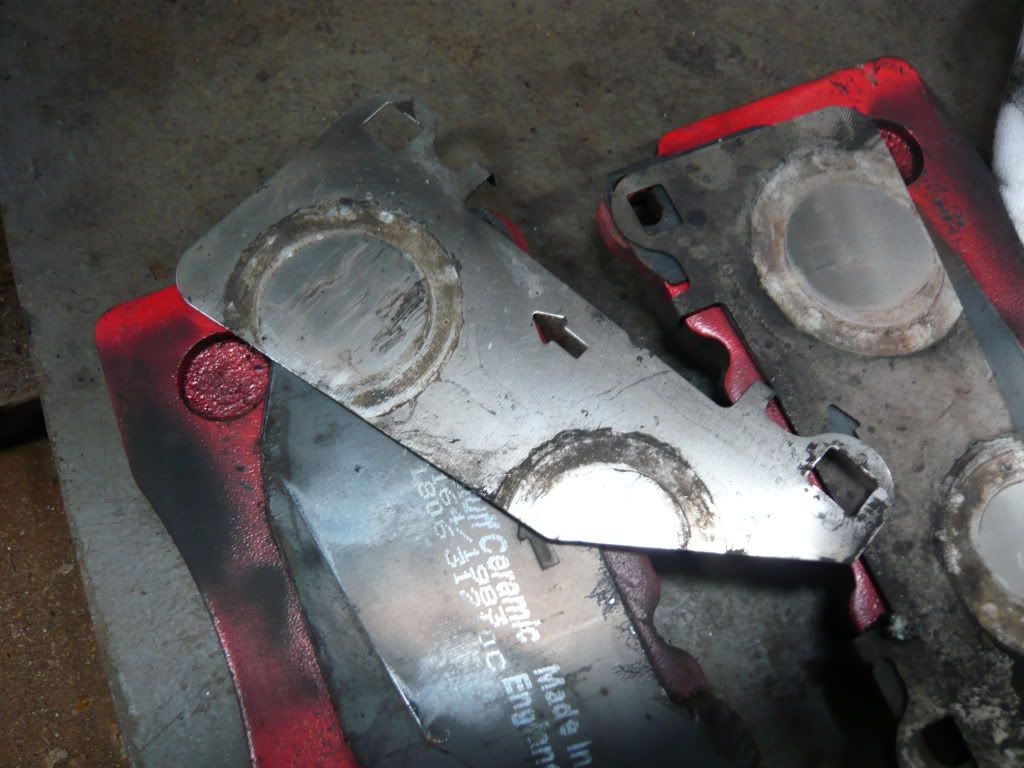
This is the old red stuff pads showing the original fit anti squeal shims. I refitted these to the new pads as I don't want squealing brakes. May sound cool at the end of a rally stage but not in your high street
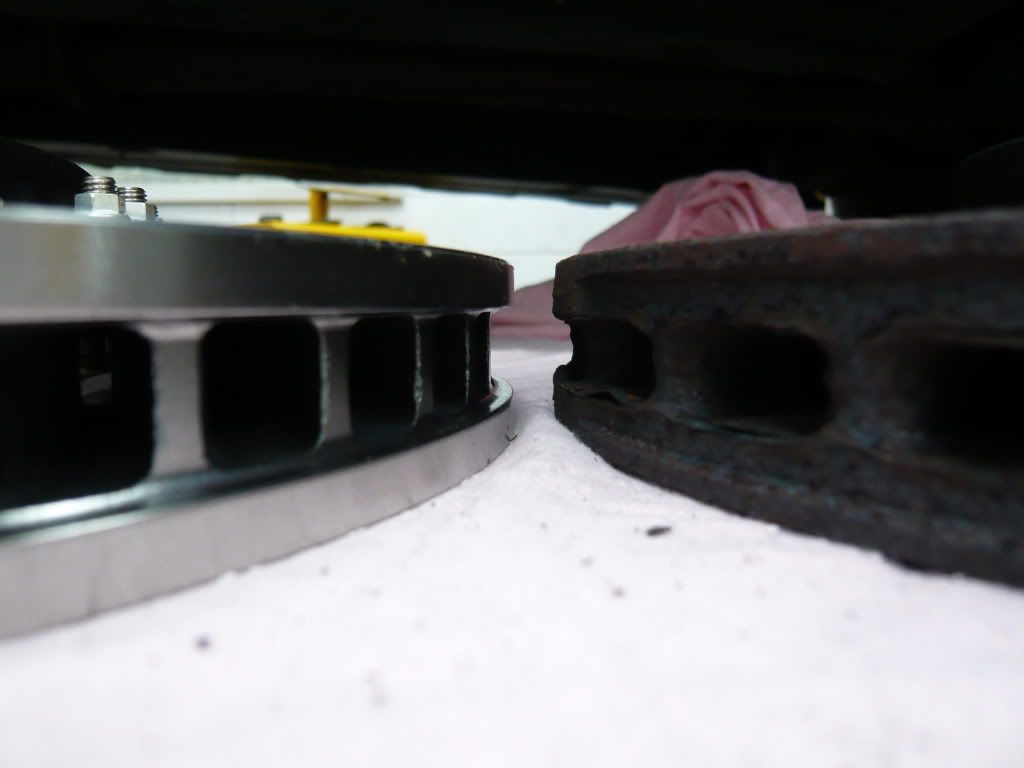
Old and new discs side by side. Same dimensions.
All fitted now. Straight forward, use copper grease on all bolts as you assemble. It makes them easier to go in, tighten up properly and you may need to remove them yourself in the future which will be all the easier to do. Don't go mad cleaning the brake retaining pins as I suspect they have a thin coating to stop rust, just rub off the old brake dust and they'll push in with your hands. Make sure all anti rattle squeal shims clips are in place and before you push pins home line up the holes for the r clips. My disc was a little tight to fit hub centre and I had to use the wheel to pull it on. Better cleaning of hub will help this. Just make sure it all seats properly as it'll all go pear shaped very quickly if you don't. Wheels back on, tightened properly then pump your brakes to push pads against discs. It would surprise you the outcome if you don't do this!!!
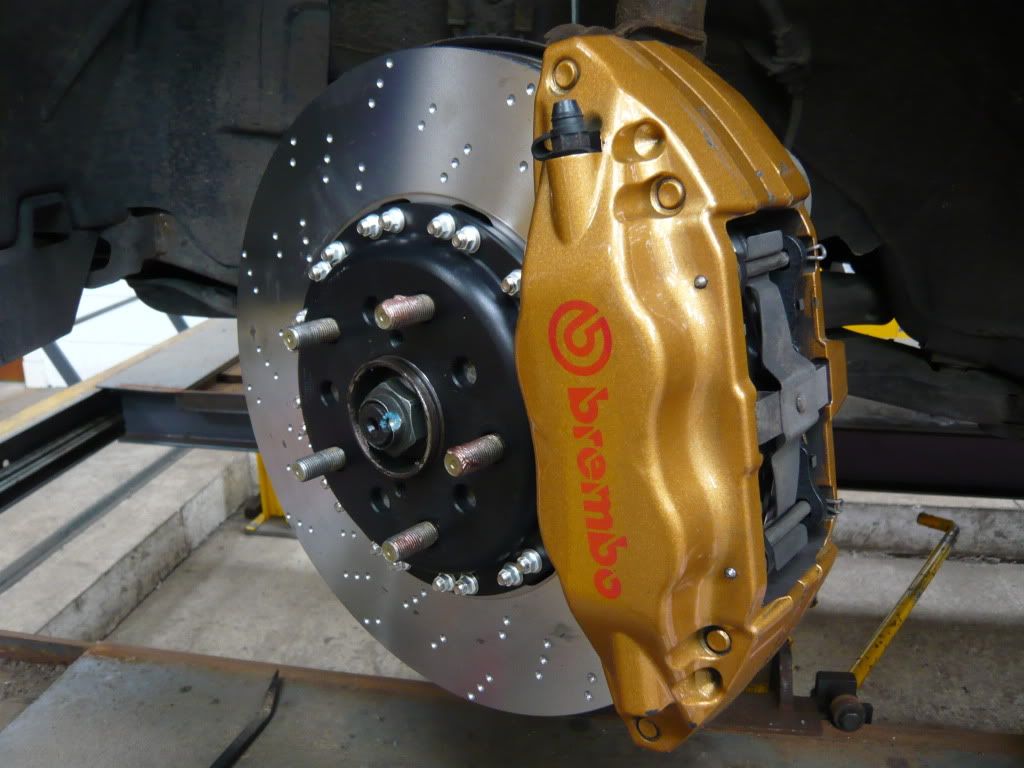
Pads in, all back as should be, cleaned caliper outside only. Pity about the stone chip damage but the calipers still look good nearly 4 years on. My advice is not to use copper grease around the pads. This is sometimes done to try to eliminate noise or seizing. In my experience it only accelerates seizing as all the sh!t sticks to the grease.
And finally some finished views, again, forgive the wheels. They badly need done.

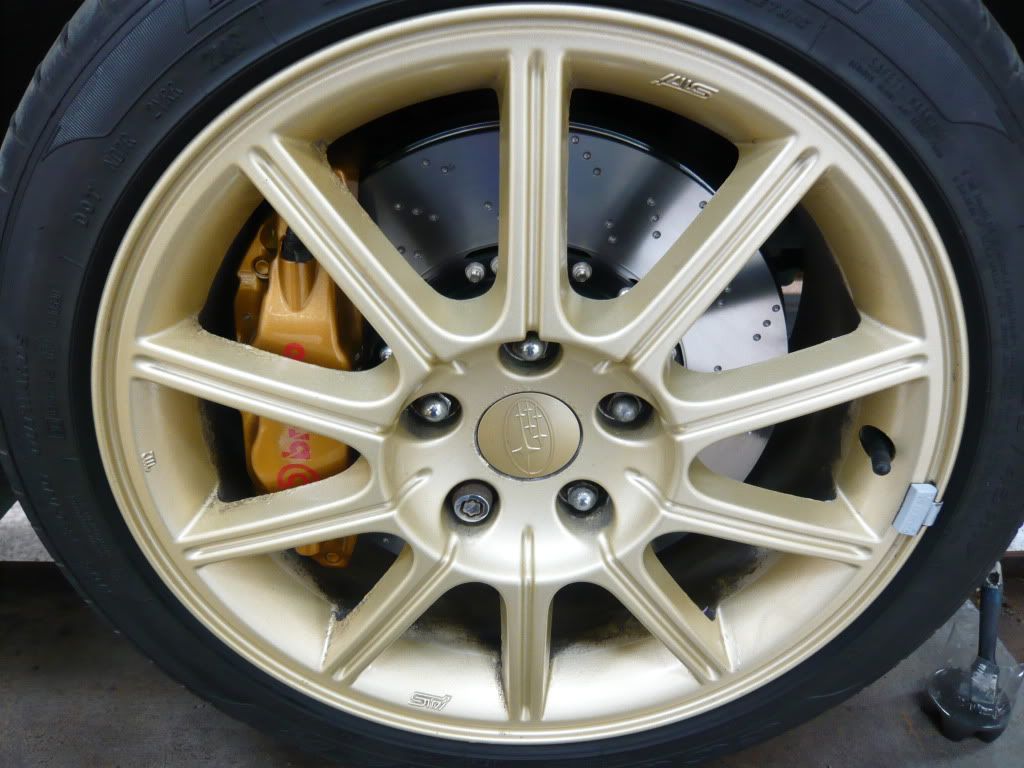
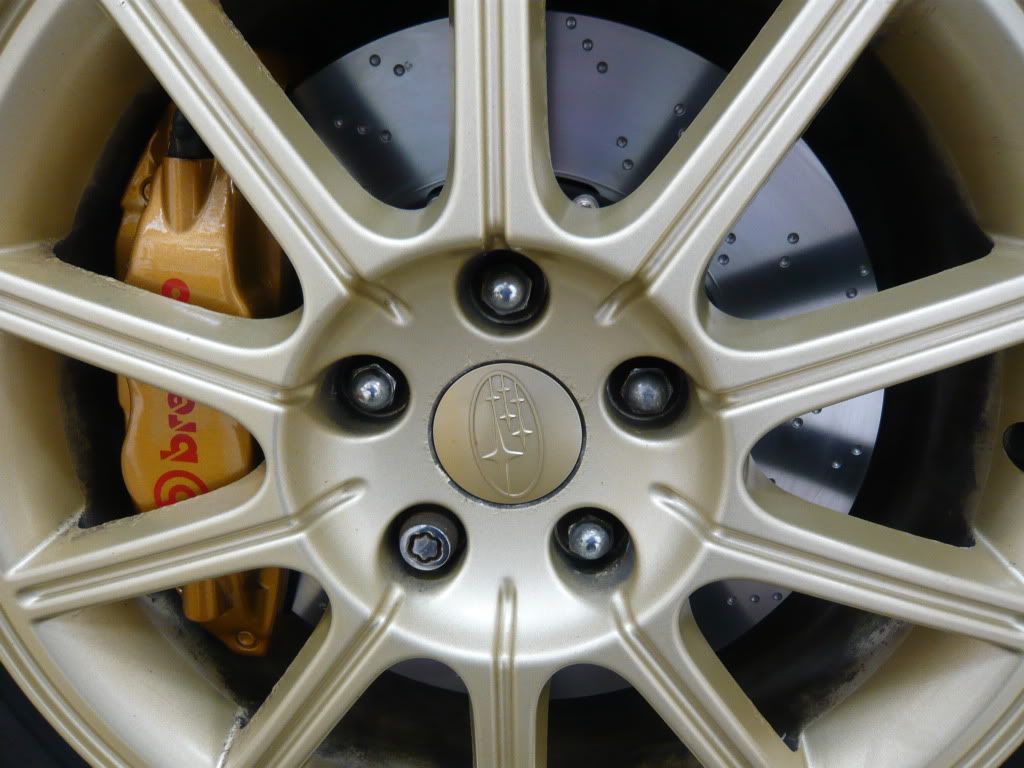
Job done! Two hours, mainly due to photography and cleaning calipers and one wheel!!
Verdict? Not sure, haven't used them in anger as yet but so far they look good, don't squeal and do in fact stop the car. I did sort of expect it to flip forward onto it's roof the first time I pressed them but it wasn't so. Time will tell if they are better, I just hope it doesn't need a track day to see the benefits. Noone seemed able to answer this question previously.
Hope I've not bored you all to death!
-
It's brake day!

Off shortly to fit the parts, i'll post pics up later for anyone who's interested. Hoping it's all straightforward!
-
Two names required I reckon as mentioned earlier.
Something following on from hawkeye, as in first version of totally new design, doesn't need to continue the eye theme as it's a new generation.
Something which follows the classic, newage pattern to refer to all versions to come of the hatchback.
Haven't any ideas yet though
-
And that leads onto the next question! Who knows where to get wheels painted, a good job for a fair price. Gotta be nearish to Lanarkshire. Preferably with wheels to prove it!!
-
ive had a set of oz sprayed by a body shop,they looked very nice but!!!!!!were very expensive to do .
i payed 50 for bead blasting then 240 for them to be sprayed,.
so in the long run p/coating is the cheap way,but dont have the colours that you can get from any b/shop.
as they could match it spot on...
Did the paint work stand up to brake dust and the associated heavy cleaning required?
-
Cheers Stu
It does look good, when I first posted I wondered what yellow would look like. It certainly works on that one! If the coating could match the graphics exactly then I'd certainly be tempted.
Who knows if wheels can be painted with something that lasts? Rather than powder coated I mean!
Thanks for looking it up!
-
Stu, hate to think you're sitting around twiddling your thumbs
 did you find the photos with the yellow wheels at all?
 -
Hi guys looking for advice /opinions ,going to upgrade my brakes and have seen some groop buys on SN problem is they all seem good prices
what i would like to know is what do i really need?. Car will be getting engine upgrades to the tune of circa 300bhp ,handling is :- Whitline
front ,rear anti roll bars ,antilift kit ,front rear droplinks soon to be getting rollcentre adjust kit too ,car also has Tein Super Street coilovers
so want to do brakes before power .
The brakes . Ksport 8 pot 330mm discs ds2500 pads £824
I am offering a complete brake kit including 330mm x 28mm grooved 2 piece discs and bells , AP CP6600 4 pot calipers , alloy mounting brackets and Ferodo DS2500 pads for £895 including free delivery
Our 335mm kit with AP 6 pots is also on offer at £1200
What would be in your opinions be the best to get for the above mentioned car set up ?
Thanks in advance
cheers kenny
Brace yourself Kenny boy, you had this comin mate. The best you could go for are big shiny Brembos from an 05 STi, but ye canny huv them so tough sh!t!!
-
Great work Stu!
I can't help think the gold wheels look awful in the original shot now. Undecided on which I prefer now. Not got b@llox big enough to go yellow!
Black with red for you Cath
-
Bloody hell, you're no bad at that! Can you give it 500hp too? Kidding

Wondered about yellow myself but it may be just too bright. Is that the yellow lifted from the cars graphics or just a close yellow?
I know I'm a cheeky beggar but could you do something with blue and yellow maybe, also white please and if you have the time something with the light blue tracer which follows the big yellow swooshes? Thanks for your efforts!
At the mo, i prefer the bottom one with the yellow stripe.
-
If it's the same wheels that are changing colour, the angle doesn't matter mate. I'm at work at the moment but I'll be more than happy to take a look when I get home this evening if you like.

Go for it mate. Looking forward to seeing the possibilities.
-
As the title suggests I'm looking for wheel colour options. My wheels are all blisters (and kerbed
) and need refurbed. Can anyone help me with some options?Remember it's same wheels as shown, although if it's easier to show a very similar style of wheel in a different colour then feel free.
All suggestions welcome. Except gold obviously, d'oh!
Sorry pic isn't full side on, I don't have one!
-
Here's gratuitous shots of said parts
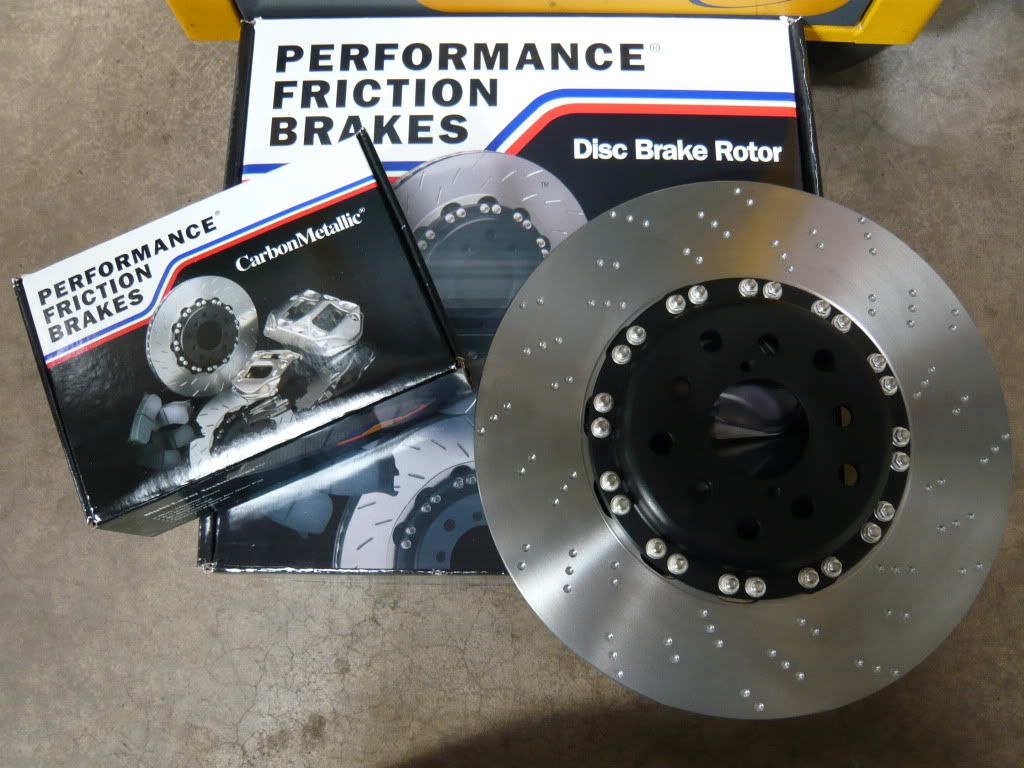
Pads are in the box, too expensive to risk flash photography

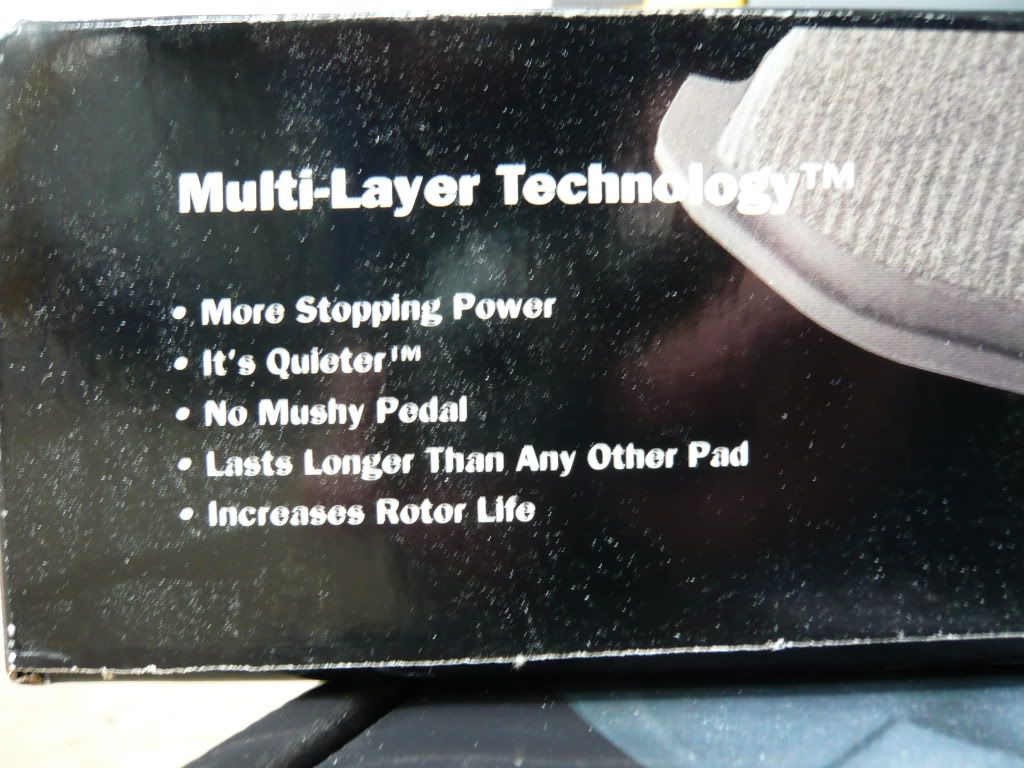
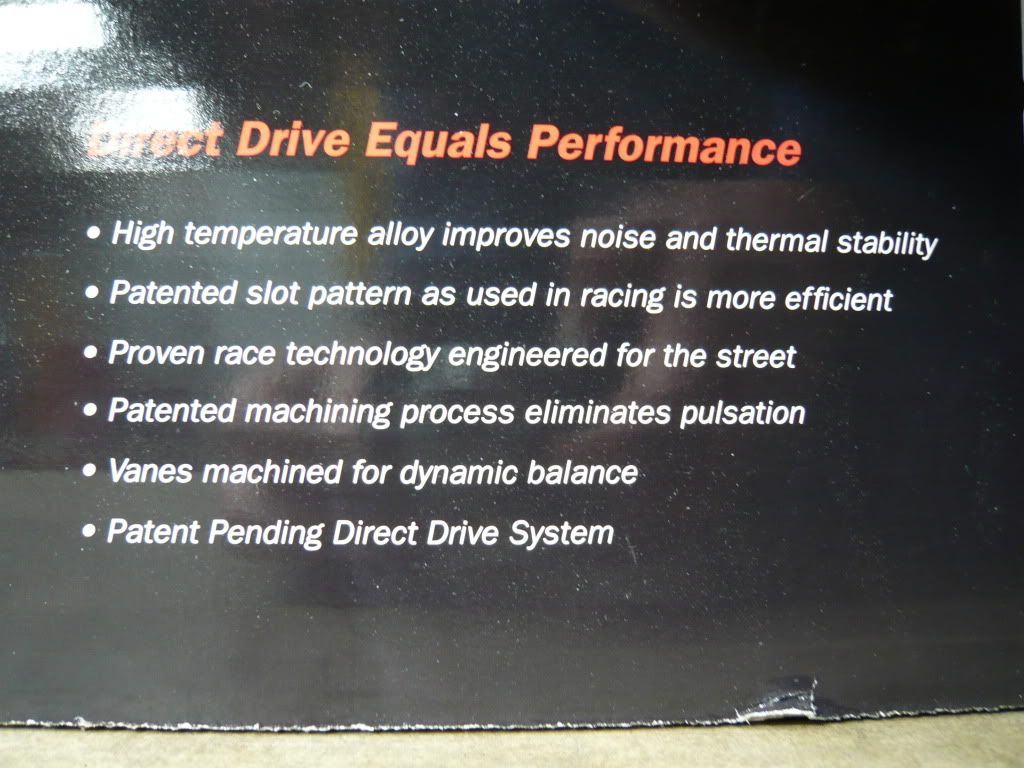
Hope it does what it says on the tin!
So here they lie on the workshop floor which is exactly where they will remain until Saturday as I'm too busy till then!
They feel very good, look very good quality, pads are thin though as the disc is very thick!
I'm trying to think of a real world test to compare their efficiency against the originals.
-
Squiggle your car is nice although loose the 3 spokes
Now that's gonna affect the handling, surely?
-
, set you up for that one nicely eh !!
That was a best case as well, might even have been...well, you know !
It was a certainty! MMM, a cocktail per chance?
-
Barry, Was it your son that asked the balloon guy if he could make a Subaru ? Brilliant !!
Yes, Nathan asked him to make a 'Subawoo' as he calls them. I didn't hold out much hope of a yes as he couldn't even make a horse for my wee lassie!!
Forgot to ask, how many people came in to Falkirk wheel park area and nearly drove past the car park - there was only about 40 Subaru's in the car park....how did you nearly miss us all ??There were a few sniggers as some rather short sighted owners steamed right past. Scoops too big, brake upgrades required or maybe a trip to Specsavers?
-
Thought that The Welsho sponsoring the kids play area was a nice touch yesterday!!
-
On the way back from Falkirk Sunday I had to pass a cattle transporter on the motorway, with some "coloured liquid" pouring out the back, sprayed all over the car...the wife was in stitches at me getting a run up to get past quick as. Oh well, needs another wash .
Och Colin, that's p!sh mate!!
-
1. Bobby C - GB 270 - 340 BHP
2. Mag C - Type RA ver 2 - 280 BHP
3. kennyuk300-UK300 - 265 BHP
4. imy - ver 2 STi Type RA V-Ltd - estimated 310bhp
5. wrx kenny wrx approx 245bhp
6. Scotsman - Bugeye WRX Wagon - 306bhp
7. Notsosmall- Blobeye WRX approx 245bhp
8. C_WRX - Blobeye WRX - 280bhp
9. Trackhound - Blue WRX Bugeye Wagon - 401 bhp
10. Soundie - Classic Jdm WRX Grey - about 315bhp
11. Strike - Hawkeye RB320- 320bhp
12. Frank_Sti - Blobeye STi - estimated 400bhp
13. Stubaroo - Blobeye WRX - 230bhp
14. NKWRX - Hawkeye WRX 245bhp
15. STi_steve Blobeye STi 305bhp
16. STI Pretender - Type R - 330bhp (estimated AndyF)
17. Mrs STI Pretender - Blobeye STI - 329bhp
18. scoobysailor - Bugeye WRX - 333BHP
19. Burgy_51_ - Hawkeye STI - 349BHP
20. jonboywrx - Classic uk - 324 Bhp
21. n3dny red wrx ppp
22. ciaranrb5 classic RB5 est 240bhp
23. scooba - black classic 93 - 400bhp
24. whitey - bugeye wrx - 220bhp
25. Gstar - GB270 saloon - 266bhp
26. Steveairdrie 95 sti type ra white 310 bhp
27. Cruz104 - 05 Blobeye-315bhp
28. marky.t.s - 00 m/y UK turbo- bog standard-218bhp ish?
29. empty_heed - blobeye wagon - gx sport - 125bhp
30. bigbob - turbo 2000 - 230bhp
31. ace_tingtong - JDM ver 2 STi 555 v-ltd Edition - 330 bhp
32. mick67 - sti ver 3 - 261 bhp
33. Midnight21 Classic WRX wagon (in red ) ? 220 bhp ? (thats what the handbook says lol)
34.scooby222- blobeye sti- 345 bhp
35. kebab nemesis RB320 - 320bhp
36. Squiggle 380bhp Ar$e estimate although i prefer the term sufficient
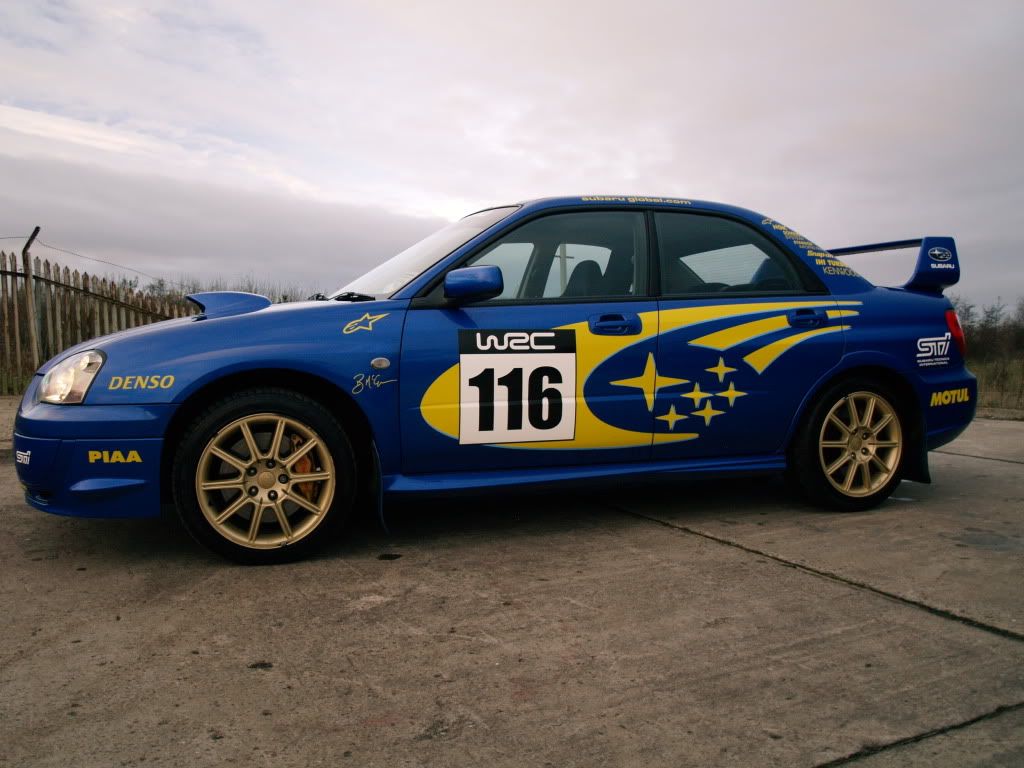
37. badbaz - Blobeye STi with rally graphics - 340bhp
Good day, nice to see everyone, kids had a ball on their roller blades round the Wheel!
-
Cusco kid is Mr whiteline he will get you the best deals on them to and also good deals on the varis coilovers very nice might even let you see what the ride is like on them
After much PM'ing, we have reached a list of components to tidy up the handling of the Scoob - sorry Geo, we got there in the end!
Parts are on order with Cusco Kid, to then be fitted by myself, set up will then be dialled in by the aforementioned Kid.
I'll detail the mods once the parts arrive if anyone is interested.
New Wheels
in Scottish Scoobies
Posted
Very nice Kenny, would like to have seen them in yellow though